Abyss Chaser: Difference between revisions
| Line 124: | Line 124: | ||
|} | |} | ||
|} | |} | ||
{| class="wikitable" style="border-collapse: collapse; width: 100%; background-color: rgb(236, 202, 250);" | {| class="wikitable" style="border-collapse: collapse; width: 100%; background-color: rgb(236, 202, 250);" | ||
|- | |- | ||
| style="width: 100%;" | | | style="width: 100%;" | | ||
{| class="wikitable" style="border-collapse: collapse; width: 100%;" | {| class="wikitable" style="border-collapse: collapse; width: 100%;" | ||
|- | |- | ||
| style="width: 25%;" | [[File:4th 5313.png|300px|frameless|Strip Shadow]] '''Strip Shadow''' | | style="width: 25%;" | [[File:4th 5313.png|300px|frameless|Strip Shadow]] '''Strip Shadow''' | ||
| style="width: 25%;" | '''Max Level 1''' | | style="width: 25%;" | '''Max Level 1''' | ||
| Line 134: | Line 134: | ||
| style="width: 25%;" | '''Debuff''' | | style="width: 25%;" | '''Debuff''' | ||
|} | |} | ||
|- | |- | ||
| style="width: 100%;" | | | style="width: 100%;" | | ||
{| class="wikitable" style="border-collapse: collapse; width: 100%;" | {| class="wikitable" style="border-collapse: collapse; width: 100%;" | ||
|- | |- | ||
| style="width: 25%; text-align: center;" | [[File:Stripshadow.gif|400px|alt=Strip Shadow Skill Animation|frameless|Strip Shadow]] | | style="width: 25%; text-align: center;" | [[File:Stripshadow.gif|400px|alt=Strip Shadow Skill Animation|frameless|Strip Shadow]] | ||
| style="width: 25%;" | | | style="width: 25%;" | | ||
*Single Other Target | *Single Other Target | ||
*Costs: 45 SP | *Costs: 45 SP | ||
| Line 152: | Line 152: | ||
|} | |} | ||
|} | |} | ||
{| class="wikitable" style="border-collapse: collapse; width: 100%; background-color: rgb(248, 202, 198);" | {| class="wikitable" style="border-collapse: collapse; width: 100%; background-color: rgb(248, 202, 198);" | ||
|- | |- | ||
| style="width: 100%;" | | | style="width: 100%;" | | ||
{| class="wikitable" style="border-collapse: collapse; width: 100%;" | {| class="wikitable" style="border-collapse: collapse; width: 100%;" | ||
|- | |- | ||
| style="width: 25%;" | [[File:4th 5315.png|300px|frameless|Unlucky Rush]] '''Unlucky Rush''' | | style="width: 25%;" | [[File:4th 5315.png|300px|frameless|Unlucky Rush]] '''Unlucky Rush''' | ||
| style="width: 25%;" | '''Max Level 5''' | | style="width: 25%;" | '''Max Level 5''' | ||
| Line 162: | Line 162: | ||
| style="width: 25%;" | '''Physical Range''' | | style="width: 25%;" | '''Physical Range''' | ||
|} | |} | ||
|- | |- | ||
| style="width: 100%;" | | | style="width: 100%;" | | ||
{| class="wikitable" style="border-collapse: collapse; width: 100%;" | {| class="wikitable" style="border-collapse: collapse; width: 100%;" | ||
|- | |- | ||
| style="width: 25%; text-align: center;" | [[File:Unluckyrush.gif|400px|alt=Unlucky Rush Skill Animation|frameless|Unlucky Rush]] | | style="width: 25%; text-align: center;" | [[File:Unluckyrush.gif|400px|alt=Unlucky Rush Skill Animation|frameless|Unlucky Rush]] | ||
| style="width: 25%;" | *Single Other Target | | style="width: 25%;" | *Single Other Target | ||
| Line 173: | Line 173: | ||
*Additional ATK | *Additional ATK | ||
*ATK% = + 5 x POW. | *ATK% = + 5 x POW. | ||
*ATK% = x Base Level / 100. | *ATK% = x Base Level / 100. | ||
*Gives Misfortune debuff, can be dispeilled, can't give to Boss. | *Gives Misfortune debuff, can be dispeilled, can't give to Boss. | ||
| Line 183: | Line 182: | ||
#ATK 1600%, Unlucky Chance: 80% | #ATK 1600%, Unlucky Chance: 80% | ||
|} | |} | ||
|- | |- | ||
| style="width: 100%;" | | | style="width: 100%;" | | ||
{| class="wikitable" style="border-collapse: collapse; width: 100%;" | {| class="wikitable" style="border-collapse: collapse; width: 100%;" | ||
|- | |- | ||
| style="width: 50%; text-align: center;" | '''Item Boosts''' | | style="width: 50%; text-align: center;" | '''Item Boosts''' | ||
| style="width: 50%; text-align: center;" | '''Item Combo Boosts''' | | style="width: 50%; text-align: center;" | '''Item Combo Boosts''' | ||
|- | |- | ||
| style="width: 50%; text-align: center;" | - | | style="width: 50%; text-align: center;" | - | ||
| style="width: 50%; text-align: center;" | <span>[[image:540081.png|middle|24px]][https://www.midgardtales.com/item/view/?id=540081 Dimensions Saint Bible [2]] + [[image:400537.png|middle|24px]][https://www.midgardtales.com/item/view/?id=400537 Dimensions Crown (Cardinal) [1]]</span> | | style="width: 50%; text-align: center;" | <span>[[image:540081.png|middle|24px]][https://www.midgardtales.com/item/view/?id=540081 Dimensions Saint Bible [2]] + [[image:400537.png|middle|24px]][https://www.midgardtales.com/item/view/?id=400537 Dimensions Crown (Cardinal) [1]]</span> | ||
|} | |} | ||
|} | |} | ||
{| class="wikitable" style="border-collapse: collapse; width: 100%; background-color: rgb(248, 202, 198);" | {| class="wikitable" style="border-collapse: collapse; width: 100%; background-color: rgb(248, 202, 198);" | ||
|- | |- | ||
| style="width: 100%;" | | | style="width: 100%;" | | ||
{| class="wikitable" style="border-collapse: collapse; width: 100%;" | {| class="wikitable" style="border-collapse: collapse; width: 100%;" | ||
|- | |- | ||
| style="width: 25%;" | [[File:4th 5320.png|300px|frameless|Deft Stab]] '''(MT) Deft Stab''' | | style="width: 25%;" | [[File:4th 5320.png|300px|frameless|Deft Stab]] '''(MT) Deft Stab''' | ||
| style="width: 25%;" | '''Max Level 10''' | | style="width: 25%;" | '''Max Level 10''' | ||
| Line 204: | Line 203: | ||
| style="width: 25%;" | '''Physical Melee''' | | style="width: 25%;" | '''Physical Melee''' | ||
|} | |} | ||
|- | |- | ||
| style="width: 100%;" | | | style="width: 100%;" | | ||
{| class="wikitable" style="border-collapse: collapse; width: 100%;" | {| class="wikitable" style="border-collapse: collapse; width: 100%;" | ||
|- | |- | ||
| style="width: 25%; text-align: center;" | [[File:Deftstab.gif|400px|alt=Deft Stab Skill Animation|frameless|Deft Stab]] | | style="width: 25%; text-align: center;" | [[File:Deftstab.gif|400px|alt=Deft Stab Skill Animation|frameless|Deft Stab]] | ||
| style="width: 25%;" | *Single Other Target | | style="width: 25%;" | *Single Other Target | ||
| Line 230: | Line 229: | ||
#ATK 6200% per Hit/AoE: 7x7 cells | #ATK 6200% per Hit/AoE: 7x7 cells | ||
|} | |} | ||
|- | |- | ||
| style="width: 100%;" | | | style="width: 100%;" | | ||
{| class="wikitable" style="border-collapse: collapse; width: 100%;" | {| class="wikitable" style="border-collapse: collapse; width: 100%;" | ||
|- | |- | ||
| style="width: 50%; text-align: center;" | '''Item Boosts''' | | style="width: 50%; text-align: center;" | '''Item Boosts''' | ||
| style="width: 50%; text-align: center;" | '''Equipment Combo Boosts''' | | style="width: 50%; text-align: center;" | '''Equipment Combo Boosts''' | ||
|- | |- | ||
| style="width: 50%; text-align: center;" | <span>[[image:400534.png|middle|24px]][https://www.midgardtales.com/item/view/?id=400534 Dimensions Crown (Abyss Chaser) [1]]</span> | | style="width: 50%; text-align: center;" | <span>[[image:400534.png|middle|24px]][https://www.midgardtales.com/item/view/?id=400534 Dimensions Crown (Abyss Chaser) [1]]</span> | ||
| Line 256: | Line 255: | ||
|} | |} | ||
|} | |} | ||
{| class="wikitable" style="border-collapse: collapse; width: 100%; background-color: rgb(194, 224, 244);" | {| class="wikitable" style="border-collapse: collapse; width: 100%; background-color: rgb(194, 224, 244);" | ||
|- | |- | ||
| style="width: 100%;" | | | style="width: 100%;" | | ||
{| class="wikitable" style="border-collapse: collapse; width: 100%;" | {| class="wikitable" style="border-collapse: collapse; width: 100%;" | ||
|- | |- | ||
| style="width: 25%;" | [[File:4th 5318.png|300px|frameless|Abyss Slayer]] '''(MT) Abyss Slayer''' | | style="width: 25%;" | [[File:4th 5318.png|300px|frameless|Abyss Slayer]] '''(MT) Abyss Slayer''' | ||
| style="width: 25%;" | '''Max Level 10''' | | style="width: 25%;" | '''Max Level 10''' | ||
| Line 266: | Line 265: | ||
| style="width: 25%;" | '''Supportive''' | | style="width: 25%;" | '''Supportive''' | ||
|} | |} | ||
|- | |- | ||
| style="width: 100%;" | | | style="width: 100%;" | | ||
{| class="wikitable" style="border-collapse: collapse; width: 100%;" | {| class="wikitable" style="border-collapse: collapse; width: 100%;" | ||
|- | |- | ||
| style="width: 25%; text-align: center;" | [[File:Abyssslayer.gif|400px|alt=Abyss Slayer Skill Animation|frameless|Abyss Slayer]] | | style="width: 25%; text-align: center;" | [[File:Abyssslayer.gif|400px|alt=Abyss Slayer Skill Animation|frameless|Abyss Slayer]] | ||
| style="width: 25%;" | *Single Self Target | | style="width: 25%;" | *Single Self Target | ||
*Costs: 100 SP, 120 AP | *Costs: 100 SP, 120 AP | ||
| style="width: 50%;" | Endows the caster's body with the power of abyss for 300 seconds.<br>The power of abyss increases the caster's abilities rapidly.<br> | | style="width: 50%;" | Endows the caster's body with the power of abyss for 300 seconds.<br>The power of abyss increases the caster's abilities rapidly.<br>Pierces 1% of target RES/MRES x skill level. | ||
Pierces 1% of target RES/MRES x skill level. | |||
#P.ATK/S.MATK +12, HIT +120 | #P.ATK/S.MATK +12, HIT +120 | ||
#P.ATK/S.MATK +14, HIT +140 | #P.ATK/S.MATK +14, HIT +140 | ||
| Line 288: | Line 285: | ||
|} | |} | ||
|} | |} | ||
{| class="wikitable" style="border-collapse: collapse; width: 100%; background-color: rgb(248, 202, 198);" | {| class="wikitable" style="border-collapse: collapse; width: 100%; background-color: rgb(248, 202, 198);" | ||
|- | |- | ||
| style="width: 100%;" | | | style="width: 100%;" | | ||
{| class="wikitable" style="border-collapse: collapse; width: 100%; height: 23px;" | {| class="wikitable" style="border-collapse: collapse; width: 100%; height: 23px;" | ||
|- style="height: 23px;" | |- style="height: 23px;" | ||
| style="width: 25%; height: 23px;" | [[File:Hidensliding.png|300px|frameless]] '''(MT) Hit and Sliding''' | | style="width: 25%; height: 23px;" | [[File:Hidensliding.png|300px|frameless]] '''(MT) Hit and Sliding''' | ||
| Line 298: | Line 295: | ||
| style="width: 25%; height: 23px;" | '''Physical Melee Critical''' | | style="width: 25%; height: 23px;" | '''Physical Melee Critical''' | ||
|} | |} | ||
|- | |- | ||
| style="width: 100%;" | | | style="width: 100%;" | | ||
{| class="wikitable" style="border-collapse: collapse; width: 100%;" | {| class="wikitable" style="border-collapse: collapse; width: 100%;" | ||
|- | |- | ||
| style="width: 25%;" | | | style="width: 25%; text-align: center;" | [[File:Hitnslide.gif|300px|frameless]] | ||
| style="width: 25%;" | - | | style="width: 25%;" | - | ||
| style="width: 50%;" | - | | style="width: 50%;" | - | ||
|} | |} | ||
|} | |} | ||
{| class="wikitable" style="border-collapse: collapse; width: 100%; background-color: rgb(248, 202, 198);" | {| class="wikitable" style="border-collapse: collapse; width: 100%; background-color: rgb(248, 202, 198);" | ||
|- | |- | ||
| style="width: 100%;" | | | style="width: 100%;" | | ||
{| class="wikitable" style="border-collapse: collapse; width: 100%;" | {| class="wikitable" style="border-collapse: collapse; width: 100%;" | ||
|- | |- | ||
| style="width: 25%;" | [[File:Chasingbreak.png|300px|frameless]] '''(MT) Chasing Break''' | | style="width: 25%;" | [[File:Chasingbreak.png|300px|frameless]] '''(MT) Chasing Break''' | ||
| style="width: 25%;" | '''Max Level 5''' | | style="width: 25%;" | '''Max Level 5''' | ||
| Line 317: | Line 314: | ||
| style="width: 25%;" | '''Physical Ranged Critical''' | | style="width: 25%;" | '''Physical Ranged Critical''' | ||
|} | |} | ||
|- | |- | ||
| style="width: 100%;" | | | style="width: 100%;" | | ||
{| class="wikitable" style="border-collapse: collapse; width: 100%;" | {| class="wikitable" style="border-collapse: collapse; width: 100%;" | ||
|- | |- | ||
| style="width: 25%;" | | | style="width: 25%; text-align: center;" | [[image:chasingbreak.gif|300px|frameless]] | ||
| style="width: 25%;" | - | | style="width: 25%;" | - | ||
| style="width: 50%;" | - | | style="width: 50%;" | - | ||
|} | |} | ||
|} | |} | ||
{| class="wikitable" style="border-collapse: collapse; width: 100%; background-color: rgb(248, 202, 198); height: 459px;" | {| class="wikitable" style="border-collapse: collapse; width: 100%; background-color: rgb(248, 202, 198); height: 459px;" | ||
|- style="height: 60px;" | |- style="height: 60px;" | ||
| style="width: 100%; height: 60px;" | | | style="width: 100%; height: 60px;" | | ||
{| class="wikitable" style="border-collapse: collapse; width: 100%;" | {| class="wikitable" style="border-collapse: collapse; width: 100%;" | ||
|- | |- | ||
| style="width: 25%;" | [[File:4th 5316.png|300px|frameless|Chain Reaction Shot]] '''(MT) Chain Reaction Shot''' | | style="width: 25%;" | [[File:4th 5316.png|300px|frameless|Chain Reaction Shot]] '''(MT) Chain Reaction Shot''' | ||
| style="width: 25%;" | '''Max Level 5''' | | style="width: 25%;" | '''Max Level 5''' | ||
| Line 337: | Line 334: | ||
|} | |} | ||
|- style="height: 376px;" | |- style="height: 376px;" | ||
| style="width: 100%; height: 376px;" | | | style="width: 100%; height: 376px;" | | ||
{| class="wikitable" style="border-collapse: collapse; width: 100%;" | {| class="wikitable" style="border-collapse: collapse; width: 100%;" | ||
|- | |- | ||
| style="width: 25%; text-align: center;" | [[File:Chainreactionshot.gif|400px|alt=Chain Reaction Shot Skill Animation|frameless|Chain Reaction Shot]] | | style="width: 25%; text-align: center;" | [[File:Chainreactionshot.gif|400px|alt=Chain Reaction Shot Skill Animation|frameless|Chain Reaction Shot]] | ||
| style="width: 25%;" | *Single Other Target | | style="width: 25%;" | *Single Other Target | ||
| Line 346: | Line 343: | ||
*Costs: 75 SP | *Costs: 75 SP | ||
*ATK% = + 15 x CON. | *ATK% = + 15 x CON. | ||
*ATK% = x Base Level / 100. | *ATK% = x Base Level / 100. | ||
*2nd Shot | *2nd Shot | ||
*ATK% = -100 + 800 + 2550 x Skill Level. | *ATK% = -100 + 800 + 2550 x Skill Level. | ||
*ATK% = + 15 x CON. | *ATK% = + 15 x CON. | ||
*ATK% = x Base Level / 100. | *ATK% = x Base Level / 100. | ||
| style="width: 50%;" | Inflicts ranged physical damage to the target and surrounding enemies. | | style="width: 50%;" | Inflicts ranged physical damage to the target and surrounding enemies. | ||
| Line 373: | Line 366: | ||
|} | |} | ||
|- style="height: 23px;" | |- style="height: 23px;" | ||
| style="width: 100%; height: 23px;" | | | style="width: 100%; height: 23px;" | | ||
{| class="wikitable" style="border-collapse: collapse; width: 100%;" | {| class="wikitable" style="border-collapse: collapse; width: 100%;" | ||
|- | |- | ||
| style="width: 50%; text-align: center;" | '''Item Boosts''' | | style="width: 50%; text-align: center;" | '''Item Boosts''' | ||
| style="width: 50%; text-align: center;" | '''Item Combo Boosts''' | | style="width: 50%; text-align: center;" | '''Item Combo Boosts''' | ||
|- | |- | ||
| style="width: 50%; text-align: center;" | <span>[[image:700066.png|middle|24px]][https://www.midgardtales.com/item/view/?id=700066 Dark Angel Ray Bow [2]]</span> | | style="width: 50%; text-align: center;" | <span>[[image:700066.png|middle|24px]][https://www.midgardtales.com/item/view/?id=700066 Dark Angel Ray Bow [2]]</span> | ||
| Line 396: | Line 389: | ||
|} | |} | ||
{| class="wikitable" style="border-collapse: collapse; width: 100%; background-color: rgb(248, 202, 198);" | {| class="wikitable" style="border-collapse: collapse; width: 100%; background-color: rgb(248, 202, 198);" | ||
|- | |- | ||
| style="width: 100%;" | | | style="width: 100%;" | | ||
{| class="wikitable" style="border-collapse: collapse; width: 100%;" | {| class="wikitable" style="border-collapse: collapse; width: 100%;" | ||
|- | |- | ||
| style="width: 25%;" | [[File:4th 5322.png|300px|frameless|Frenzy Shot]]''' (MT) Frenzy Shot''' | | style="width: 25%;" | [[File:4th 5322.png|300px|frameless|Frenzy Shot]]''' (MT) Frenzy Shot''' | ||
| style="width: 25%;" | '''Max Level 10''' | | style="width: 25%;" | '''Max Level 10''' | ||
| Line 405: | Line 398: | ||
| style="width: 25%;" | '''Physical Ranged Critical''' | | style="width: 25%;" | '''Physical Ranged Critical''' | ||
|} | |} | ||
|- | |- | ||
| style="width: 100%;" | | | style="width: 100%;" | | ||
{| class="wikitable" style="border-collapse: collapse; width: 100%;" | {| class="wikitable" style="border-collapse: collapse; width: 100%;" | ||
|- | |- | ||
| style="width: 25%; text-align: center;" | [[File:Frenzyshot.gif|400px|alt=Frenzy Shot Skill Animation|frameless|Frenzy Shot]] | | style="width: 25%; text-align: center;" | [[File:Frenzyshot.gif|400px|alt=Frenzy Shot Skill Animation|frameless|Frenzy Shot]] | ||
| style="width: 25%;" | *Single Other Target | | style="width: 25%;" | *Single Other Target | ||
| Line 417: | Line 410: | ||
*Costs: 65 SP | *Costs: 65 SP | ||
*ATK% = + 15 x CON. | *ATK% = + 15 x CON. | ||
*ATK% = x Base Level / 100. | *ATK% = x Base Level / 100. | ||
*3 Hits chance% = 5 x Skill Level. | *3 Hits chance% = 5 x Skill Level. | ||
| Line 440: | Line 432: | ||
#ATK 8250% per Hit, Trigger Chance: 50% | #ATK 8250% per Hit, Trigger Chance: 50% | ||
|} | |} | ||
|- | |- | ||
| style="width: 100%;" | | | style="width: 100%;" | | ||
{| class="wikitable" style="border-collapse: collapse; width: 100%; height: 23px;" | {| class="wikitable" style="border-collapse: collapse; width: 100%; height: 23px;" | ||
|- style="height: 23px;" | |- style="height: 23px;" | ||
| style="width: 50%; height: 23px; text-align: center;" | '''Item Boosts''' | | style="width: 50%; height: 23px; text-align: center;" | '''Item Boosts''' | ||
| style="width: 50%; height: 23px; text-align: center;" | '''Item Combo Boosts''' | | style="width: 50%; height: 23px; text-align: center;" | '''Item Combo Boosts''' | ||
|- | |- | ||
| style="width: 50%; text-align: center;" | <span>[[image:400534.png|middle|24px]][https://www.midgardtales.com/item/view/?id=400534 Dimensions Crown (Abyss Chaser) [1]]</span> | | style="width: 50%; text-align: center;" | <span>[[image:400534.png|middle|24px]][https://www.midgardtales.com/item/view/?id=400534 Dimensions Crown (Abyss Chaser) [1]]</span> | ||
| Line 470: | Line 462: | ||
|} | |} | ||
|} | |} | ||
{| class="wikitable" style="border-collapse: collapse; width: 100%; background-color: rgb(251, 238, 184);" | {| class="wikitable" style="border-collapse: collapse; width: 100%; background-color: rgb(251, 238, 184);" | ||
|- | |- | ||
| style="width: 100%;" | | | style="width: 100%;" | | ||
{| class="wikitable" style="border-collapse: collapse; width: 100%;" | {| class="wikitable" style="border-collapse: collapse; width: 100%;" | ||
|- | |- | ||
| style="width: 25%;" | [[File:4th 5312.png|300px|frameless|Magic Sword Mastery]] '''Magic Sword Mastery''' | | style="width: 25%;" | [[File:4th 5312.png|300px|frameless|Magic Sword Mastery]] '''Magic Sword Mastery''' | ||
| style="width: 25%;" | '''Max Level 10''' | | style="width: 25%;" | '''Max Level 10''' | ||
| style="width: 50%;" | '''Passive''' | | style="width: 50%;" | '''Passive''' | ||
|} | |} | ||
|- | |- | ||
| style="width: 100%;" | | | style="width: 100%;" | | ||
{| class="wikitable" style="border-collapse: collapse; width: 100%;" | {| class="wikitable" style="border-collapse: collapse; width: 100%;" | ||
|- | |- | ||
| style="width: 100%;" | Increases magical damage against enemies of their size when equipped with a Dagger or One-Handed Sword. | | style="width: 100%;" | Increases magical damage against enemies of their size when equipped with a Dagger or One-Handed Sword. | ||
*Level 10: Small +15%, Medium +15%, Large +15% | *Level 10: Small +15%, Medium +15%, Large +15% | ||
|} | |} | ||
|} | |} | ||
{| class="wikitable" style="border-collapse: collapse; width: 100%; background-color: rgb(248, 202, 198);" | {| class="wikitable" style="border-collapse: collapse; width: 100%; background-color: rgb(248, 202, 198);" | ||
|- | |- | ||
| style="width: 100%;" | | | style="width: 100%;" | | ||
{| class="wikitable" style="border-collapse: collapse; width: 100%; height: 24px;" | {| class="wikitable" style="border-collapse: collapse; width: 100%; height: 24px;" | ||
|- style="height: 24px;" | |- style="height: 24px;" | ||
| style="width: 25%; height: 24px;" | [[File:4th 5317.png|300px|frameless|From the Abyss]] '''From the Abyss''' | | style="width: 25%; height: 24px;" | [[File:4th 5317.png|300px|frameless|From the Abyss]] '''From the Abyss''' | ||
| Line 497: | Line 489: | ||
| style="width: 25%; height: 24px;" | '''Magical Neutral / Supportive''' | | style="width: 25%; height: 24px;" | '''Magical Neutral / Supportive''' | ||
|} | |} | ||
|- | |- | ||
| style="width: 100%;" | | | style="width: 100%;" | | ||
{| class="wikitable" style="border-collapse: collapse; width: 100%;" | {| class="wikitable" style="border-collapse: collapse; width: 100%;" | ||
|- | |- | ||
| style="width: 25%; text-align: center;" | [[File:Fromtheabyss.gif|400px|alt=From the Abyss Skill Animation|frameless|From the Abyss]] | | style="width: 25%; text-align: center;" | [[File:Fromtheabyss.gif|400px|alt=From the Abyss Skill Animation|frameless|From the Abyss]] | ||
| style="width: 25%;" | *Single Self Target | | style="width: 25%;" | *Single Self Target | ||
| Line 507: | Line 499: | ||
*NoBanishingBuster, NoDispell, NoClearance | *NoBanishingBuster, NoDispell, NoClearance | ||
*MATK% = + 5 x SPL. | *MATK% = + 5 x SPL. | ||
*MATK% = x Base Level / 100. | *MATK% = x Base Level / 100. | ||
*Autocast chance% = 25. | *Autocast chance% = 25. | ||
| Line 517: | Line 508: | ||
#MATK 3400%, Duration: 150 seconds, Abyss Sphere Interval: 1 seconds | #MATK 3400%, Duration: 150 seconds, Abyss Sphere Interval: 1 seconds | ||
|} | |} | ||
|- | |- | ||
| style="width: 100%;" | | | style="width: 100%;" | | ||
{| class="wikitable" style="border-collapse: collapse; width: 100%;" | {| class="wikitable" style="border-collapse: collapse; width: 100%;" | ||
|- | |- | ||
| style="width: 50%; text-align: center;" | '''Item Boosts''' | | style="width: 50%; text-align: center;" | '''Item Boosts''' | ||
| style="width: 50%; text-align: center;" | '''Item Combo Boosts''' | | style="width: 50%; text-align: center;" | '''Item Combo Boosts''' | ||
|- | |- | ||
| style="width: 50%; text-align: center;" | <span>[[image:510030.png|middle|24px]][https://www.midgardtales.com/item/view/?id=510030 Thanos Dagger-AD [2]] </span> | | style="width: 50%; text-align: center;" | <span>[[image:510030.png|middle|24px]][https://www.midgardtales.com/item/view/?id=510030 Thanos Dagger-AD [2]] </span> | ||
<span>[[image:510051.png|middle|24px]][https://www.midgardtales.com/item/view/?id=510051 Wicked Dagger [2]]</span> | <span>[[image:510051.png|middle|24px]][https://www.midgardtales.com/item/view/?id=510051 Wicked Dagger [2]]</span> | ||
| Line 532: | Line 523: | ||
|} | |} | ||
|} | |} | ||
{| class="wikitable" style="border-collapse: collapse; width: 100%; background-color: rgb(248, 202, 198);" | {| class="wikitable" style="border-collapse: collapse; width: 100%; background-color: rgb(248, 202, 198);" | ||
|- | |- | ||
| style="width: 100%;" | | | style="width: 100%;" | | ||
{| class="wikitable" style="border-collapse: collapse; width: 100%; height: 24px;" | {| class="wikitable" style="border-collapse: collapse; width: 100%; height: 24px;" | ||
|- style="height: 24px;" | |- style="height: 24px;" | ||
| style="width: 25%; height: 24px;" | [[File:Abyssflame.png|300px|frameless]] '''Abyss Flame''' | | style="width: 25%; height: 24px;" | [[File:Abyssflame.png|300px|frameless]] '''Abyss Flame''' | ||
| Line 542: | Line 533: | ||
| style="width: 25%; height: 24px;" | '''Magical Fire''' | | style="width: 25%; height: 24px;" | '''Magical Fire''' | ||
|} | |} | ||
|- | |- | ||
| style="width: 100%;" | | | style="width: 100%;" | | ||
{| class="wikitable" style="border-collapse: collapse; width: 100%;" | {| class="wikitable" style="border-collapse: collapse; width: 100%; height: 23px;" | ||
|- | |- style="height: 23px;" | ||
| style="width: | | style="width: 25%; height: 23px; text-align: center;" | [[image:abyssflame.gif|300px|frameless]] | ||
| style="width: 25%;" | - | |||
| style="width: 50%; height: 23px;" | - | |||
|} | |} | ||
|} | |} | ||
{| class="wikitable" style="border-collapse: collapse; width: 100%; background-color: rgb(248, 202, 198);" | {| class="wikitable" style="border-collapse: collapse; width: 100%; background-color: rgb(248, 202, 198);" | ||
|- | |- | ||
| style="width: 100%;" | | | style="width: 100%;" | | ||
{| class="wikitable" style="border-collapse: collapse; width: 100%;" | {| class="wikitable" style="border-collapse: collapse; width: 100%;" | ||
|- | |- | ||
| style="width: 25%;" | [[File:4th 5321.png|300px|frameless|Abyss Square]] '''Abyss Square''' | | style="width: 25%;" | [[File:4th 5321.png|300px|frameless|Abyss Square]] '''Abyss Square''' | ||
| style="width: 25%;" | '''Max Level 5''' | | style="width: 25%;" | '''Max Level 5''' | ||
| Line 559: | Line 552: | ||
| style="width: 25%;" | '''Magical Neutral''' | | style="width: 25%;" | '''Magical Neutral''' | ||
|} | |} | ||
|- | |- | ||
| style="width: 100%;" | | | style="width: 100%;" | | ||
{| class="wikitable" style="border-collapse: collapse; width: 100%;" | {| class="wikitable" style="border-collapse: collapse; width: 100%;" | ||
|- | |- | ||
| style="width: 25%; text-align: center;" | [[File:Abysssquare.gif|400px|alt=Abyss Square Skill Animation|frameless|Abyss Square]] | | style="width: 25%; text-align: center;" | [[File:Abysssquare.gif|400px|alt=Abyss Square Skill Animation|frameless|Abyss Square]] | ||
| style="width: 25%;" | *Ground | | style="width: 25%;" | *Ground | ||
| Line 569: | Line 562: | ||
*Costs: 105 SP | *Costs: 105 SP | ||
*MATK% = + 5 x SPL. | *MATK% = + 5 x SPL. | ||
*MATK% = x Base Level / 100. | *MATK% = x Base Level / 100. | ||
*Autocast chance% = 15. | *Autocast chance% = 15. | ||
| Line 579: | Line 571: | ||
#MATK 3750+(Magic Sword Mastery Lv x200)% | #MATK 3750+(Magic Sword Mastery Lv x200)% | ||
|} | |} | ||
|- | |- | ||
| style="width: 100%;" | | | style="width: 100%;" | | ||
{| class="wikitable" style="border-collapse: collapse; width: 100%;" | {| class="wikitable" style="border-collapse: collapse; width: 100%;" | ||
|- | |- | ||
| style="width: 50%; text-align: center;" | '''Item Boosts''' | | style="width: 50%; text-align: center;" | '''Item Boosts''' | ||
| style="width: 50%; text-align: center;" | '''Item Combo Boosts''' | | style="width: 50%; text-align: center;" | '''Item Combo Boosts''' | ||
|- | |- | ||
| style="width: 50%; text-align: center;" | <span>[[image:510026.png|middle|24px]][https://www.midgardtales.com/item/view/?id=510026 Relapse Dagger [2]] </span> | | style="width: 50%; text-align: center;" | <span>[[image:510026.png|middle|24px]][https://www.midgardtales.com/item/view/?id=510026 Relapse Dagger [2]] </span> | ||
<span>[[image:510051.png|middle|24px]][https://www.midgardtales.com/item/view/?id=510051 Wicked Dagger [2]]</span> | <span>[[image:510051.png|middle|24px]][https://www.midgardtales.com/item/view/?id=510051 Wicked Dagger [2]]</span> | ||
| Line 599: | Line 591: | ||
|} | |} | ||
|} | |} | ||
{| class="wikitable" style="border-collapse: collapse; width: 100%; height: 46px; background-color: rgb(248, 202, 198);" | {| class="wikitable" style="border-collapse: collapse; width: 100%; height: 46px; background-color: rgb(248, 202, 198);" | ||
|- style="height: 23px;" | |- style="height: 23px;" | ||
| style="width: 100%; height: 23px;" | | | style="width: 100%; height: 23px;" | | ||
{| class="wikitable" style="border-collapse: collapse; width: 100%;" | {| class="wikitable" style="border-collapse: collapse; width: 100%;" | ||
|- | |- | ||
| style="width: 25%;" | [[File:4th 5319.png|300px|frameless|Omega Abyss Strike]] '''Omega Abyss Strike''' | | style="width: 25%;" | [[File:4th 5319.png|300px|frameless|Omega Abyss Strike]] '''Omega Abyss Strike''' | ||
| style="width: 25%;" | '''Max Level 10''' | | style="width: 25%;" | '''Max Level 10''' | ||
| Line 610: | Line 602: | ||
|} | |} | ||
|- style="height: 23px;" | |- style="height: 23px;" | ||
| style="width: 100%; height: 23px;" | | | style="width: 100%; height: 23px;" | | ||
{| class="wikitable" style="border-collapse: collapse; width: 100%;" | {| class="wikitable" style="border-collapse: collapse; width: 100%;" | ||
|- | |- | ||
| style="width: 25%; text-align: center;" | [[File:Abyssstrike.gif|400px|alt=Omega Abyss Strike Skill Animation|frameless|Omega Abyss Strike]] | | style="width: 25%; text-align: center;" | [[File:Abyssstrike.gif|400px|alt=Omega Abyss Strike Skill Animation|frameless|Omega Abyss Strike]] | ||
| style="width: 25%;" | *Ground | | style="width: 25%;" | *Ground | ||
| Line 619: | Line 611: | ||
*Costs: 125 SP, 10 AP | *Costs: 125 SP, 10 AP | ||
*MATK% = + 10 x SPL. | *MATK% = + 10 x SPL. | ||
*MATK% if Demon & Angel = + 200 x Skill Level. | *MATK% if Demon & Angel = + 200 x Skill Level. | ||
*MATK% = x Base Level / 100. | *MATK% = x Base Level / 100. | ||
| style="width: 50%;" | Drops the powerful meteorite at the targeted area, inflicting Fire elemental magic damage to all targets within 9x9 cells.<br>Inflicts additional damage against Angel and Demon race monsters.<br>Damage additionally increases according to the caster's Base Level and SPL.<br> | | style="width: 50%;" | Drops the powerful meteorite at the targeted area, inflicting Fire elemental magic damage to all targets within 9x9 cells.<br>Inflicts additional damage against Angel and Demon race monsters.<br>Damage additionally increases according to the caster's Base Level and SPL.<br> | ||
Revision as of 01:27, 23 May 2026
Intro
| Novice | Thief
(1st Job) |
Rogue
(2nd Job) |
Stalker
(2nd Job Transcedent) |
Shadow Chaser
(3rd Job) |
Abyss Chaser
(4th Job) |

|

|

|

|

|
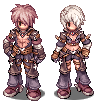
|
|
Description |
Max Level HP/SP | Stats Bonus when Max Job Level |
|
- |
|
Str+8, Agi+9, Vit+8, Int+6, Dex+6, Luk+6 Pow+9, Sta+8, Wis+4, Spl+8, Con+5, Ctr+6 |
1st Job Skills
2nd Job Skills
2nd Job Transcendent Skills
3rd Job Skills
4th Job Skills
| |||
|

| ||||
| ||||


| ||||
|


| ||||
| ||||
|


| ||||
| ||||


| ||||
|


| ||||
|


| ||||
|


| ||||
| ||||


| ||||
| ||||


| |||
|

| ||||
| ||||
|


| ||||
|


| ||||
| ||||


| ||||
|


Related NPC
|
Job Change |
N/A |
Given |
|
Supply Dealer Department Store in main town |

|
|
|
Magician Steven Department Store in main town |

|
 Red Gemstone Red Gemstone
|
|
Plagiarism NPC Training Ground |

|
Copy skills available for Intimidate and Reproduce. |


