Abyss Chaser: Difference between revisions
| (4 intermediate revisions by the same user not shown) | |||
| Line 636: | Line 636: | ||
== 3rd Job Skills == | == 3rd Job Skills == | ||
{| class="wikitable" style="border-collapse: collapse; width: 100%; background-color: rgb(194, 224, 244);" | |||
|- | |||
| style="width: 100%;" | | |||
{| class="wikitable" style="border-collapse: collapse; width: 100%;" | |||
|- | |||
| style="width: 25%;" | [[File:Reproduce.png|300px|frameless]] '''Reproduce''' | |||
| style="width: 25%;" | '''Max Level 10''' | |||
| style="width: 25%;" | '''Active (Toggle on/off)''' | |||
| style="width: 25%;" | '''Supportive''' | |||
|} | |||
|- | |||
| style="width: 100%;" | | |||
{| class="wikitable" style="border-collapse: collapse; width: 100%;" | |||
|- | |||
| style="width: 100%;" | - | |||
|} | |||
|} | |||
{| class="wikitable" style="border-collapse: collapse; width: 100%; background-color: rgb(194, 224, 244);" | |||
|- | |||
| style="width: 100%;" | | |||
{| class="wikitable" style="border-collapse: collapse; width: 100%;" | |||
|- | |||
| style="width: 25%;" | [[File:Shadowspell.png|300px|frameless]] '''Auto Shadow Spell''' | |||
| style="width: 25%;" | '''Max Level 10''' | |||
| style="width: 25%;" | '''Active''' | |||
| style="width: 25%;" | '''Supportive''' | |||
|} | |||
|- | |||
| style="width: 100%;" | | |||
{| class="wikitable" style="border-collapse: collapse; width: 100%;" | |||
|- | |||
| style="width: 100%;" | - | |||
|} | |||
|} | |||
{| class="wikitable" style="border-collapse: collapse; width: 100%; height: 83px; background-color: rgb(236, 202, 250);" | |||
|- style="height: 60px;" | |||
| style="width: 100%; height: 60px;" | | |||
{| class="wikitable" style="border-collapse: collapse; width: 100%; height: 19px;" | |||
|- style="height: 19px;" | |||
| style="width: 25%; height: 19px;" | [[File:Shadowformation.png|300px|frameless]] '''Shadow Form''' | |||
| style="width: 25%; height: 19px;" | '''Max Level 5''' | |||
| style="width: 25%; height: 19px;" | '''Active''' | |||
| style="width: 25%; height: 19px;" | '''Debuff''' | |||
|} | |||
|- style="height: 23px;" | |||
| style="width: 100%; height: 23px;" | | |||
{| class="wikitable" style="border-collapse: collapse; width: 100%;" | |||
|- | |||
| style="width: 100%;" | - | |||
|} | |||
|} | |||
{| class="wikitable" style="border-collapse: collapse; width: 100%; background-color: rgb(194, 224, 244);" | |||
|- | |||
| style="width: 100%;" | | |||
{| class="wikitable" style="border-collapse: collapse; width: 100%;" | |||
|- | |||
| style="width: 25%;" | [[File:Deadlyinfection.png|300px|frameless]] '''Deadly Infection''' | |||
| style="width: 25%;" | '''Max Level 5''' | |||
| style="width: 25%;" | '''Active''' | |||
| style="width: 25%;" | '''Supportive''' | |||
|} | |||
|- | |||
| style="width: 100%;" | | |||
{| class="wikitable" style="border-collapse: collapse; width: 100%;" | |||
|- | |||
| style="width: 100%;" | - | |||
|} | |||
|} | |||
{| class="wikitable" style="border-collapse: collapse; width: 100%; background-color: rgb(194, 224, 244);" | |||
|- | |||
| style="width: 100%;" | | |||
{| class="wikitable" style="border-collapse: collapse; width: 100%;" | |||
|- | |||
| style="width: 25%;" | [[File:Invisibility.png|300px|frameless]] '''(MT) Invisibility''' | |||
| style="width: 25%;" | '''Max Level 5''' | |||
| style="width: 25%;" | '''Active''' | |||
| style="width: 25%;" | '''Supportive''' | |||
|} | |||
|- | |||
| style="width: 100%;" | | |||
{| class="wikitable" style="border-collapse: collapse; width: 100%;" | |||
|- | |||
| style="width: 100%;" | - | |||
|} | |||
|} | |||
{| class="wikitable" style="border-collapse: collapse; width: 100%; background-color: rgb(248, 202, 198);" | |||
|- | |||
| style="width: 100%;" | | |||
{| class="wikitable" style="border-collapse: collapse; width: 100%;" | |||
|- | |||
| style="width: 25%;" | [[File:Fatalmenace.png|300px|frameless]] '''Fatal Menace''' | |||
| style="width: 25%;" | '''Max Level 10''' | |||
| style="width: 25%;" | '''Active''' | |||
| style="width: 25%;" | '''Physical Melee''' | |||
|} | |||
|- | |||
| style="width: 100%;" | | |||
{| class="wikitable" style="border-collapse: collapse; width: 100%;" | |||
|- | |||
| style="width: 100%;" | - | |||
|} | |||
|} | |||
{| class="wikitable" style="border-collapse: collapse; width: 100%; background-color: rgb(236, 202, 250);" | |||
|- | |||
| style="width: 100%;" | | |||
{| class="wikitable" style="border-collapse: collapse; width: 100%;" | |||
|- | |||
| style="width: 25%;" | [[File:Bodypainting.png|300px|frameless]] '''Body Paint''' | |||
| style="width: 25%;" | '''Max Level 5''' | |||
| style="width: 25%;" | '''Active''' | |||
| style="width: 25%;" | '''Debuff''' | |||
|} | |||
|- | |||
| style="width: 100%;" | | |||
{| class="wikitable" style="border-collapse: collapse; width: 100%;" | |||
|- | |||
| style="width: 100%;" | - | |||
|} | |||
|} | |||
{| class="wikitable" style="border-collapse: collapse; width: 100%; background-color: rgb(236, 202, 250);" | |||
|- | |||
| style="width: 100%;" | | |||
{| class="wikitable" style="border-collapse: collapse; width: 100%;" | |||
|- | |||
| style="width: 25%;" | [[File:MasqEnervation.png|300px|frameless]] '''Masquerade Enervation''' | |||
| style="width: 25%;" | '''Max Level 3''' | |||
| style="width: 25%;" | '''Active''' | |||
| style="width: 25%;" | '''Debuff''' | |||
|} | |||
|- | |||
| style="width: 100%;" | | |||
{| class="wikitable" style="border-collapse: collapse; width: 100%;" | |||
|- | |||
| style="width: 100%;" | - | |||
|} | |||
|} | |||
{| class="wikitable" style="border-collapse: collapse; width: 100%; background-color: rgb(236, 202, 250);" | |||
|- | |||
| style="width: 100%;" | | |||
{| class="wikitable" style="border-collapse: collapse; width: 100%;" | |||
|- | |||
| style="width: 25%;" | [[File:MasqGloomy.png|300px|frameless]] '''Masquerade Glommy''' | |||
| style="width: 25%;" | '''Max Level 3''' | |||
| style="width: 25%;" | '''Active''' | |||
| style="width: 25%;" | '''Debuff''' | |||
|} | |||
|- | |||
| style="width: 100%;" | | |||
{| class="wikitable" style="border-collapse: collapse; width: 100%;" | |||
|- | |||
| style="width: 100%;" | - | |||
|} | |||
|} | |||
{| class="wikitable" style="border-collapse: collapse; width: 100%; background-color: rgb(236, 202, 250);" | |||
|- | |||
| style="width: 100%;" | | |||
{| class="wikitable" style="border-collapse: collapse; width: 100%;" | |||
|- | |||
| style="width: 25%;" | [[File:MasqIgnorance.png|300px|frameless]] '''Masquerade Ignorance''' | |||
| style="width: 25%;" | '''Max Level 3''' | |||
| style="width: 25%;" | '''Active''' | |||
| style="width: 25%;" | '''Debuff''' | |||
|} | |||
|- | |||
| style="width: 100%;" | | |||
{| class="wikitable" style="border-collapse: collapse; width: 100%;" | |||
|- | |||
| style="width: 100%;" | - | |||
|} | |||
|} | |||
{| class="wikitable" style="border-collapse: collapse; width: 100%; background-color: rgb(236, 202, 250);" | |||
|- | |||
| style="width: 100%;" | | |||
{| class="wikitable" style="border-collapse: collapse; width: 100%;" | |||
|- | |||
| style="width: 25%;" | [[File:MasqLaziness.png|300px|frameless]] '''Masquerade Laziness''' | |||
| style="width: 25%;" | '''Max Level 3''' | |||
| style="width: 25%;" | '''Active''' | |||
| style="width: 25%;" | '''Debuff''' | |||
|} | |||
|- | |||
| style="width: 100%;" | | |||
{| class="wikitable" style="border-collapse: collapse; width: 100%;" | |||
|- | |||
| style="width: 100%;" | - | |||
|} | |||
|} | |||
{| class="wikitable" style="border-collapse: collapse; width: 100%; background-color: rgb(236, 202, 250);" | |||
|- | |||
| style="width: 100%;" | | |||
{| class="wikitable" style="border-collapse: collapse; width: 100%;" | |||
|- | |||
| style="width: 25%;" | [[File:MasqWeakness.png|300px|frameless]] '''Masquerade Weakness''' | |||
| style="width: 25%;" | '''Max Level 3''' | |||
| style="width: 25%;" | '''Active''' | |||
| style="width: 25%;" | '''Debuff''' | |||
|} | |||
|- | |||
| style="width: 100%;" | | |||
{| class="wikitable" style="border-collapse: collapse; width: 100%;" | |||
|- | |||
| style="width: 100%;" | - | |||
|} | |||
|} | |||
{| class="wikitable" style="border-collapse: collapse; width: 100%; background-color: rgb(236, 202, 250);" | |||
|- | |||
| style="width: 100%;" | | |||
{| class="wikitable" style="border-collapse: collapse; width: 100%;" | |||
|- | |||
| style="width: 25%;" | [[File:MasqUnlucky.png|300px|frameless]] '''Masquerade Unlucky''' | |||
| style="width: 25%;" | '''Max Level 3''' | |||
| style="width: 25%;" | '''Active''' | |||
| style="width: 25%;" | '''Debuff''' | |||
|} | |||
|- | |||
| style="width: 100%;" | | |||
{| class="wikitable" style="border-collapse: collapse; width: 100%;" | |||
|- | |||
| style="width: 100%;" | - | |||
|} | |||
|} | |||
{| class="wikitable" style="border-collapse: collapse; width: 100%; background-color: rgb(236, 202, 250);" | |||
|- | |||
| style="width: 100%;" | | |||
{| class="wikitable" style="border-collapse: collapse; width: 100%;" | |||
|- | |||
| style="width: 25%;" | [[File:Maelstorm.png|300px|frameless]] '''Maelstorm''' | |||
| style="width: 25%;" | '''Max Level 3''' | |||
| style="width: 25%;" | '''Active''' | |||
| style="width: 25%;" | '''Debuff''' | |||
|} | |||
|- | |||
| style="width: 100%;" | | |||
{| class="wikitable" style="border-collapse: collapse; width: 100%;" | |||
|- | |||
| style="width: 100%;" | - | |||
|} | |||
|} | |||
{| class="wikitable" style="border-collapse: collapse; width: 100%; background-color: rgb(248, 202, 198);" | |||
|- | |||
| style="width: 100%;" | | |||
{| class="wikitable" style="border-collapse: collapse; width: 100%;" | |||
|- | |||
| style="width: 25%;" | [[File:Triagleshot.png|300px|frameless]] '''Triangle Shot''' | |||
| style="width: 25%;" | '''Max Level 10''' | |||
| style="width: 25%;" | '''Active''' | |||
| style="width: 25%;" | '''Physical Ranged''' | |||
|} | |||
|- | |||
| style="width: 100%;" | | |||
{| class="wikitable" style="border-collapse: collapse; width: 100%;" | |||
|- | |||
| style="width: 100%;" | - | |||
|} | |||
|} | |||
{| class="wikitable" style="border-collapse: collapse; width: 100%; background-color: rgb(194, 224, 244);" | {| class="wikitable" style="border-collapse: collapse; width: 100%; background-color: rgb(194, 224, 244);" | ||
|- | |- | ||
| Line 641: | Line 896: | ||
{| class="wikitable" style="border-collapse: collapse; width: 100%;" | {| class="wikitable" style="border-collapse: collapse; width: 100%;" | ||
|- | |- | ||
| style="width: 25%;" | [[File: | | style="width: 25%;" | [[File:Urgentescape.png|300px|frameless]] '''Escape''' | ||
| style="width: 25%;" | '''Max Level 5''' | |||
| style="width: 25%;" | '''Active''' | |||
| style="width: 25%;" | '''Supportive''' | |||
|} | |||
|- | |||
| style="width: 100%;" | | |||
{| class="wikitable" style="border-collapse: collapse; width: 100%;" | |||
|- | |||
| style="width: 100%;" | - | |||
|} | |||
|} | |||
{| class="wikitable" style="border-collapse: collapse; width: 100%; background-color: rgb(236, 202, 250);" | |||
|- | |||
| style="width: 100%;" | | |||
{| class="wikitable" style="border-collapse: collapse; width: 100%;" | |||
|- | |||
| style="width: 25%;" | [[File:Manhole.png|300px|frameless]] '''Manhole''' | |||
| style="width: 25%;" | '''Max Level 3''' | |||
| style="width: 25%;" | '''Active''' | |||
| style="width: 25%;" | '''Debuff''' | |||
|} | |||
|- | |||
| style="width: 100%;" | | |||
{| class="wikitable" style="border-collapse: collapse; width: 100%;" | |||
|- | |||
| style="width: 100%;" | - | |||
|} | |||
|} | |||
{| class="wikitable" style="border-collapse: collapse; width: 100%; background-color: rgb(236, 202, 250);" | |||
|- | |||
| style="width: 100%;" | | |||
{| class="wikitable" style="border-collapse: collapse; width: 100%;" | |||
|- | |||
| style="width: 25%;" | [[File:Chaospanic.png|300px|frameless]] '''Chaos Panic''' | |||
| style="width: 25%;" | '''Max Level 3''' | |||
| style="width: 25%;" | '''Active''' | |||
| style="width: 25%;" | '''Debuff''' | |||
|} | |||
|- | |||
| style="width: 100%;" | | |||
{| class="wikitable" style="border-collapse: collapse; width: 100%;" | |||
|- | |||
| style="width: 100%;" | - | |||
|} | |||
|} | |||
{| class="wikitable" style="border-collapse: collapse; width: 100%; background-color: rgb(236, 202, 250);" | |||
|- | |||
| style="width: 100%;" | | |||
{| class="wikitable" style="border-collapse: collapse; width: 100%;" | |||
|- | |||
| style="width: 25%;" | [[File:Dimensionaldoor.png|300px|frameless]] '''Dimensional Door''' | |||
| style="width: 25%;" | '''Max Level 3''' | |||
| style="width: 25%;" | '''Active''' | |||
| style="width: 25%;" | '''Debuff''' | |||
|} | |||
|- | |||
| style="width: 100%;" | | |||
{| class="wikitable" style="border-collapse: collapse; width: 100%;" | |||
|- | |||
| style="width: 100%;" | - | |||
|} | |||
|} | |||
{| class="wikitable" style="border-collapse: collapse; width: 100%; background-color: rgb(194, 224, 244); height: 119px;" | |||
|- style="height: 60px;" | |||
| style="width: 100%; height: 60px;" | | |||
{| class="wikitable" style="border-collapse: collapse; width: 100%;" | |||
|- | |||
| style="width: 25%;" | [[File:Feintbomb'.png|300px|frameless]] '''Feint Bomb''' | |||
| style="width: 25%;" | '''Max Level 10''' | | style="width: 25%;" | '''Max Level 10''' | ||
| style="width: 25%;" | '''Active | | style="width: 25%;" | '''Active''' | ||
| style="width: 25%;" | '''Supportive''' | | style="width: 25%;" | '''Supportive''' | ||
|} | |||
|- style="height: 59px;" | |||
| style="width: 100%; height: 59px;" | | |||
{| class="wikitable" style="border-collapse: collapse; width: 100%; height: 23px;" | |||
|- style="height: 23px;" | |||
| style="width: 100%; height: 23px;" | - | |||
|} | |||
|} | |||
{| class="wikitable" style="border-collapse: collapse; width: 100%; background-color: rgb(236, 202, 250);" | |||
|- | |||
| style="width: 100%;" | | |||
{| class="wikitable" style="border-collapse: collapse; width: 100%;" | |||
|- | |||
| style="width: 25%;" | [[File:Bloodylust.png|300px|frameless]] '''Bloody Lust''' | |||
| style="width: 25%;" | '''Max Level 3''' | |||
| style="width: 25%;" | '''Active''' | |||
| style="width: 25%;" | '''Debuff''' | |||
|} | |} | ||
|- | |- | ||
| Line 651: | Line 991: | ||
|- | |- | ||
| style="width: 100%;" | - | | style="width: 100%;" | - | ||
|} | |||
|} | |||
{| class="wikitable" style="border-collapse: collapse; width: 100%; background-color: rgb(236, 202, 250);" | |||
|- | |||
| style="width: 100%;" | | |||
{| class="wikitable" style="border-collapse: collapse; width: 100%;" | |||
|- | |||
| style="width: 25%;" | [[File:Stripaccessory.png|300px|frameless]] '''Strip Accessory''' | |||
| style="width: 25%;" | '''Max Level 5''' | |||
| style="width: 25%;" | '''Active''' | |||
| style="width: 25%;" | '''Debuff''' | |||
|} | |||
|- | |||
| style="width: 100%;" | | |||
{| class="wikitable" style="border-collapse: collapse; width: 100%;" | |||
|- | |||
| style="width: 100%;" | - | |||
|} | |||
|} | |||
{| class="wikitable" style="border-collapse: collapse; width: 100%; background-color: rgb(194, 224, 244);" | |||
|- | |||
| style="width: 100%;" | | |||
{| class="wikitable" style="border-collapse: collapse; width: 100%;" | |||
|- | |||
| style="width: 25%;" | [[File:Fullthrottle.png|300px|frameless]]<font color="#000000"><span style="font-size: 14.4px;"> '''Full Throttle'''</span></font> | |||
| style="width: 25%;" | '''<font color="#000000"><span style="font-size: 14.4px;" >Max Level 5</span></font>''' | |||
| style="width: 25%;" | '''<font color="#000000"><span style="font-size: 14.4px;" >Active</span></font>''' | |||
| style="width: 25%;" | '''<font color="#000000"><span style="font-size: 14.4px;" >Supportive Self</span></font>''' | |||
|} | |||
|- | |||
| style="width: 100%;" | | |||
{| class="wikitable" style="border-collapse: collapse; width: 100%; height: 23px;" | |||
|- style="height: 23px;" | |||
| style="width: 25%; height: 23px; text-align: center;" | - | |||
| style="width: 25%; height: 23px;" | | |||
*Target: Caster<br> | |||
*Cost: 1 SP | |||
*Immune to Dispel, Clearance and Banishing Buster | |||
| style="width: 50%; height: 23px;" | | |||
Exceed the limits of the body by sacrificing vitality to strength for a short duration. | |||
Fully restores HP when casted, All Stats +20% and increases Movement Speed. | |||
When skill duration is over, you will receive Rebound debuff, during Rebound your movement speed is lowered and your natural HP/SP regen is disabled. | |||
*Level 5: 1% HP/SP drained per second for 30 seconds. | |||
|} | |} | ||
|} | |} | ||
Latest revision as of 04:45, 23 May 2026
Intro
| Novice | Thief
(1st Job) |
Rogue
(2nd Job) |
Stalker
(2nd Job Transcedent) |
Shadow Chaser
(3rd Job) |
Abyss Chaser
(4th Job) |

|

|

|

|

|
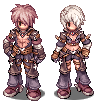
|
|
Description |
Max Level HP/SP | Stats Bonus when Max Job Level |
|
- |
|
Str+8, Agi+9, Vit+8, Int+6, Dex+6, Luk+6 Pow+9, Sta+8, Wis+4, Spl+8, Con+5, Ctr+6 |
1st Job Skills
| |||
|

| |||
|

| ||||
|

| ||||
|

| ||||
|

| ||||
|

| ||||
|

| ||||
|

| ||||
|

| ||||
|

2nd Job Skills
| |||
|

| ||||
|

| ||||
|

| |||
|

| |||
|

| ||||
|

| ||||
|

| ||||
|

| ||||
|

| |||
|

| ||||
|

| ||||
|

| ||||
|

| ||||
|

| |||
|

| |||
|

| ||||
|

| ||||
|

| ||||
|

| |||
|

| ||||
|

2nd Job Transcendent Skills
| ||||
|

| ||||
|

| ||||
|

| ||||
|

3rd Job Skills
| ||||
|

| ||||
|

| ||||
|

| ||||
|

| ||||
|

| ||||
|

| ||||
|

| ||||
|

| ||||
|

| ||||
|

| ||||
|

| ||||
|

| ||||
|

| ||||
|

| ||||
|

| ||||
|

| ||||
|

| ||||
|

| ||||
|

| ||||
|

| ||||
|

| ||||
|

| ||||
|

4th Job Skills
| |||
|

| ||||
| ||||


| ||||
|


| ||||
| ||||
|


| ||||
| ||||


| ||||
|


| ||||
|


| ||||
|


| ||||
| ||||


| ||||
| ||||


| |||
|

| ||||
| ||||
|


| ||||
|


| ||||
| ||||


| ||||
|


Related NPC
|
Job Change |
N/A |
Given |
|
Supply Dealer Department Store in main town |

|
|
|
Magician Steven Department Store in main town |

|
 Red Gemstone Red Gemstone
|
|
Plagiarism NPC Training Ground |

|
Copy skills available for Intimidate and Reproduce. |


