Abyss Chaser: Difference between revisions
| (17 intermediate revisions by the same user not shown) | |||
| Line 1: | Line 1: | ||
== Intro == | |||
{| class="wikitable" style="border-collapse: collapse; width: 100%;" | |||
|- | |||
| style="width: 16.6667%; text-align: center;" | '''Novice''' | |||
| style="width: 16.6667%; text-align: center;" | '''Thief''' | |||
== | |||
'''(1st Job)''' | |||
| style="width: 16.6667%; text-align: center;" | '''Rogue''' | |||
'''(2nd Job)''' | |||
| style="width: 16.6667%; text-align: center;" | '''Stalker''' | |||
'''(2nd Job Transcedent)''' | |||
| style="width: 16.6667%; text-align: center;" | '''Shadow Chaser''' | |||
'''(3rd Job)''' | |||
| style="width: 16.6667%; text-align: center;" | <span style="color: rgb(53, 152, 219);">'''Abyss Chaser'''</span> | |||
<span style="color: rgb(53, 152, 219);">'''(4th Job)'''</span> | |||
|- | |||
| style="width: 16.6667%; text-align: center;" | [[File:Novice.gif|300px|frameless]] | |||
| style="width: 16.6667%; text-align: center;" | [[File:THIEF.gif|300px|frameless]] | |||
| style="width: 16.6667%; text-align: center;" | [[File:ROGUE.gif|300px|frameless]] | |||
| style="width: 16.6667%; text-align: center;" | [[File:Stalker.png|300px|frameless]] | |||
| style="width: 16.6667%; text-align: center;" | [[File:Shadow Chaser.png|300px|frameless]] | |||
| style="width: 16.6667%; text-align: center;" | [[File:Abysschasersprite.png|300px|link=Abyss Chaser|alt=Abyss Chaser|frameless|Abyss Chaser]] | |||
|} | |||
{| class="wikitable" style="border-collapse: collapse; width: 100%; height: 105px;" | {| class="wikitable" style="border-collapse: collapse; width: 100%; height: 105px;" | ||
|- style="height: 28px;" | |- style="height: 28px;" | ||
| style="width: 25%; height: 28px; text-align: center;" | | | style="width: 25%; height: 28px; text-align: center;" | | ||
''' | '''<span style="color: #000000;"><span style="font-size: 14.4px;">Description</span></span>''' | ||
| style="width: 12.5%; text-align: center; height: 28px;" | '''<span style="color: #000000;"><span style="font-size: 14.4px;">Max Level HP/SP</span></span>''' | |||
| style="width: 12.5% | | style="width: 25%; height: 28px; text-align: center;" | '''<span style="color: #000000;"><span style="font-size: 14.4px;">Stats Bonus when Max Job Level</span></span>''' | ||
| style="width: 25%; height: 28px; text-align: center;" | '''Stats Bonus when Max Job Level''' | |||
|- style="height: 77px;" | |- style="height: 77px;" | ||
| style="width: 25%; height: 77px; text-align: | | style="width: 25%; height: 77px; text-align: left;" | | ||
- | |||
| style="width: | | style="width: 12.5%; height: 77px;" | | ||
*<span style="color: #000000;"><span style="font-size: 14.4px;">Base Max HP: 73600</span></span> | |||
*<span style="color: #000000;"><span style="font-size: 14.4px;">Base Max SP: 2420</span></span> | |||
| | |||
* | |||
*Base Max SP: | |||
| style="width: 25%; height: 77px;" | | | style="width: 25%; height: 77px;" | | ||
<p style="text-align: center;">Str+8, Agi+9, Vit+8, Int+6, Dex+6, Luk+6<br></p> | <p style="text-align: center;">Str+8, Agi+9, Vit+8, Int+6, Dex+6, Luk+6<br></p> | ||
<p style="text-align: center;">Pow+ | <p style="text-align: center;">Pow+9, Sta+8, Wis+4, Spl+8, Con+5, Ctr+6</p> | ||
|} | |} | ||
== | == 1st Job Skills == | ||
==== [[File: | {| class="wikitable" style="border-collapse: collapse; width: 100%; background-color: rgb(251, 238, 184);" | ||
{| class="wikitable" style="border-collapse: collapse; width: 100%; height: | |- | ||
| style="width: 100%;" | | |||
{| class="wikitable" style="border-collapse: collapse; width: 100%; height: 23px;" | |||
|- style="height: 23px;" | |||
| style="width: 25%; height: 23px;" | [[File:Doubleattack.png|300px|frameless]] '''Double Attack''' | |||
| style="width: 25%; height: 23px;" | '''Max Level 10''' | |||
| style="width: 50%; height: 23px;" | '''Passive''' | |||
|} | |||
|- | |||
| style="width: 100%;" | | |||
{| class="wikitable" style="border-collapse: collapse; width: 100%;" | |||
|- | |||
| style="width: 100%;" | - | |||
|} | |||
|} | |||
{| class="wikitable" style="border-collapse: collapse; width: 100%; background-color: rgb(251, 238, 184);" | |||
|- | |||
| style="width: 100%;" | | |||
{| class="wikitable" style="border-collapse: collapse; width: 100%; height: 24px;" | |||
|- style="height: 24px;" | |||
| style="width: 25%; height: 24px;" | [[File:Improvedodge.png|300px|frameless]] '''Improve Dodge''' | |||
| style="width: 25%; height: 24px;" | '''Max Level 10''' | |||
| style="width: 50%; height: 24px;" | '''Passive''' | |||
|} | |||
|- | |||
| style="width: 100%;" | | |||
{| class="wikitable" style="border-collapse: collapse; width: 100%;" | |||
|- | |||
| style="width: 100%;" | - | |||
|} | |||
|} | |||
{| class="wikitable" style="border-collapse: collapse; width: 100%; height: 83px; background-color: rgb(194, 224, 244);" | |||
|- style="height: 60px;" | |||
| style="width: 100%; height: 60px;" | | |||
{| class="wikitable" style="border-collapse: collapse; width: 100%;" | |||
|- | |||
| style="width: 25%;" | [[File:Steal.png|300px|frameless]] '''Steal''' | |||
| style="width: 25%;" | '''Max Level 10''' | |||
| style="width: 25%;" | '''Active''' | |||
| style="width: 25%;" | '''Supportive Other''' | |||
|} | |||
|- style="height: 23px;" | |||
| style="width: 100%; height: 23px;" | | |||
{| class="wikitable" style="border-collapse: collapse; width: 100%;" | |||
|- | |||
| style="width: 100%;" | - | |||
|} | |||
|} | |||
{| class="wikitable" style="border-collapse: collapse; width: 100%; height: 83px; background-color: rgb(194, 224, 244);" | |||
|- style="height: 60px;" | |||
| style="width: 100%; height: 60px;" | | |||
{| class="wikitable" style="border-collapse: collapse; width: 100%;" | |||
|- | |||
| style="width: 25%;" | [[File:Hiding.png|300px|frameless]] '''Hiding''' | |||
| style="width: 25%;" | '''Max Level 10''' | |||
| style="width: 25%;" | '''Active''' | |||
| style="width: 25%;" | '''Supportive Self''' | |||
|} | |||
|- style="height: 23px;" | |||
| style="width: 100%; height: 23px;" | | |||
{| class="wikitable" style="border-collapse: collapse; width: 100%;" | |||
|- | |||
| style="width: 100%;" | - | |||
|} | |||
|} | |||
{| class="wikitable" style="border-collapse: collapse; width: 100%; height: 83px; background-color: rgb(248, 202, 198);" | |||
|- style="height: 60px;" | |||
| style="width: 100%; height: 60px;" | | |||
{| class="wikitable" style="border-collapse: collapse; width: 100%;" | |||
|- | |||
| style="width: 25%;" | [[File:Envenom.png|300px|frameless]] '''Envenom''' | |||
| style="width: 25%;" | '''Max Level 10''' | |||
| style="width: 25%;" | '''Active''' | |||
| style="width: 25%;" | '''Physical Melee''' | |||
|} | |||
|- style="height: 23px;" | |||
| style="width: 100%; height: 23px;" | | |||
{| class="wikitable" style="border-collapse: collapse; width: 100%;" | |||
|- | |||
| style="width: 100%;" | - | |||
|} | |||
|} | |||
{| class="wikitable" style="border-collapse: collapse; width: 100%; background-color: rgb(194, 224, 244); height: 83px;" | |||
|- style="height: 60px;" | |||
| style="width: 100%; height: 60px;" | | |||
{| class="wikitable" style="border-collapse: collapse; width: 100%;" | |||
|- | |||
| style="width: 25%;" | [[File:Detoxify.png|300px|frameless]] '''Detoxify''' | |||
| style="width: 25%;" | '''Max Level 1''' | |||
| style="width: 25%;" | '''Active''' | |||
| style="width: 25%;" | '''Supportive Self or Other''' | |||
|} | |||
|- style="height: 23px;" | |||
| style="width: 100%; height: 23px;" | | |||
{| class="wikitable" style="border-collapse: collapse; width: 100%;" | |||
|- | |||
| style="width: 100%;" | - | |||
|} | |||
|} | |||
{| class="wikitable" style="border-collapse: collapse; width: 100%; background-color: rgb(248, 202, 198);" | |||
|- | |||
| style="width: 100%;" | | |||
{| class="wikitable" style="border-collapse: collapse; width: 100%;" | |||
|- | |||
| style="width: 25%;" | [[File:Sprinklesand.png|300px|frameless]] '''Sprinkle Sand''' | |||
| style="width: 25%;" | '''Quest Skill (Learned from NPC)''' | |||
| style="width: 25%;" | '''Active''' | |||
| style="width: 25%;" | '''Physical Melee''' | |||
|} | |||
|- | |||
| style="width: 100%;" | | |||
{| class="wikitable" style="border-collapse: collapse; width: 100%;" | |||
|- | |||
| style="width: 100%;" | - | |||
|} | |||
|} | |||
{| class="wikitable" style="border-collapse: collapse; width: 100%; background-color: rgb(194, 224, 244);" | |||
|- | |||
| style="width: 100%;" | | |||
{| class="wikitable" style="border-collapse: collapse; width: 100%;" | |||
|- | |||
| style="width: 25%;" | [[File:Backslide2.png|300px|frameless]] '''Back Slide''' | |||
| style="width: 25%;" | '''Quest Skill (Learned from NPC)''' | |||
| style="width: 25%;" | '''Active''' | |||
| style="width: 25%;" | '''Supportive Self''' | |||
|} | |||
|- | |||
| style="width: 100%;" | | |||
{| class="wikitable" style="border-collapse: collapse; width: 100%;" | |||
|- | |||
| style="width: 100%;" | - | |||
|} | |||
|} | |||
{| class="wikitable" style="border-collapse: collapse; width: 100%; background-color: rgb(248, 202, 198);" | |||
|- | |||
| style="width: 100%;" | | |||
{| class="wikitable" style="border-collapse: collapse; width: 100%;" | |||
|- | |||
| style="width: 25%;" | [[File:Throwstone.png|300px|frameless]] '''Throw Stone''' | |||
| style="width: 25%;" | '''Quest Skill (Learned from NPC)''' | |||
| style="width: 25%;" | '''Active''' | |||
| style="width: 25%;" | '''Physical Ranged''' | |||
|} | |||
|- | |||
| style="width: 100%;" | | |||
{| class="wikitable" style="border-collapse: collapse; width: 100%;" | |||
|- | |||
| style="width: 100%;" | - | |||
|} | |||
|} | |||
{| class="wikitable" style="border-collapse: collapse; width: 100%; height: 84px; background-color: rgb(194, 224, 244);" | |||
|- style="height: 61px;" | |||
| style="width: 100%; height: 61px;" | | |||
{| class="wikitable" style="border-collapse: collapse; width: 100%;" | |||
|- | |||
| style="width: 25%;" | [[File:Pickstone.png|300px|frameless]] '''Pick Stone''' | |||
| style="width: 25%;" | '''Quest Skill (Learned from NPC)''' | |||
| style="width: 25%;" | '''Active''' | |||
| style="width: 25%;" | '''Supportive Self''' | |||
|} | |||
|- style="height: 23px;" | |||
| style="width: 100%; height: 23px;" | | |||
{| class="wikitable" style="border-collapse: collapse; width: 100%;" | |||
|- | |||
| style="width: 100%;" | - | |||
|} | |||
|} | |||
== 2nd Job Skills == | |||
{| class="wikitable" style="border-collapse: collapse; width: 100%; background-color: rgb(251, 238, 184);" | |||
|- | |||
| style="width: 100%;" | | |||
{| class="wikitable" style="border-collapse: collapse; width: 100%; height: 24px;" | |||
|- style="height: 24px;" | |||
| style="width: 25%; height: 24px;" | [[File:Vultureeye1.png|300px|frameless]] '''(MT) Vulture's Eye''' | |||
| style="width: 25%; height: 24px;" | '''Max Level 10''' | |||
| style="width: 50%; height: 24px;" | '''Passive''' | |||
|} | |||
|- | |||
| style="width: 100%;" | | |||
{| class="wikitable" style="border-collapse: collapse; width: 100%;" | |||
|- | |||
| style="width: 100%;" | - | |||
|} | |||
|} | |||
{| class="wikitable" style="border-collapse: collapse; width: 100%; height: 83px; background-color: rgb(248, 202, 198);" | |||
|- style="height: 60px;" | |||
| style="width: 100%; height: 60px;" | | |||
{| class="wikitable" style="border-collapse: collapse; width: 100%; height: 24px;" | |||
|- style="height: 24px;" | |||
| style="width: 25%; height: 24px;" | [[File:Doublestrafe2.png|300px|frameless]] '''Double Strafe''' | |||
| style="width: 25%; height: 24px;" | '''Max Level 10''' | |||
| style="width: 25%; height: 24px;" | '''Active''' | |||
| style="width: 25%; height: 24px;" | '''Physical Ranged''' | |||
|} | |||
|- style="height: 23px;" | |||
| style="width: 100%; height: 23px;" | | |||
{| class="wikitable" style="border-collapse: collapse; width: 100%;" | |||
|- | |||
| style="width: 100%;" | - | |||
|} | |||
|} | |||
{| class="wikitable" style="border-collapse: collapse; width: 100%; height: 83px; background-color: rgb(194, 224, 244);" | |||
|- style="height: 60px;" | |||
| style="width: 100%; height: 60px;" | | |||
{| class="wikitable" style="border-collapse: collapse; width: 100%;" | |||
|- | |||
| style="width: 25%;" | [[File:Removetrap2.png|300px|frameless]] '''Remove Trap''' | |||
| style="width: 25%;" | '''Max Level 1''' | |||
| style="width: 25%;" | '''Active''' | |||
| style="width: 25%;" | '''Supportive''' | |||
|} | |||
|- style="height: 23px;" | |||
| style="width: 100%; height: 23px;" | | |||
{| class="wikitable" style="border-collapse: collapse; width: 100%;" | |||
|- | |||
| style="width: 100%;" | - | |||
|} | |||
|} | |||
{| class="wikitable" style="border-collapse: collapse; width: 100%; background-color: rgb(251, 238, 184);" | |||
|- | |||
| style="width: 100%;" | | |||
{| class="wikitable" style="border-collapse: collapse; width: 100%;" | |||
|- | |||
| style="width: 25%;" | [[File:Tunneldrive.png|300px|frameless]] '''Tunnel Drive''' | |||
| style="width: 25%;" | '''Max Level 5''' | |||
| style="width: 50%;" | '''Passive''' | |||
|} | |||
|- | |||
| style="width: 100%;" | | |||
{| class="wikitable" style="border-collapse: collapse; width: 100%;" | |||
|- | |||
| style="width: 100%;" | - | |||
|} | |||
|} | |||
{| class="wikitable" style="border-collapse: collapse; width: 100%; background-color: rgb(251, 238, 184);" | |||
|- | |||
| style="width: 100%;" | | |||
{| class="wikitable" style="border-collapse: collapse; width: 100%;" | |||
|- | |||
| style="width: 25%;" | [[File:Snatcher.png|300px|frameless]] '''Snatcher''' | |||
| style="width: 25%;" | '''Max Level 10''' | |||
| style="width: 50%;" | '''Passive''' | |||
|} | |||
|- | |||
| style="width: 100%;" | | |||
{| class="wikitable" style="border-collapse: collapse; width: 100%;" | |||
|- | |||
| style="width: 100%;" | - | |||
|} | |||
|} | |||
{| class="wikitable" style="border-collapse: collapse; width: 100%; height: 46px; background-color: rgb(194, 224, 244);" | |||
|- style="height: 23px;" | |||
| style="width: 100%; height: 23px;" | | |||
{| class="wikitable" style="border-collapse: collapse; width: 100%;" | |||
|- | |||
| style="width: 25%;" | [[File:Stealcoin.png|300px|frameless]] '''Steal Coin''' | |||
| style="width: 25%;" | '''Max Level 10''' | |||
| style="width: 25%;" | '''Active''' | |||
| style="width: 25%;" | '''Supportive''' | |||
|} | |||
|- style="height: 23px;" | |||
| style="width: 100%; height: 23px;" | | |||
{| class="wikitable" style="border-collapse: collapse; width: 100%;" | |||
|- | |||
| style="width: 100%;" | - | |||
|} | |||
|} | |||
{| class="wikitable" style="border-collapse: collapse; width: 100%; background-color: rgb(248, 202, 198);" | |||
|- | |||
| style="width: 100%;" | | |||
{| class="wikitable" style="border-collapse: collapse; width: 100%;" | |||
|- | |||
| style="width: 25%;" | [[File:Backstab.png|300px|frameless]] '''Back Stab''' | |||
| style="width: 25%;" | '''Max Level 10''' | |||
| style="width: 25%;" | '''Active''' | |||
| style="width: 25%;" | '''Physical Melee''' | |||
|} | |||
|- | |||
| style="width: 100%;" | | |||
{| class="wikitable" style="border-collapse: collapse; width: 100%;" | |||
|- | |||
| style="width: 100%;" | - | |||
|} | |||
|} | |||
{| class="wikitable" style="border-collapse: collapse; width: 100%; background-color: rgb(248, 202, 198);" | |||
|- | |||
| style="width: 100%;" | | |||
{| class="wikitable" style="border-collapse: collapse; width: 100%;" | |||
|- | |||
| style="width: 25%;" | [[File:Raid.png|300px|frameless]] '''Raid''' | |||
| style="width: 25%;" | '''Max Level 5''' | |||
| style="width: 25%;" | '''Active''' | |||
| style="width: 25%;" | '''Physical Melee''' | |||
|} | |||
|- | |||
| style="width: 100%;" | | |||
{| class="wikitable" style="border-collapse: collapse; width: 100%;" | |||
|- | |||
| style="width: 100%;" | - | |||
|} | |||
|} | |||
{| class="wikitable" style="border-collapse: collapse; width: 100%; background-color: rgb(248, 202, 198);" | |||
|- | |||
| style="width: 100%;" | | |||
{| class="wikitable" style="border-collapse: collapse; width: 100%;" | |||
|- | |||
| style="width: 25%;" | [[File:Intimidate.png|300px|frameless]] '''Intimidate''' | |||
| style="width: 25%;" | '''Max Level 5''' | |||
| style="width: 25%;" | '''Active''' | |||
| style="width: 25%;" | '''Physical Melee''' | |||
|} | |||
|- | |||
| style="width: 100%;" | | |||
{| class="wikitable" style="border-collapse: collapse; width: 100%;" | |||
|- | |||
| style="width: 100%;" | - | |||
|} | |||
|} | |||
{| class="wikitable" style="border-collapse: collapse; width: 100%; background-color: rgb(251, 238, 184);" | |||
|- | |||
| style="width: 100%;" | | |||
{| class="wikitable" style="border-collapse: collapse; width: 100%;" | |||
|- | |||
| style="width: 25%;" | [[File:Plagiarism.png|300px|frameless]] '''Plagiarism''' | |||
| style="width: 25%;" | '''Max Level 10''' | |||
| style="width: 50%;" | '''Passive''' | |||
|} | |||
|- | |||
| style="width: 100%;" | | |||
{| class="wikitable" style="border-collapse: collapse; width: 100%;" | |||
|- | |||
| style="width: 100%;" | - | |||
|} | |||
|} | |||
{| class="wikitable" style="border-collapse: collapse; width: 100%; background-color: rgb(236, 202, 250);" | |||
|- | |||
| style="width: 100%;" | | |||
{| class="wikitable" style="border-collapse: collapse; width: 100%;" | |||
|- | |||
| style="width: 25%;" | [[File:Striphelm.png|300px|frameless]] '''Strip Helm''' | |||
| style="width: 25%;" | '''Max Level 5''' | |||
| style="width: 25%;" | '''Active''' | |||
| style="width: 25%;" | '''Debuff''' | |||
|} | |||
|- | |||
| style="width: 100%;" | | |||
{| class="wikitable" style="border-collapse: collapse; width: 100%;" | |||
|- | |||
| style="width: 100%;" | - | |||
|} | |||
|} | |||
{| class="wikitable" style="border-collapse: collapse; width: 100%; height: 46px; background-color: rgb(236, 202, 250);" | |||
|- style="height: 23px;" | |||
| style="width: 100%; height: 23px;" | | |||
{| class="wikitable" style="border-collapse: collapse; width: 100%;" | |||
|- | |||
| style="width: 25%;" | [[File:Strishield.png|300px|frameless]] '''Strip Shield''' | |||
| style="width: 25%;" | '''Max Level 5''' | |||
| style="width: 25%;" | '''Active''' | |||
| style="width: 25%;" | '''Debuff''' | |||
|} | |||
|- style="height: 23px;" | |||
| style="width: 100%; height: 23px;" | | |||
{| class="wikitable" style="border-collapse: collapse; width: 100%;" | |||
|- | |||
| style="width: 100%;" | - | |||
|} | |||
|} | |||
{| class="wikitable" style="border-collapse: collapse; width: 100%; background-color: rgb(236, 202, 250);" | |||
|- | |||
| style="width: 100%;" | | |||
{| class="wikitable" style="border-collapse: collapse; width: 100%;" | |||
|- | |||
| style="width: 25%;" | [[File:Striparmo.png|300px|frameless]] '''Strip Armor''' | |||
| style="width: 25%;" | '''Max Level 5''' | |||
| style="width: 25%;" | '''Active''' | |||
| style="width: 25%;" | '''Debuff''' | |||
|} | |||
|- | |||
| style="width: 100%;" | | |||
{| class="wikitable" style="border-collapse: collapse; width: 100%;" | |||
|- | |||
| style="width: 100%;" | - | |||
|} | |||
|} | |||
{| class="wikitable" style="border-collapse: collapse; width: 100%; background-color: rgb(236, 202, 250);" | |||
|- | |||
| style="width: 100%;" | | |||
{| class="wikitable" style="border-collapse: collapse; width: 100%;" | |||
|- | |||
| style="width: 25%;" | [[File:Stripweapon.png|300px|frameless]] '''Strip Weapon''' | |||
| style="width: 25%;" | '''Max Level 5''' | |||
| style="width: 25%;" | '''Active''' | |||
| style="width: 25%;" | '''Debuff''' | |||
|} | |||
|- | |||
| style="width: 100%;" | | |||
{| class="wikitable" style="border-collapse: collapse; width: 100%;" | |||
|- | |||
| style="width: 100%;" | - | |||
|} | |||
|} | |||
{| class="wikitable" style="border-collapse: collapse; width: 100%; background-color: rgb(251, 238, 184);" | |||
|- | |||
| style="width: 100%;" | | |||
{| class="wikitable" style="border-collapse: collapse; width: 100%;" | |||
|- | |||
| style="width: 25%;" | [[File:Swordmastery1.png|300px|frameless]] '''Sword Mastery''' | |||
| style="width: 25%;" | '''Max Level 10''' | |||
| style="width: 50%;" | '''Passive''' | |||
|} | |||
|- | |||
| style="width: 100%;" | | |||
{| class="wikitable" style="border-collapse: collapse; width: 100%;" | |||
|- | |||
| style="width: 100%;" | - | |||
|} | |||
|} | |||
{| class="wikitable" style="border-collapse: collapse; width: 100%; background-color: rgb(251, 238, 184); height: 83px;" | |||
|- style="height: 60px;" | |||
| style="width: 100%; height: 60px;" | | |||
{| class="wikitable" style="border-collapse: collapse; width: 100%;" | |||
|- | |||
| style="width: 25%;" | [[File:Gangster.png|300px|frameless]] '''Gangster Paradise''' | |||
| style="width: 25%;" | '''Max Level 1''' | |||
| style="width: 50%;" | '''Passive''' | |||
|} | |||
|- style="height: 23px;" | |||
| style="width: 100%; height: 23px;" | | |||
{| class="wikitable" style="border-collapse: collapse; width: 100%;" | |||
|- | |||
| style="width: 100%;" | - | |||
|} | |||
|} | |||
{| class="wikitable" style="border-collapse: collapse; width: 100%; background-color: rgb(194, 224, 244);" | |||
|- | |||
| style="width: 100%;" | | |||
{| class="wikitable" style="border-collapse: collapse; width: 100%; height: 24px;" | |||
|- style="height: 24px;" | |||
| style="width: 25%; height: 24px;" | [[File:Cleaner.png|300px|frameless]] '''Cleaner''' | |||
| style="width: 25%; height: 24px;" | '''Max Level 1''' | |||
| style="width: 25%; height: 24px;" | '''Active''' | |||
| style="width: 25%; height: 24px;" | '''Supportive''' | |||
|} | |||
|- | |||
| style="width: 100%;" | | |||
{| class="wikitable" style="border-collapse: collapse; width: 100%;" | |||
|- | |||
| style="width: 100%;" | - | |||
|} | |||
|} | |||
{| class="wikitable" style="border-collapse: collapse; width: 100%; background-color: rgb(194, 224, 244);" | |||
|- | |||
| style="width: 100%;" | | |||
{| class="wikitable" style="border-collapse: collapse; width: 100%; height: 24px;" | |||
|- style="height: 24px;" | |||
| style="width: 25%; height: 24px;" | [[File:Flaggraffiti.png|300px|frameless]] '''Flag Graffiti''' | |||
| style="width: 25%; height: 24px;" | '''Max Level 5''' | |||
| style="width: 25%; height: 24px;" | '''Active''' | |||
| style="width: 25%; height: 24px;" | '''Supportive''' | |||
|} | |||
|- | |||
| style="width: 100%;" | | |||
{| class="wikitable" style="border-collapse: collapse; width: 100%;" | |||
|- | |||
| style="width: 100%;" | - | |||
|} | |||
|} | |||
{| class="wikitable" style="border-collapse: collapse; width: 100%; background-color: rgb(194, 224, 244);" | |||
|- | |||
| style="width: 100%;" | | |||
{| class="wikitable" style="border-collapse: collapse; width: 100%;" | |||
|- | |||
| style="width: 25%;" | [[File:Grafitti.png|300px|frameless]] '''Graffiti''' | |||
| style="width: 25%;" | '''Max Level 1''' | |||
| style="width: 25%;" | '''Active''' | |||
| style="width: 25%;" | '''Supportive''' | |||
|} | |||
|- | |||
| style="width: 100%;" | | |||
{| class="wikitable" style="border-collapse: collapse; width: 100%;" | |||
|- | |||
| style="width: 100%;" | - | |||
|} | |||
|} | |||
{| class="wikitable" style="border-collapse: collapse; width: 100%; background-color: rgb(251, 238, 184);" | |||
|- | |||
| style="width: 100%;" | | |||
{| class="wikitable" style="border-collapse: collapse; width: 100%;" | |||
|- | |||
| style="width: 25%;" | [[File:Compulsion.png|300px|frameless]] '''Compulsion Discount''' | |||
| style="width: 25%;" | '''Max Level 5''' | |||
| style="width: 50%;" | '''Passive''' | |||
|} | |||
|- | |||
| style="width: 100%;" | | |||
{| class="wikitable" style="border-collapse: collapse; width: 100%;" | |||
|- | |||
| style="width: 100%;" | - | |||
|} | |||
|} | |||
{| class="wikitable" style="border-collapse: collapse; width: 100%; background-color: rgb(236, 202, 250); height: 119px;" | |||
|- style="height: 60px;" | |||
| style="width: 100%; height: 60px;" | | |||
{| class="wikitable" style="border-collapse: collapse; width: 100%; height: 24px;" | |||
|- style="height: 24px;" | |||
| style="width: 25%; height: 24px;" | [[File:Closecofine.png|300px|frameless]] '''Close Confine''' | |||
| style="width: 25%; height: 24px;" | '''Quest Skill (Learned from NPC)''' | |||
| style="width: 25%; height: 24px;" | '''Active''' | |||
| style="width: 25%; height: 24px;" | '''Debuff''' | |||
|} | |||
|- style="height: 59px;" | |||
| style="width: 100%; height: 59px;" | | |||
{| class="wikitable" style="border-collapse: collapse; width: 100%;" | |||
|- | |||
| style="width: 100%;" | - | |||
|} | |||
|} | |||
== 2nd Job Transcendent Skills == | |||
{| class="wikitable" style="border-collapse: collapse; width: 100%; background-color: rgb(194, 224, 244);" | |||
|- | |||
| style="width: 100%;" | | |||
{| class="wikitable" style="border-collapse: collapse; width: 100%;" | |||
|- | |||
| style="width: 25%;" | [[File:Chasewalk.png|300px|frameless]] '''Chase Walk''' | |||
| style="width: 25%;" | '''Max Level 5''' | |||
| style="width: 25%;" | '''Active''' | |||
| style="width: 25%;" | '''Supportive''' | |||
|} | |||
|- | |||
| style="width: 100%;" | | |||
{| class="wikitable" style="border-collapse: collapse; width: 100%;" | |||
|- | |||
| style="width: 100%;" | - | |||
|} | |||
|} | |||
{| class="wikitable" style="border-collapse: collapse; width: 100%; background-color: rgb(236, 202, 250);" | |||
|- | |||
| style="width: 100%;" | | |||
{| class="wikitable" style="border-collapse: collapse; width: 100%;" | |||
|- | |||
| style="width: 25%;" | [[File:Fullstrip.png|300px|frameless]] '''Full Strip''' | |||
| style="width: 25%;" | '''Max Level 5''' | |||
| style="width: 25%;" | '''Active''' | |||
| style="width: 25%;" | '''Debuff''' | |||
|} | |||
|- | |||
| style="width: 100%;" | | |||
{| class="wikitable" style="border-collapse: collapse; width: 100%;" | |||
|- | |||
| style="width: 100%;" | - | |||
|} | |||
|} | |||
{| class="wikitable" style="border-collapse: collapse; width: 100%; background-color: rgb(194, 224, 244);" | |||
|- | |||
| style="width: 100%;" | | |||
{| class="wikitable" style="border-collapse: collapse; width: 100%;" | |||
|- | |||
| style="width: 25%;" | [[File:Rejectsword.png|300px|frameless]] '''Reject Sword''' | |||
| style="width: 25%;" | '''Max Level 5''' | |||
| style="width: 25%;" | '''Active''' | |||
| style="width: 25%;" | '''Supportive''' | |||
|} | |||
|- | |||
| style="width: 100%;" | | |||
{| class="wikitable" style="border-collapse: collapse; width: 100%;" | |||
|- | |||
| style="width: 100%;" | - | |||
|} | |||
|} | |||
{| class="wikitable" style="border-collapse: collapse; width: 100%; background-color: rgb(194, 224, 244);" | |||
|- | |||
| style="width: 100%;" | | |||
{| class="wikitable" style="border-collapse: collapse; width: 100%;" | |||
|- | |||
| style="width: 25%;" | [[File:Preserve.png|300px|frameless]] '''(MT) Preserve''' | |||
| style="width: 25%;" | '''Max Level 1''' | |||
| style="width: 25%;" | '''Active''' | |||
| style="width: 25%;" | '''Supportive''' | |||
|} | |||
|- | |||
| style="width: 100%;" | | |||
{| class="wikitable" style="border-collapse: collapse; width: 100%;" | |||
|- | |||
| style="width: 100%;" | - | |||
|} | |||
|} | |||
== 3rd Job Skills == | |||
{| class="wikitable" style="border-collapse: collapse; width: 100%; background-color: rgb(194, 224, 244);" | |||
|- | |||
| style="width: 100%;" | | |||
{| class="wikitable" style="border-collapse: collapse; width: 100%;" | |||
|- | |||
| style="width: 25%;" | [[File:Reproduce.png|300px|frameless]] '''Reproduce''' | |||
| style="width: 25%;" | '''Max Level 10''' | |||
| style="width: 25%;" | '''Active (Toggle on/off)''' | |||
| style="width: 25%;" | '''Supportive''' | |||
|} | |||
|- | |||
| style="width: 100%;" | | |||
{| class="wikitable" style="border-collapse: collapse; width: 100%;" | |||
|- | |||
| style="width: 100%;" | - | |||
|} | |||
|} | |||
{| class="wikitable" style="border-collapse: collapse; width: 100%; background-color: rgb(194, 224, 244);" | |||
|- | |||
| style="width: 100%;" | | |||
{| class="wikitable" style="border-collapse: collapse; width: 100%;" | |||
|- | |||
| style="width: 25%;" | [[File:Shadowspell.png|300px|frameless]] '''Auto Shadow Spell''' | |||
| style="width: 25%;" | '''Max Level 10''' | |||
| style="width: 25%;" | '''Active''' | |||
| style="width: 25%;" | '''Supportive''' | |||
|} | |||
|- | |||
| style="width: 100%;" | | |||
{| class="wikitable" style="border-collapse: collapse; width: 100%;" | |||
|- | |||
| style="width: 100%;" | - | |||
|} | |||
|} | |||
{| class="wikitable" style="border-collapse: collapse; width: 100%; height: 83px; background-color: rgb(236, 202, 250);" | |||
|- style="height: 60px;" | |||
| style="width: 100%; height: 60px;" | | |||
{| class="wikitable" style="border-collapse: collapse; width: 100%; height: 19px;" | |||
|- style="height: 19px;" | |||
| style="width: 25%; height: 19px;" | [[File:Shadowformation.png|300px|frameless]] '''Shadow Form''' | |||
| style="width: 25%; height: 19px;" | '''Max Level 5''' | |||
| style="width: 25%; height: 19px;" | '''Active''' | |||
| style="width: 25%; height: 19px;" | '''Debuff''' | |||
|} | |||
|- style="height: 23px;" | |||
| style="width: 100%; height: 23px;" | | |||
{| class="wikitable" style="border-collapse: collapse; width: 100%;" | |||
|- | |||
| style="width: 100%;" | - | |||
|} | |||
|} | |||
{| class="wikitable" style="border-collapse: collapse; width: 100%; background-color: rgb(194, 224, 244);" | |||
|- | |||
| style="width: 100%;" | | |||
{| class="wikitable" style="border-collapse: collapse; width: 100%;" | |||
|- | |||
| style="width: 25%;" | [[File:Deadlyinfection.png|300px|frameless]] '''Deadly Infection''' | |||
| style="width: 25%;" | '''Max Level 5''' | |||
| style="width: 25%;" | '''Active''' | |||
| style="width: 25%;" | '''Supportive''' | |||
|} | |||
|- | |||
| style="width: 100%;" | | |||
{| class="wikitable" style="border-collapse: collapse; width: 100%;" | |||
|- | |||
| style="width: 100%;" | - | |||
|} | |||
|} | |||
{| class="wikitable" style="border-collapse: collapse; width: 100%; background-color: rgb(194, 224, 244);" | |||
|- | |||
| style="width: 100%;" | | |||
{| class="wikitable" style="border-collapse: collapse; width: 100%;" | |||
|- | |||
| style="width: 25%;" | [[File:Invisibility.png|300px|frameless]] '''(MT) Invisibility''' | |||
| style="width: 25%;" | '''Max Level 5''' | |||
| style="width: 25%;" | '''Active''' | |||
| style="width: 25%;" | '''Supportive''' | |||
|} | |||
|- | |||
| style="width: 100%;" | | |||
{| class="wikitable" style="border-collapse: collapse; width: 100%;" | |||
|- | |||
| style="width: 100%;" | - | |||
|} | |||
|} | |||
{| class="wikitable" style="border-collapse: collapse; width: 100%; background-color: rgb(248, 202, 198);" | |||
|- | |||
| style="width: 100%;" | | |||
{| class="wikitable" style="border-collapse: collapse; width: 100%;" | |||
|- | |||
| style="width: 25%;" | [[File:Fatalmenace.png|300px|frameless]] '''Fatal Menace''' | |||
| style="width: 25%;" | '''Max Level 10''' | |||
| style="width: 25%;" | '''Active''' | |||
| style="width: 25%;" | '''Physical Melee''' | |||
|} | |||
|- | |||
| style="width: 100%;" | | |||
{| class="wikitable" style="border-collapse: collapse; width: 100%;" | |||
|- | |||
| style="width: 100%;" | - | |||
|} | |||
|} | |||
{| class="wikitable" style="border-collapse: collapse; width: 100%; background-color: rgb(236, 202, 250);" | |||
|- | |||
| style="width: 100%;" | | |||
{| class="wikitable" style="border-collapse: collapse; width: 100%;" | |||
|- | |||
| style="width: 25%;" | [[File:Bodypainting.png|300px|frameless]] '''Body Paint''' | |||
| style="width: 25%;" | '''Max Level 5''' | |||
| style="width: 25%;" | '''Active''' | |||
| style="width: 25%;" | '''Debuff''' | |||
|} | |||
|- | |||
| style="width: 100%;" | | |||
{| class="wikitable" style="border-collapse: collapse; width: 100%;" | |||
|- | |||
| style="width: 100%;" | - | |||
|} | |||
|} | |||
{| class="wikitable" style="border-collapse: collapse; width: 100%; background-color: rgb(236, 202, 250);" | |||
|- | |||
| style="width: 100%;" | | |||
{| class="wikitable" style="border-collapse: collapse; width: 100%;" | |||
|- | |||
| style="width: 25%;" | [[File:MasqEnervation.png|300px|frameless]] '''Masquerade Enervation''' | |||
| style="width: 25%;" | '''Max Level 3''' | |||
| style="width: 25%;" | '''Active''' | |||
| style="width: 25%;" | '''Debuff''' | |||
|} | |||
|- | |||
| style="width: 100%;" | | |||
{| class="wikitable" style="border-collapse: collapse; width: 100%;" | |||
|- | |||
| style="width: 100%;" | - | |||
|} | |||
|} | |||
{| class="wikitable" style="border-collapse: collapse; width: 100%; background-color: rgb(236, 202, 250);" | |||
|- | |||
| style="width: 100%;" | | |||
{| class="wikitable" style="border-collapse: collapse; width: 100%;" | |||
|- | |||
| style="width: 25%;" | [[File:MasqGloomy.png|300px|frameless]] '''Masquerade Glommy''' | |||
| style="width: 25%;" | '''Max Level 3''' | |||
| style="width: 25%;" | '''Active''' | |||
| style="width: 25%;" | '''Debuff''' | |||
|} | |||
|- | |||
| style="width: 100%;" | | |||
{| class="wikitable" style="border-collapse: collapse; width: 100%;" | |||
|- | |||
| style="width: 100%;" | - | |||
|} | |||
|} | |||
{| class="wikitable" style="border-collapse: collapse; width: 100%; background-color: rgb(236, 202, 250);" | |||
|- | |||
| style="width: 100%;" | | |||
{| class="wikitable" style="border-collapse: collapse; width: 100%;" | |||
|- | |||
| style="width: 25%;" | [[File:MasqIgnorance.png|300px|frameless]] '''Masquerade Ignorance''' | |||
| style="width: 25%;" | '''Max Level 3''' | |||
| style="width: 25%;" | '''Active''' | |||
| style="width: 25%;" | '''Debuff''' | |||
|} | |||
|- | |||
| style="width: 100%;" | | |||
{| class="wikitable" style="border-collapse: collapse; width: 100%;" | |||
|- | |||
| style="width: 100%;" | - | |||
|} | |||
|} | |||
{| class="wikitable" style="border-collapse: collapse; width: 100%; background-color: rgb(236, 202, 250);" | |||
|- | |||
| style="width: 100%;" | | |||
{| class="wikitable" style="border-collapse: collapse; width: 100%;" | |||
|- | |||
| style="width: 25%;" | [[File:MasqLaziness.png|300px|frameless]] '''Masquerade Laziness''' | |||
| style="width: 25%;" | '''Max Level 3''' | |||
| style="width: 25%;" | '''Active''' | |||
| style="width: 25%;" | '''Debuff''' | |||
|} | |||
|- | |||
| style="width: 100%;" | | |||
{| class="wikitable" style="border-collapse: collapse; width: 100%;" | |||
|- | |||
| style="width: 100%;" | - | |||
|} | |||
|} | |||
{| class="wikitable" style="border-collapse: collapse; width: 100%; background-color: rgb(236, 202, 250);" | |||
|- | |||
| style="width: 100%;" | | |||
{| class="wikitable" style="border-collapse: collapse; width: 100%;" | |||
|- | |||
| style="width: 25%;" | [[File:MasqWeakness.png|300px|frameless]] '''Masquerade Weakness''' | |||
| style="width: 25%;" | '''Max Level 3''' | |||
| style="width: 25%;" | '''Active''' | |||
| style="width: 25%;" | '''Debuff''' | |||
|} | |||
|- | |||
| style="width: 100%;" | | |||
{| class="wikitable" style="border-collapse: collapse; width: 100%;" | |||
|- | |||
| style="width: 100%;" | - | |||
|} | |||
|} | |||
{| class="wikitable" style="border-collapse: collapse; width: 100%; background-color: rgb(236, 202, 250);" | |||
|- | |||
| style="width: 100%;" | | |||
{| class="wikitable" style="border-collapse: collapse; width: 100%;" | |||
|- | |||
| style="width: 25%;" | [[File:MasqUnlucky.png|300px|frameless]] '''Masquerade Unlucky''' | |||
| style="width: 25%;" | '''Max Level 3''' | |||
| style="width: 25%;" | '''Active''' | |||
| style="width: 25%;" | '''Debuff''' | |||
|} | |||
|- | |||
| style="width: 100%;" | | |||
{| class="wikitable" style="border-collapse: collapse; width: 100%;" | |||
|- | |||
| style="width: 100%;" | - | |||
|} | |||
|} | |||
{| class="wikitable" style="border-collapse: collapse; width: 100%; background-color: rgb(236, 202, 250);" | |||
|- | |||
| style="width: 100%;" | | |||
{| class="wikitable" style="border-collapse: collapse; width: 100%;" | |||
|- | |||
| style="width: 25%;" | [[File:Maelstorm.png|300px|frameless]] '''Maelstorm''' | |||
| style="width: 25%;" | '''Max Level 3''' | |||
| style="width: 25%;" | '''Active''' | |||
| style="width: 25%;" | '''Debuff''' | |||
|} | |||
|- | |||
| style="width: 100%;" | | |||
{| class="wikitable" style="border-collapse: collapse; width: 100%;" | |||
|- | |||
| style="width: 100%;" | - | |||
|} | |||
|} | |||
{| class="wikitable" style="border-collapse: collapse; width: 100%; background-color: rgb(248, 202, 198);" | |||
|- | |||
| style="width: 100%;" | | |||
{| class="wikitable" style="border-collapse: collapse; width: 100%;" | |||
|- | |||
| style="width: 25%;" | [[File:Triagleshot.png|300px|frameless]] '''Triangle Shot''' | |||
| style="width: 25%;" | '''Max Level 10''' | |||
| style="width: 25%;" | '''Active''' | |||
| style="width: 25%;" | '''Physical Ranged''' | |||
|} | |||
|- | |||
| style="width: 100%;" | | |||
{| class="wikitable" style="border-collapse: collapse; width: 100%;" | |||
|- | |||
| style="width: 100%;" | - | |||
|} | |||
|} | |||
{| class="wikitable" style="border-collapse: collapse; width: 100%; background-color: rgb(194, 224, 244);" | |||
|- | |||
| style="width: 100%;" | | |||
{| class="wikitable" style="border-collapse: collapse; width: 100%;" | |||
|- | |||
| style="width: 25%;" | [[File:Urgentescape.png|300px|frameless]] '''Escape''' | |||
| style="width: 25%;" | '''Max Level 5''' | |||
| style="width: 25%;" | '''Active''' | |||
| style="width: 25%;" | '''Supportive''' | |||
|} | |||
|- | |||
| style="width: 100%;" | | |||
{| class="wikitable" style="border-collapse: collapse; width: 100%;" | |||
|- | |||
| style="width: 100%;" | - | |||
|} | |||
|} | |||
{| class="wikitable" style="border-collapse: collapse; width: 100%; background-color: rgb(236, 202, 250);" | |||
|- | |||
| style="width: 100%;" | | |||
{| class="wikitable" style="border-collapse: collapse; width: 100%;" | |||
|- | |||
| style="width: 25%;" | [[File:Manhole.png|300px|frameless]] '''Manhole''' | |||
| style="width: 25%;" | '''Max Level 3''' | |||
| style="width: 25%;" | '''Active''' | |||
| style="width: 25%;" | '''Debuff''' | |||
|} | |||
|- | |||
| style="width: 100%;" | | |||
{| class="wikitable" style="border-collapse: collapse; width: 100%;" | |||
|- | |||
| style="width: 100%;" | - | |||
|} | |||
|} | |||
{| class="wikitable" style="border-collapse: collapse; width: 100%; background-color: rgb(236, 202, 250);" | |||
|- | |||
| style="width: 100%;" | | |||
{| class="wikitable" style="border-collapse: collapse; width: 100%;" | |||
|- | |||
| style="width: 25%;" | [[File:Chaospanic.png|300px|frameless]] '''Chaos Panic''' | |||
| style="width: 25%;" | '''Max Level 3''' | |||
| style="width: 25%;" | '''Active''' | |||
| style="width: 25%;" | '''Debuff''' | |||
|} | |||
|- | |||
| style="width: 100%;" | | |||
{| class="wikitable" style="border-collapse: collapse; width: 100%;" | |||
|- | |||
| style="width: 100%;" | - | |||
|} | |||
|} | |||
{| class="wikitable" style="border-collapse: collapse; width: 100%; background-color: rgb(236, 202, 250);" | |||
|- | |||
| style="width: 100%;" | | |||
{| class="wikitable" style="border-collapse: collapse; width: 100%;" | |||
|- | |||
| style="width: 25%;" | [[File:Dimensionaldoor.png|300px|frameless]] '''Dimensional Door''' | |||
| style="width: 25%;" | '''Max Level 3''' | |||
| style="width: 25%;" | '''Active''' | |||
| style="width: 25%;" | '''Debuff''' | |||
|} | |||
|- | |||
| style="width: 100%;" | | |||
{| class="wikitable" style="border-collapse: collapse; width: 100%;" | |||
|- | |||
| style="width: 100%;" | - | |||
|} | |||
|} | |||
{| class="wikitable" style="border-collapse: collapse; width: 100%; background-color: rgb(194, 224, 244); height: 119px;" | |||
|- style="height: 60px;" | |||
| style="width: 100%; height: 60px;" | | |||
{| class="wikitable" style="border-collapse: collapse; width: 100%;" | |||
|- | |||
| style="width: 25%;" | [[File:Feintbomb'.png|300px|frameless]] '''Feint Bomb''' | |||
| style="width: 25%;" | '''Max Level 10''' | |||
| style="width: 25%;" | '''Active''' | |||
| style="width: 25%;" | '''Supportive''' | |||
|} | |||
|- style="height: 59px;" | |||
| style="width: 100%; height: 59px;" | | |||
{| class="wikitable" style="border-collapse: collapse; width: 100%; height: 23px;" | |||
|- style="height: 23px;" | |- style="height: 23px;" | ||
| style="width: | | style="width: 100%; height: 23px;" | - | ||
| style="width: | |} | ||
| style="width: 25%; | |} | ||
| style="width: | {| class="wikitable" style="border-collapse: collapse; width: 100%; background-color: rgb(236, 202, 250);" | ||
|- | |||
| style="width: 100%;" | | |||
{| class="wikitable" style="border-collapse: collapse; width: 100%;" | |||
|- | |||
| style="width: 25%;" | [[File:Bloodylust.png|300px|frameless]] '''Bloody Lust''' | |||
| style="width: 25%;" | '''Max Level 3''' | |||
| style="width: 25%;" | '''Active''' | |||
| style="width: 25%;" | '''Debuff''' | |||
|} | |||
|- | |||
| style="width: 100%;" | | |||
{| class="wikitable" style="border-collapse: collapse; width: 100%;" | |||
|- | |||
| style="width: 100%;" | - | |||
|} | |||
|} | |||
{| class="wikitable" style="border-collapse: collapse; width: 100%; background-color: rgb(236, 202, 250);" | |||
|- | |||
| style="width: 100%;" | | |||
{| class="wikitable" style="border-collapse: collapse; width: 100%;" | |||
|- | |||
| style="width: 25%;" | [[File:Stripaccessory.png|300px|frameless]] '''Strip Accessory''' | |||
| style="width: 25%;" | '''Max Level 5''' | |||
| style="width: 25%;" | '''Active''' | |||
| style="width: 25%;" | '''Debuff''' | |||
|} | |||
|- | |||
| style="width: 100%;" | | |||
{| class="wikitable" style="border-collapse: collapse; width: 100%;" | |||
|- | |||
| style="width: 100%;" | - | |||
|} | |||
|} | |||
{| class="wikitable" style="border-collapse: collapse; width: 100%; background-color: rgb(194, 224, 244);" | |||
|- | |||
| style="width: 100%;" | | |||
{| class="wikitable" style="border-collapse: collapse; width: 100%;" | |||
|- | |||
| style="width: 25%;" | [[File:Fullthrottle.png|300px|frameless]]<font color="#000000"><span style="font-size: 14.4px;"> '''Full Throttle'''</span></font> | |||
| style="width: 25%;" | '''<font color="#000000"><span style="font-size: 14.4px;" >Max Level 5</span></font>''' | |||
| style="width: 25%;" | '''<font color="#000000"><span style="font-size: 14.4px;" >Active</span></font>''' | |||
| style="width: 25%;" | '''<font color="#000000"><span style="font-size: 14.4px;" >Supportive Self</span></font>''' | |||
|} | |||
|- | |||
| style="width: 100%;" | | |||
{| class="wikitable" style="border-collapse: collapse; width: 100%; height: 23px;" | |||
|- style="height: 23px;" | |- style="height: 23px;" | ||
| style="width: | | style="width: 25%; height: 23px; text-align: center;" | - | ||
| style="width: 25%; height: 23px;" | | | style="width: 25%; height: 23px;" | | ||
*Target: Caster<br> | |||
*Cost: 1 SP | |||
*Immune to Dispel, Clearance and Banishing Buster | |||
| style="width: 50%; height: 23px;" | | |||
Exceed the limits of the body by sacrificing vitality to strength for a short duration. | |||
Fully restores HP when casted, All Stats +20% and increases Movement Speed. | |||
When skill duration is over, you will receive Rebound debuff, during Rebound your movement speed is lowered and your natural HP/SP regen is disabled. | |||
*Level 5: 1% HP/SP drained per second for 30 seconds. | |||
|} | |||
| style="width: | |||
|} | |} | ||
==== [[File:4th | == 4th Job Skills == | ||
{| class="wikitable" style="border-collapse: collapse; width: 100%; height: | {| class="wikitable" style="border-collapse: collapse; width: 100%; background-color: rgb(251, 238, 184);" | ||
|- | |||
| style="width: 100%;" | | |||
{| class="wikitable" style="border-collapse: collapse; width: 100%;" | |||
|- | |||
| style="width: 25%;" | [[File:4th 5311.png|300px|frameless|Dagger and Bow Mastery]] Dagger & Bow Mastery | |||
| style="width: 25%;" | Max Level 10 | |||
| style="width: 50%;" | Passive | |||
|} | |||
|- | |||
| style="width: 100%;" | | |||
{| class="wikitable" style="border-collapse: collapse; width: 100%;" | |||
|- | |||
| style="width: 100%;" | | |||
Increases physical damage against enemies of their size when equipped with a Dagger or Bow. | |||
*Level 10: Small +10%, Medium +15%, Large +20% | |||
|} | |||
|} | |||
{| class="wikitable" style="border-collapse: collapse; width: 100%; height: 83px; background-color: rgb(248, 202, 198);" | |||
|- style="height: 60px;" | |||
| style="width: 100%; height: 60px;" | | |||
{| class="wikitable" style="border-collapse: collapse; width: 100%;" | |||
|- | |||
| style="width: 25%;" | [[File:4th 5314.png|300px|frameless|Abyss Dagger]] '''(MT) Abyss Dagger''' | |||
| style="width: 25%;" | '''Max Level 5''' | |||
| style="width: 25%;" | '''Active''' | |||
| style="width: 25%;" | '''Physical Melee''' | |||
|} | |||
|- style="height: 23px;" | |- style="height: 23px;" | ||
| style="width: | | style="width: 100%; height: 23px;" | | ||
| style="width: | {| class="wikitable" style="border-collapse: collapse; width: 100%;" | ||
| style="width: 25% | |- | ||
| style="width: 25%; text-align: center;" | [[File:Abyssdagger.gif|400px|alt=Abyss Dagger Skill Animation|frameless|Abyss Dagger]] | |||
| | | style="width: 25%;" | | ||
| style="width: | |||
*Single Other Target | *Single Other Target | ||
*Hit Count: 2x | *Hit Count: 2x | ||
*Element: Weapon | *Element: Weapon | ||
*Costs: 76 SP | *Costs: 76 SP | ||
* | *Additional ATK | ||
* | *ATK% = + 5 x POW. | ||
*ATK% = x Base Level / 100. | |||
*Gives Abyss Dagger buff, can be dispelled. | |||
| style="width: | | style="width: 50%;" | Inflicts melee physical damage twice to nearby targets within 7x7 cells around the caster.<br>Increases damage of Fatal Menace during the skill duration.<br>Damage additionally increases according to the caster's Base Level and POW.<br>Requires a Dagger or One-Handed Sword.<br> | ||
Inflicts melee physical damage twice to nearby targets within 7x7 cells around the caster.<br>Increases damage of Fatal Menace during the skill duration.<br>Damage additionally increases according to the caster's Base Level and POW.<br>Requires a Dagger or One-Handed Sword.<br> | |||
#ATK 1750% per Hit, Effect Duration: 3 seconds | #ATK 1750% per Hit, Effect Duration: 3 seconds | ||
#ATK 3150% per Hit, Effect Duration: 6 seconds | #ATK 3150% per Hit, Effect Duration: 6 seconds | ||
| Line 86: | Line 1,088: | ||
#ATK 5950% per Hit, Effect Duration: 12 seconds | #ATK 5950% per Hit, Effect Duration: 12 seconds | ||
#ATK 7350% per Hit, Effect Duration: 15 seconds | #ATK 7350% per Hit, Effect Duration: 15 seconds | ||
|} | |} | ||
{| class="wikitable" style="border-collapse: collapse; width: 100% | |- | ||
|- | | style="width: 100%;" | | ||
| style="width: 50%; text-align: center | {| class="wikitable" style="border-collapse: collapse; width: 100%;" | ||
| style="width: 50%; text-align: center | |- | ||
|- | | style="width: 50%; text-align: center;" | '''Item Boosts''' | ||
| style="width: 50%; text-align: center | | style="width: 50%; text-align: center;" | '''Item Combo Boosts''' | ||
<span>[[image:510092.png|middle|24px]][https://www.midgardtales.com/item/view/?id=510092 Holy Light Dagger [2]]</span> | |- | ||
| style="width: 50%; text-align: center;" | <span>[[image:510092.png|middle|24px]][https://www.midgardtales.com/item/view/?id=510092 Holy Light Dagger [2]]</span> | |||
<span>[[image:311153.png|middle|24px]][https://www.midgardtales.com/item/view/?id=311153 Ice Magic Orb (Fatal Attack)]</span> | |||
<span>[[image:311285.png|middle|24px]][https://www.midgardtales.com/item/view/?id=311285 Glacier Magic Orb (Abyss Dagger)]</span> | |||
<span>[[image:312214.png|middle|24px]][https://www.midgardtales.com/item/view/?id=312214 Abyss Chaser Soul (Abyss Dagger)]</span> | |||
| style="width: 50%; text-align: center | | style="width: 50%; text-align: center;" | <span>[[image:400191.png|middle|24px]][https://www.midgardtales.com/item/view/?id=400191 Helm of Faith (Shadow Chaser) [1]] + [[image:510033.png|middle|24px]][https://www.midgardtales.com/item/view/?id=510033 Vivatus Fides Dagger [2]]</span> | ||
<span>[[image:400191.png|middle|24px]][https://www.midgardtales.com/item/view/?id=400191 Helm of Faith (Shadow Chaser) [1]] + | |||
<span>[[image:490165.png|middle|24px]][https://www.midgardtales.com/item/view/?id=490165 Heroic Token (Abyss Chaser) [1]] + [[image:510041.png|middle|24px]][https://www.midgardtales.com/item/view/?id=510041 Fatalist-LT [2]]</span> | |||
<span>[[image:400383.png|middle|24px]][https://www.midgardtales.com/item/view/?id=400383 Crown of Good and Evil (Abyss Chaser) [1]] + [[image:312014.png|middle|24px]][https://www.midgardtales.com/item/view/?id=312014 Good Spell] + [[image:510092.png|middle|24px]][https://www.midgardtales.com/item/view/?id=510092 Holy Light Dagger [2]]</span> | |||
<span>[[image:400383.png|middle|24px]][https://www.midgardtales.com/item/view/?id=400383 Crown of Good and Evil (Abyss Chaser) [1]] + [[image:510092.png|middle|24px]][https://www.midgardtales.com/item/view/?id=510092 Holy Light Dagger [2]]</span> | |||
<span>[[image:312685.png|middle|24px]][https://www.midgardtales.com/item/view/?id=312685 Good Vigor (Abyss Chaser)] + [[image:312014.png|middle|24px]][https://www.midgardtales.com/item/view/?id=312014 Good Spell]</span> | |||
<span>[[image:510139.png|middle|24px]][https://www.midgardtales.com/item/view/?id=510139 Dimensions Abyss Knife [2]] + [[image:400534.png|middle|24px]][https://www.midgardtales.com/item/view/?id=400534 Dimensions Crown (Abyss Chaser) [1]]</span> | |||
|} | |} | ||
|} | |||
{| class="wikitable" style="border-collapse: collapse; width: 100%; background-color: rgb(236, 202, 250);" | |||
{| class="wikitable" style="border-collapse: collapse; width: 100%; | |- | ||
|- style=" | | style="width: 100%;" | | ||
| style="width: | {| class="wikitable" style="border-collapse: collapse; width: 100%;" | ||
| style="width: | |- | ||
| style="width: 25% | | style="width: 25%;" | [[File:4th 5313.png|300px|frameless|Strip Shadow]] '''Strip Shadow''' | ||
| style="width: | | style="width: 25%;" | '''Max Level 1''' | ||
|- style=" | | style="width: 25%;" | '''Active''' | ||
| style="width: | | style="width: 25%;" | '''Debuff''' | ||
|} | |||
|- | |||
| style="width: 100%;" | | |||
{| class="wikitable" style="border-collapse: collapse; width: 100%;" | |||
|- | |||
| style="width: 25%; text-align: center;" | [[File:Stripshadow.gif|400px|alt=Strip Shadow Skill Animation|frameless|Strip Shadow]] | |||
| style="width: 25%;" | | |||
*Single Other Target | *Single Other Target | ||
*Costs: 45 SP | *Costs: 45 SP | ||
* | *Rate: 50 x (Skill Level + 3) + 2 x (Dex - Dex). | ||
*BossResist, NoClearbuff, Debuff, NoBanisherBuster, NoDispell, NoClearance | *BossResist, NoClearbuff, Debuff, NoBanisherBuster, NoDispell, NoClearance | ||
| style="width: | | style="width: 50%;" | Strips all of the target's Shadow Equipment and can't be equipped for the skill duration.<br>Decreases physical and magical resistance when used on monsters.<br> | ||
Strips all of the target's Shadow Equipment and can't be equipped for the skill duration.<br>Decreases physical and magical resistance when used on monsters.<br> | |||
#Strip Chance: 20%, Duration: 60 seconds | #Strip Chance: 20%, Duration: 60 seconds | ||
#Strip Chance: 25%, Duration: 70 seconds | #Strip Chance: 25%, Duration: 70 seconds | ||
| Line 149: | Line 1,142: | ||
#Strip Chance: 35%, Duration: 90 seconds | #Strip Chance: 35%, Duration: 90 seconds | ||
#Strip Chance: 40%, Duration: 100 seconds | #Strip Chance: 40%, Duration: 100 seconds | ||
|} | |} | ||
|} | |||
{| class="wikitable" style="border-collapse: collapse; width: 100%; background-color: rgb(248, 202, 198);" | |||
{| class="wikitable" style="border-collapse: collapse; width: 100%; | |- | ||
|- style=" | | style="width: 100%;" | | ||
| style="width: | {| class="wikitable" style="border-collapse: collapse; width: 100%;" | ||
| style="width: | |- | ||
| style="width: 25% | | style="width: 25%;" | [[File:4th 5315.png|300px|frameless|Unlucky Rush]] '''Unlucky Rush''' | ||
| style="width: | | style="width: 25%;" | '''Max Level 5''' | ||
|- style=" | | style="width: 25%;" | '''Active''' | ||
| style="width: | | style="width: 25%;" | '''Physical Range''' | ||
|} | |||
|- | |||
*Single Other Target | | style="width: 100%;" | | ||
{| class="wikitable" style="border-collapse: collapse; width: 100%;" | |||
|- | |||
| style="width: 25%; text-align: center;" | [[File:Unluckyrush.gif|400px|alt=Unlucky Rush Skill Animation|frameless|Unlucky Rush]] | |||
| style="width: 25%;" | *Single Other Target | |||
*Range 9 Cells | *Range 9 Cells | ||
*Element: Weapon | *Element: Weapon | ||
*Costs: 50 SP | *Costs: 50 SP | ||
* | *Additional ATK | ||
* | *ATK% = + 5 x POW. | ||
*ATK% = x Base Level / 100. | |||
*Gives Misfortune debuff, can be dispeilled, can't give to Boss. | |||
| style="width: | | style="width: 50%;" | Instantly dashes to the target and inflicts melee physical damage, which also has a chance to inflict Misfortune status on the target. <br>Damage additionally increases according to the caster's Base Level and POW.<br> | ||
Instantly dashes to the target and inflicts melee physical damage, which also has a chance to inflict Misfortune status on the target. <br>Damage additionally increases according to the caster's Base Level and POW.<br> | |||
#ATK 400%, Unlucky Chance: 40% | #ATK 400%, Unlucky Chance: 40% | ||
#ATK 700%, Unlucky Chance: 50% | #ATK 700%, Unlucky Chance: 50% | ||
| Line 179: | Line 1,173: | ||
#ATK 1300%, Unlucky Chance: 70% | #ATK 1300%, Unlucky Chance: 70% | ||
#ATK 1600%, Unlucky Chance: 80% | #ATK 1600%, Unlucky Chance: 80% | ||
|} | |} | ||
{| class="wikitable" style="border-collapse: collapse; width: 100% | |- | ||
|- | | style="width: 100%;" | | ||
| style="width: 50%; text-align: center | {| class="wikitable" style="border-collapse: collapse; width: 100%;" | ||
| style="width: 50%; text-align: center | |- | ||
|- | | style="width: 50%; text-align: center;" | '''Item Boosts''' | ||
| style="width: 50%; text-align: center | | style="width: 50%; text-align: center;" | '''Item Combo Boosts''' | ||
|- | |||
| style="width: 50%; text-align: center | | style="width: 50%; text-align: center;" | - | ||
<span>[[image:540081.png|middle|24px]][https://www.midgardtales.com/item/view/?id=540081 Dimensions Saint Bible [2]] + | | style="width: 50%; text-align: center;" | <span>[[image:540081.png|middle|24px]][https://www.midgardtales.com/item/view/?id=540081 Dimensions Saint Bible [2]] + [[image:400537.png|middle|24px]][https://www.midgardtales.com/item/view/?id=400537 Dimensions Crown (Cardinal) [1]]</span> | ||
|} | |||
|} | |||
{| class="wikitable" style="border-collapse: collapse; width: 100%; background-color: rgb(248, 202, 198);" | |||
|- | |||
| style="width: 100%;" | | |||
{| class="wikitable" style="border-collapse: collapse; width: 100%;" | |||
|- | |||
| style="width: 25%;" | [[File:4th 5320.png|300px|frameless|Deft Stab]] '''(MT) Deft Stab''' | |||
| style="width: 25%;" | '''Max Level 10''' | |||
| style="width: 25%;" | '''Active''' | |||
| style="width: 25%;" | '''Physical Melee''' | |||
|} | |} | ||
|- | |||
= | | style="width: 100%;" | | ||
{| class="wikitable" style="border-collapse: collapse; width: 100% | {| class="wikitable" style="border-collapse: collapse; width: 100%;" | ||
|- | |- | ||
| style="width: | | style="width: 25%; text-align: center;" | [[File:Deftstab.gif|400px|alt=Deft Stab Skill Animation|frameless|Deft Stab]] | ||
| style="width: 25%;" | *Single Other Target | |||
| | |||
| style="width: | |||
*Single Other Target | |||
*Range 2 Cells | *Range 2 Cells | ||
*Hit Count: 5x | *Hit Count: 5x | ||
| Line 218: | Line 1,206: | ||
*AP Recovery: 3 | *AP Recovery: 3 | ||
*Costs: 72 SP | *Costs: 72 SP | ||
* | *Additional ATK | ||
* | *ATK% = + 7 x POW. | ||
*ATK% = x Base Level / 100. | |||
| style="width: 50%;" | Quickly attacks the target and surrounding enemies around the target by inflicting melee physical damage 5 times.<br>Damage additionally increases according to the caster's Base Level and POW.<br> | |||
| style="width: | |||
Quickly attacks the target and surrounding enemies around the target by inflicting melee physical damage 5 times.<br>Damage additionally increases according to the caster's Base Level and POW.<br> | |||
#ATK 1250% per Hit/AoE: 5x5 cells | #ATK 1250% per Hit/AoE: 5x5 cells | ||
#ATK 1800% per Hit/AoE: 5x5 cells | #ATK 1800% per Hit/AoE: 5x5 cells | ||
| Line 234: | Line 1,220: | ||
#ATK 5650% per Hit/AoE: 7x7 cells | #ATK 5650% per Hit/AoE: 7x7 cells | ||
#ATK 6200% per Hit/AoE: 7x7 cells | #ATK 6200% per Hit/AoE: 7x7 cells | ||
|} | |} | ||
{| class="wikitable" style="border-collapse: collapse; width: 100% | |- | ||
|- | | style="width: 100%;" | | ||
| style="width: 50%; text-align: center | {| class="wikitable" style="border-collapse: collapse; width: 100%;" | ||
| style="width: 50%; text-align: center | |- | ||
|- | | style="width: 50%; text-align: center;" | '''Item Boosts''' | ||
| style="width: 50%; text-align: center | | style="width: 50%; text-align: center;" | '''Equipment Combo Boosts''' | ||
<span>[[image:400534.png|middle|24px]][https://www.midgardtales.com/item/view/?id=400534 Dimensions Crown (Abyss Chaser) [1]]</span> | |- | ||
| style="width: 50%; text-align: center;" | <span>[[image:400534.png|middle|24px]][https://www.midgardtales.com/item/view/?id=400534 Dimensions Crown (Abyss Chaser) [1]]</span> | |||
<span>[[image:510028.png|middle|24px]][https://www.midgardtales.com/item/view/?id=510028 Poenitentia Dilacero [2]] </span> | |||
<span>[[image:510092.png|middle|24px]][https://www.midgardtales.com/item/view/?id=510092 Holy Light Dagger [2]]</span> | |||
<span>[[image:510102.png|middle|24px]][https://www.midgardtales.com/item/view/?id=510102 Muqaddas Tasyiribatiy [2]] </span> | |||
<span>[[image:510139.png|middle|24px]][https://www.midgardtales.com/item/view/?id=510139 Dimensions Abyss Knife [2]]</span> | |||
<span><span><span><span>[[image: | <span>[[image:311289.png|middle|24px]][https://www.midgardtales.com/item/view/?id=311289 Glacier Magic Orb (Deft Stab)] </span> | ||
<span>[[image:312211.png|middle|24px]][https://www.midgardtales.com/item/view/?id=312211 Abyss Chaser Soul (Deft Staff)]</span> | |||
| style="width: 50%; text-align: center;" | <span>[[image:400383.png|middle|24px]][https://www.midgardtales.com/item/view/?id=400383 Crown of Good and Evil (Abyss Chaser) [1]] + [[image:312014.png|middle|24px]][https://www.midgardtales.com/item/view/?id=312014 Good Spell] + [[image:510092.png|middle|24px]][https://www.midgardtales.com/item/view/?id=510092 Holy Light Dagger [2]]</span> | |||
<span>[[image:400383.png|middle|24px]][https://www.midgardtales.com/item/view/?id=400383 Crown of Good and Evil (Abyss Chaser) [1]] + [[image:510092.png|middle|24px]][https://www.midgardtales.com/item/view/?id=510092 Holy Light Dagger [2]]</span> | |||
<span>[[image:312685.png|middle|24px]][https://www.midgardtales.com/item/view/?id=312685 Good Vigor (Abyss Chaser)] + [[image:312014.png|middle|24px]][https://www.midgardtales.com/item/view/?id=312014 Good Spell]</span> | |||
<span> | <span> [[image:510139.png|middle|24px]][https://www.midgardtales.com/item/view/?id=510139 Dimensions Abyss Knife [2]] + [[image:400534.png|middle|24px]][https://www.midgardtales.com/item/view/?id=400534 Dimensions Crown (Abyss Chaser) [1]]</span> | ||
|} | |||
|} | |||
{| class="wikitable" style="border-collapse: collapse; width: 100%; background-color: rgb(194, 224, 244);" | |||
|- | |||
| style="width: 100%;" | | |||
{| class="wikitable" style="border-collapse: collapse; width: 100%;" | |||
|- | |||
| style="width: 25%;" | [[File:4th 5318.png|300px|frameless|Abyss Slayer]] '''(MT) Abyss Slayer''' | |||
| style="width: 25%;" | '''Max Level 10''' | |||
| style="width: 25%;" | '''Active''' | |||
| style="width: 25%;" | '''Supportive''' | |||
|} | |} | ||
|- | |||
= | | style="width: 100%;" | | ||
{| class="wikitable" style="border-collapse: collapse; width: 100% | {| class="wikitable" style="border-collapse: collapse; width: 100%;" | ||
|- | |- | ||
| style="width: | | style="width: 25%; text-align: center;" | [[File:Abyssslayer.gif|400px|alt=Abyss Slayer Skill Animation|frameless|Abyss Slayer]] | ||
| style="width: 25%;" | *Single Self Target | |||
| | |||
| style="width: | |||
*Single Self Target | |||
*Costs: 100 SP, 120 AP | *Costs: 100 SP, 120 AP | ||
| style="width: 50%;" | Endows the caster's body with the power of abyss for 300 seconds.<br>The power of abyss increases the caster's abilities rapidly.<br>Pierces 1% of target RES/MRES x skill level. | |||
| style="width: | |||
Endows the caster's body with the power of abyss for 300 seconds. | |||
#P.ATK/S.MATK +12, HIT +120 | #P.ATK/S.MATK +12, HIT +120 | ||
#P.ATK/S.MATK +14, HIT +140 | #P.ATK/S.MATK +14, HIT +140 | ||
| Line 302: | Line 1,275: | ||
#P.ATK/S.MATK +28, HIT +280 | #P.ATK/S.MATK +28, HIT +280 | ||
#P.ATK/S.MATK +30, HIT +300 | #P.ATK/S.MATK +30, HIT +300 | ||
|} | |} | ||
|} | |||
== | {| class="wikitable" style="border-collapse: collapse; width: 100%; background-color: rgb(248, 202, 198);" | ||
{| class="wikitable" style="border-collapse: collapse; width: 100%; height: | |- | ||
| style="width: 100%;" | | |||
{| class="wikitable" style="border-collapse: collapse; width: 100%; height: 23px;" | |||
|- style="height: 23px;" | |- style="height: 23px;" | ||
| style="width: | | style="width: 25%; height: 23px;" | [[File:Hidensliding.png|300px|frameless]] '''(MT) Hit and Sliding''' | ||
| style="width: | | style="width: 25%; height: 23px;" | '''Max Level 5''' | ||
| style="width: 25%; | | style="width: 25%; height: 23px;" | '''Active''' | ||
| style="width: | | style="width: 25%; height: 23px;" | '''Physical Melee Critical''' | ||
|- style="height: | |} | ||
| style="width: | |- | ||
| style="width: 100%;" | | |||
{| class="wikitable" style="border-collapse: collapse; width: 100%;" | |||
*Single Other Target | |- | ||
*Range | | style="width: 25%; text-align: center;" | [[File:Hitnslide.gif|300px|frameless]] | ||
| style="width: 25%;" | - | |||
| style="width: 50%;" | - | |||
|} | |||
|} | |||
{| class="wikitable" style="border-collapse: collapse; width: 100%; background-color: rgb(248, 202, 198);" | |||
|- | |||
| style="width: 100%;" | | |||
{| class="wikitable" style="border-collapse: collapse; width: 100%;" | |||
|- | |||
| style="width: 25%;" | [[File:Chasingbreak.png|300px|frameless]] '''(MT) Chasing Break''' | |||
| style="width: 25%;" | '''Max Level 5''' | |||
| style="width: 25%;" | '''Active''' | |||
| style="width: 25%;" | '''Physical Ranged Critical''' | |||
|} | |||
|- | |||
| style="width: 100%;" | | |||
{| class="wikitable" style="border-collapse: collapse; width: 100%;" | |||
|- | |||
| style="width: 25%; text-align: center;" | [[image:chasingbreak.gif|300px|frameless]] | |||
| style="width: 25%;" | - | |||
| style="width: 50%;" | - | |||
|} | |||
|} | |||
{| class="wikitable" style="border-collapse: collapse; width: 100%; background-color: rgb(248, 202, 198); height: 459px;" | |||
|- style="height: 60px;" | |||
| style="width: 100%; height: 60px;" | | |||
{| class="wikitable" style="border-collapse: collapse; width: 100%;" | |||
|- | |||
| style="width: 25%;" | [[File:4th 5316.png|300px|frameless|Chain Reaction Shot]] '''(MT) Chain Reaction Shot''' | |||
| style="width: 25%;" | '''Max Level 5''' | |||
| style="width: 25%;" | '''Active''' | |||
| style="width: 25%;" | '''Physical Melee''' | |||
|} | |||
|- style="height: 376px;" | |||
| style="width: 100%; height: 376px;" | | |||
{| class="wikitable" style="border-collapse: collapse; width: 100%;" | |||
|- | |||
| style="width: 25%; text-align: center;" | [[File:Chainreactionshot.gif|400px|alt=Chain Reaction Shot Skill Animation|frameless|Chain Reaction Shot]] | |||
| style="width: 25%;" | *Single Other Target | |||
*Range 5 Cells + Vulture's Eye | |||
*Element: Weapon/Arrow | *Element: Weapon/Arrow | ||
*Costs: 75 SP | *Costs: 75 SP | ||
* | *ATK% = + 15 x CON. | ||
* | *ATK% = x Base Level / 100. | ||
* | *2nd Shot | ||
*ATK% = -100 + 800 + 2550 x Skill Level. | |||
*ATK% = + 15 x CON. | |||
| style="width: | *ATK% = x Base Level / 100. | ||
Inflicts ranged physical damage to the target and surrounding enemies. | | style="width: 50%;" | Inflicts ranged physical damage to the target and surrounding enemies. | ||
Inflicts additional ranged physical damage to targets within 7x7 cells of the main target. | |||
Additional Range based on Vulture's Eye. | |||
Damage additionally increases according to the caster's Base Level and CON. | |||
Requires a Bow and consumes 2 Arrows. | |||
(You need at at least 8 to use this skill).<br> | |||
#ATK 850%/3350%(Secondary) AoE: 5x5 cells | #ATK 850%/3350%(Secondary) AoE: 5x5 cells | ||
#ATK 1700%/5900%(Secondary) AoE: 5x5 cells | #ATK 1700%/5900%(Secondary) AoE: 5x5 cells | ||
| Line 335: | Line 1,356: | ||
#ATK 3400%/11000%(Secondary) AoE: 7x7 cells | #ATK 3400%/11000%(Secondary) AoE: 7x7 cells | ||
#ATK 4250%/13550%(Secondary) AoE: 9x9 cells | #ATK 4250%/13550%(Secondary) AoE: 9x9 cells | ||
|} | |} | ||
|- style="height: 23px;" | |- style="height: 23px;" | ||
| style="width: 50%; text-align: center | | style="width: 100%; height: 23px;" | | ||
| style="width: 50%; text-align: center | {| class="wikitable" style="border-collapse: collapse; width: 100%;" | ||
|- | |- | ||
| style="width: 50%; text-align: center | | style="width: 50%; text-align: center;" | '''Item Boosts''' | ||
<span>[[image:700066.png|middle|24px]][https://www.midgardtales.com/item/view/?id=700066 Dark Angel Ray Bow [2]]</span> | | style="width: 50%; text-align: center;" | '''Item Combo Boosts''' | ||
|- | |||
| style="width: 50%; text-align: center;" | <span>[[image:700066.png|middle|24px]][https://www.midgardtales.com/item/view/?id=700066 Dark Angel Ray Bow [2]]</span> | |||
<span>[[image:311286.png|middle|24px]][https://www.midgardtales.com/item/view/?id=311286 Glacier Magic Orb (Chain Reaction Shot)]</span> | |||
<span>[[image:312212.png|middle|24px]][https://www.midgardtales.com/item/view/?id=312212 Abyss Chaser Soul (Chain Reaction Shot)]</span> | |||
| style="width: 50%; text-align: center | | style="width: 50%; text-align: center;" | <span>[[image:400383.png|middle|24px]][https://www.midgardtales.com/item/view/?id=400383 Crown of Good and Evil (Abyss Chaser) [1]] + [[image:312021.png|middle|24px]][https://www.midgardtales.com/item/view/?id=312021 Evil Spell] + </span><span>[[image:700066.png|middle|24px]][https://www.midgardtales.com/item/view/?id=700066 Dark Angel Ray Bow [2]]</span> | ||
<span>[[image:400383.png|middle|24px]][https://www.midgardtales.com/item/view/?id=400383 Crown of Good and Evil (Abyss Chaser) [1]] + | |||
<span>[[image:400383.png|middle|24px]][https://www.midgardtales.com/item/view/?id=400383 Crown of Good and Evil (Abyss Chaser) [1]] + [[image:700066.png|middle|24px]][https://www.midgardtales.com/item/view/?id=700066 Dark Angel Ray Bow [2]]</span> | |||
<span>[[image:312686.png|middle|24px]][https://www.midgardtales.com/item/view/?id=312686 Evil Vigor (Abyss Chaser)] + [[image:312021.png|middle|24px]][https://www.midgardtales.com/item/view/?id=312021 Evil Spell]</span> | |||
<span>[[image:312692.png|middle|24px]][https://www.midgardtales.com/item/view/?id=312692 Abyss Chaser Stone (Lower II)] + [[image:311364.png|middle|24px]][https://www.midgardtales.com/item/view/?id=311364 Shadow Chaser Stone (Bottom)]</span> | |||
<span>[[image:700092.png|middle|24px]][https://www.midgardtales.com/item/view/?id=700092 Dimensions Abyss Bow [2]] + [[image:400534.png|middle|24px]][https://www.midgardtales.com/item/view/?id=400534 Dimensions Crown (Abyss Chaser) [1]]</span> | |||
|} | |} | ||
|} | |||
{| class="wikitable" style="border-collapse: collapse; width: 100%; background-color: rgb(248, 202, 198);" | |||
|- | |||
{| class="wikitable" style="border-collapse: collapse; width: 100%; | | style="width: 100%;" | | ||
|- style=" | {| class="wikitable" style="border-collapse: collapse; width: 100%;" | ||
| style="width: | |- | ||
| style="width: | | style="width: 25%;" | [[File:4th 5322.png|300px|frameless|Frenzy Shot]]''' (MT) Frenzy Shot''' | ||
| style="width: 25% | | style="width: 25%;" | '''Max Level 10''' | ||
| style="width: | | style="width: 25%;" | '''Active''' | ||
|- style=" | | style="width: 25%;" | '''Physical Ranged Critical''' | ||
| style="width: | |} | ||
|- | |||
| style="width: 100%;" | | |||
*Single Other Target | {| class="wikitable" style="border-collapse: collapse; width: 100%;" | ||
*Range | |- | ||
| style="width: 25%; text-align: center;" | [[File:Frenzyshot.gif|400px|alt=Frenzy Shot Skill Animation|frameless|Frenzy Shot]] | |||
| style="width: 25%;" | *Single Other Target | |||
*Range 5 Cells + Vulture's Eye | |||
*Hit Count: 2x | *Hit Count: 2x | ||
*Element: Weapon/Arrow | *Element: Weapon/Arrow | ||
*AP Recovery: 3 | *AP Recovery: 3 | ||
*Costs: 65 SP | *Costs: 65 SP | ||
* | *ATK% = + 15 x CON. | ||
* | *ATK% = x Base Level / 100. | ||
*3 Hits chance% = 5 x Skill Level. | |||
| style="width: 50%;" | Inflicts ranged physical damage to the target twice and has a chance to inflict 3 times the damage. | |||
| style="width: | |||
Inflicts ranged physical damage to the target twice and has a chance to inflict 3 times the damage. | Damage additionally increases according to the caster's Base Level and CON, can inflict half of the total Critical | ||
Damage at the caster's Critical chance. | |||
Additional Range based on Vulture's Eye. | |||
Requires a Bow and consumes 3 Arrows.<br> | |||
#ATK 1050% per Hit, Trigger Chance: 5% | #ATK 1050% per Hit, Trigger Chance: 5% | ||
#ATK 1850% per Hit, Trigger Chance: 10% | #ATK 1850% per Hit, Trigger Chance: 10% | ||
| Line 411: | Line 1,423: | ||
#ATK 7450% per Hit, Trigger Chance: 45% | #ATK 7450% per Hit, Trigger Chance: 45% | ||
#ATK 8250% per Hit, Trigger Chance: 50% | #ATK 8250% per Hit, Trigger Chance: 50% | ||
|} | |} | ||
{| class="wikitable" style="border-collapse: collapse; width: 100%; height: | |- | ||
| style="width: 100%;" | | |||
{| class="wikitable" style="border-collapse: collapse; width: 100%; height: 23px;" | |||
|- style="height: 23px;" | |- style="height: 23px;" | ||
| style="width: 50%; text-align: center | | style="width: 50%; height: 23px; text-align: center;" | '''Item Boosts''' | ||
| style="width: 50%; text-align: center | | style="width: 50%; height: 23px; text-align: center;" | '''Item Combo Boosts''' | ||
|- | |- | ||
| style="width: 50%; text-align: center | | style="width: 50%; text-align: center;" | <span>[[image:400534.png|middle|24px]][https://www.midgardtales.com/item/view/?id=400534 Dimensions Crown (Abyss Chaser) [1]]</span> | ||
<span>[[image:400534.png|middle|24px]][https://www.midgardtales.com/item/view/?id=400534 Dimensions Crown (Abyss Chaser) [1]]</span> | |||
<span>[[image:700022.png|middle|24px]][https://www.midgardtales.com/item/view/?id=700022 Poenitentia Tenon [2]] </span> | |||
<span>[[image:700066.png|middle|24px]][https://www.midgardtales.com/item/view/?id=700066 Dark Angel Ray Bow [2]]</span> | |||
<span>[[image:700092.png|middle|24px]][https://www.midgardtales.com/item/view/?id=700092 Dimensions Abyss Bow [2]] </span><span></span> | |||
<span>[[image:311155.png|middle|24px]][https://www.midgardtales.com/item/view/?id=311155 Ice Magic Orb (Angle Shot)]</span> | |||
<span><span> | <span>[[image:311286.png|middle|24px]][https://www.midgardtales.com/item/view/?id=311286 Glacier Magic Orb (Chain Reaction Shot)] </span> | ||
<span>[[image:312213.png|middle|24px]][https://www.midgardtales.com/item/view/?id=312213 Abyss Chaser Soul (Frenzy Shot)]</span> | |||
| style="width: 50%; text-align: center;" | <span>[[image:400192.png|middle|24px]][https://www.midgardtales.com/item/view/?id=400192 Helm of Faith II (Shadow Chaser) [1]] + [[image:700033.png|middle|24px]][https://www.midgardtales.com/item/view/?id=700033 Vivatus Fides Cross Bow [2]]</span> | |||
<span>[[image:400383.png|middle|24px]][https://www.midgardtales.com/item/view/?id=400383 Crown of Good and Evil (Abyss Chaser) [1]] + [[image:312021.png|middle|24px]][https://www.midgardtales.com/item/view/?id=312021 Evil Spell] + [[image:700066.png|middle|24px]][https://www.midgardtales.com/item/view/?id=700066 Dark Angel Ray Bow [2]]</span> | |||
<span>[[image:400383.png|middle|24px]][https://www.midgardtales.com/item/view/?id=400383 Crown of Good and Evil (Abyss Chaser) [1]] + [[image:700066.png|middle|24px]][https://www.midgardtales.com/item/view/?id=700066 Dark Angel Ray Bow [2]]</span> | |||
<span>[[image:312686.png|middle|24px]][https://www.midgardtales.com/item/view/?id=312686 Evil Vigor (Abyss Chaser)] + [[image:312021.png|middle|24px]][https://www.midgardtales.com/item/view/?id=312021 Evil Spell]</span> | |||
<span>[[image:312692.png|middle|24px]][https://www.midgardtales.com/item/view/?id=312692 Abyss Chaser Stone (Lower II)] + [[image:311363.png|middle|24px]][https://www.midgardtales.com/item/view/?id=311363 Shadow Chaser Stone (Upper II)]</span> | |||
<span>[[image:700092.png|middle|24px]][https://www.midgardtales.com/item/view/?id=700092 Dimensions Abyss Bow [2]] + [[image:400534.png|middle|24px]][https://www.midgardtales.com/item/view/?id=400534 Dimensions Crown (Abyss Chaser) [1]]</span> | |||
|} | |||
|} | |||
{| class="wikitable" style="border-collapse: collapse; width: 100%; background-color: rgb(251, 238, 184);" | |||
|- | |||
| style="width: 100%;" | | |||
{| class="wikitable" style="border-collapse: collapse; width: 100%;" | |||
|- | |||
| style="width: 25%;" | [[File:4th 5312.png|300px|frameless|Magic Sword Mastery]] '''Magic Sword Mastery''' | |||
| style="width: 25%;" | '''Max Level 10''' | |||
| style="width: 50%;" | '''Passive''' | |||
|} | |||
|- | |||
| style="width: 100%;" | | |||
{| class="wikitable" style="border-collapse: collapse; width: 100%;" | |||
|- | |||
| style="width: 100%;" | Increases magical damage against enemies of their size when equipped with a Dagger or One-Handed Sword. | |||
*Level 10: Small +15%, Medium +15%, Large +15% | |||
|} | |||
|} | |} | ||
{| class="wikitable" style="border-collapse: collapse; width: 100%; background-color: rgb(248, 202, 198);" | |||
|- | |||
{| class="wikitable" style="border-collapse: collapse; width: 100%; | | style="width: 100%;" | | ||
|- | {| class="wikitable" style="border-collapse: collapse; width: 100%; height: 24px;" | ||
| style="width: | |- style="height: 24px;" | ||
| style="width: | | style="width: 25%; height: 24px;" | [[File:4th 5317.png|300px|frameless|From the Abyss]] '''From the Abyss''' | ||
| style=" | | style="width: 25%; height: 24px;" | '''Max Level 5''' | ||
| style="width: | | style="width: 25%; height: 24px;" | '''Active''' | ||
| style="width: 25%; height: 24px;" | '''Magical Neutral / Supportive''' | |||
| style="width: | |||
| style="width: 25%; height: | |||
| style="width: | |||
|} | |} | ||
|- | |||
= | | style="width: 100%;" | | ||
{| class="wikitable" style="border-collapse: collapse; width: 100% | {| class="wikitable" style="border-collapse: collapse; width: 100%;" | ||
|- | |- | ||
| style="width: | | style="width: 25%; text-align: center;" | [[File:Fromtheabyss.gif|400px|alt=From the Abyss Skill Animation|frameless|From the Abyss]] | ||
| style="width: 25%;" | *Single Self Target | |||
| | |||
| style="width: | |||
*Single Self Target | |||
*AP Recovery: 4/8/12/16/20 | *AP Recovery: 4/8/12/16/20 | ||
*Costs: 80 SP | *Costs: 80 SP | ||
*NoBanishingBuster, NoDispell, NoClearance | *NoBanishingBuster, NoDispell, NoClearance | ||
*MATK% = + 5 x SPL. | |||
*MATK% = x Base Level / 100. | |||
| style="width: | *Autocast chance% = 25. | ||
Summons spheres containing power of the abyss for the skill duration.<br>5 Abyss Spheres are summoned upon using this skill.<br>Inflicting physical damage has a chance to consume 1 Abyss Sphere to inflict Neutral elemental magic damage 5 times to the target and surrounding enemies within 9x9 cells around the target.<br>Summons Abyss Spheres over time.<br>Damage additionally increases according to the caster's Base Level and SPL.<br> | | style="width: 50%;" | Summons spheres containing power of the abyss for the skill duration.<br>5 Abyss Spheres are summoned upon using this skill.<br>Inflicting physical damage has a chance to consume 1 Abyss Sphere to inflict Neutral elemental magic damage 5 times to the target and surrounding enemies within 9x9 cells around the target.<br>Summons Abyss Spheres over time.<br>Damage additionally increases according to the caster's Base Level and SPL.<br> | ||
#MATK 800%, Duration: 30 seconds, Abyss Sphere Interval: 3 seconds | #MATK 800%, Duration: 30 seconds, Abyss Sphere Interval: 3 seconds | ||
#MATK 1450%, Duration: 60 seconds, Abyss Sphere Interval: 2.5 seconds | #MATK 1450%, Duration: 60 seconds, Abyss Sphere Interval: 2.5 seconds | ||
| Line 509: | Line 1,499: | ||
#MATK 2750%, Duration: 120 seconds, Abyss Sphere Interval: 1.5 seconds | #MATK 2750%, Duration: 120 seconds, Abyss Sphere Interval: 1.5 seconds | ||
#MATK 3400%, Duration: 150 seconds, Abyss Sphere Interval: 1 seconds | #MATK 3400%, Duration: 150 seconds, Abyss Sphere Interval: 1 seconds | ||
| style="width: | |} | ||
|- | |||
| style="width: 100%;" | | |||
{| class="wikitable" style="border-collapse: collapse; width: 100%;" | |||
|- | |||
| style="width: 50%; text-align: center;" | '''Item Boosts''' | |||
| style="width: 50%; text-align: center;" | '''Item Combo Boosts''' | |||
|- | |||
| style="width: 50%; text-align: center;" | <span>[[image:510030.png|middle|24px]][https://www.midgardtales.com/item/view/?id=510030 Thanos Dagger-AD [2]] </span> | |||
<span>[[image:510051.png|middle|24px]][https://www.midgardtales.com/item/view/?id=510051 Wicked Dagger [2]]</span> | |||
<span>[[image:311040.png|middle|24px]][https://www.midgardtales.com/item/view/?id=311040 From the Abyss Tuning Device] </span> | |||
<span>[[image:312216.png|middle|24px]][https://www.midgardtales.com/item/view/?id=312216 Abyss Chaser Soul (From the Abyss)]</span> | |||
| style="width: 50%; text-align: center;" | <span>[[image:311373.png|middle|24px]][https://www.midgardtales.com/item/view/?id=311373 Earth Magic (Magical) Lv. 1] - Lv. 3 + [[image:510030.png|middle|24px]][https://www.midgardtales.com/item/view/?id=510030 Thanos Dagger-AD [2]]</span> | |||
|} | |||
|} | |} | ||
{| class="wikitable" style="border-collapse: collapse; width: 100%; | {| class="wikitable" style="border-collapse: collapse; width: 100%; background-color: rgb(248, 202, 198);" | ||
|- | |- | ||
| style="width: | | style="width: 100%;" | | ||
| style="width: | {| class="wikitable" style="border-collapse: collapse; width: 100%; height: 24px;" | ||
|- style="height: 24px;" | |- style="height: 24px;" | ||
| style="width: | | style="width: 25%; height: 24px;" | [[File:Abyssflame.png|300px|frameless]] '''Abyss Flame''' | ||
| style="width: 25%; height: 24px;" | '''Max Level 5''' | |||
| style="width: 25%; height: 24px;" | '''Active''' | |||
| style="width: 25%; height: 24px;" | '''Magical Fire''' | |||
|} | |||
|- | |||
| style="width: 100%;" | | |||
{| class="wikitable" style="border-collapse: collapse; width: 100%; height: 23px;" | |||
| style="width: | |- style="height: 23px;" | ||
| style="width: 25%; height: 23px; text-align: center;" | [[image:abyssflame.gif|300px|frameless]] | |||
| style="width: 25%;" | - | |||
| style="width: 50%; height: 23px;" | - | |||
|} | |||
|} | |||
{| class="wikitable" style="border-collapse: collapse; width: 100%; background-color: rgb(248, 202, 198);" | |||
|- | |||
| style="width: 100%;" | | |||
{| class="wikitable" style="border-collapse: collapse; width: 100%;" | |||
|- | |||
| style="width: 25%;" | [[File:4th 5321.png|300px|frameless|Abyss Square]] '''Abyss Square''' | |||
| style="width: 25%;" | '''Max Level 5''' | |||
| style="width: 25%;" | '''Active''' | |||
| style="width: 25%;" | '''Magical Neutral''' | |||
|} | |} | ||
|- | |||
= | | style="width: 100%;" | | ||
{| class="wikitable" style="border-collapse: collapse; width: 100% | {| class="wikitable" style="border-collapse: collapse; width: 100%;" | ||
|- | |- | ||
| style="width: | | style="width: 25%; text-align: center;" | [[File:Abysssquare.gif|400px|alt=Abyss Square Skill Animation|frameless|Abyss Square]] | ||
| style="width: 25%;" | *Ground | |||
| | |||
| style="width: | |||
*Ground | |||
*Range 9 Cells | *Range 9 Cells | ||
*AP Recovery: 5 | *AP Recovery: 5 | ||
*Costs: 105 SP | *Costs: 105 SP | ||
* | *MATK% = + 5 x SPL. | ||
* | *MATK% = x Base Level / 100. | ||
* | *Autocast chance% = 15. | ||
| style="width: 50%;" | Inflicts Neutral elemental magic damage by awakening the abyss within 7x7 cells in the targeted area.<br>If the caster is within skill range, inflicts the damage twice.<br>Damage additionally increases according to the caster's Base Level and SPL.<br>When From the Abyss is active, there is a chance to autocast Abyss Square, when inflicting physical damage.<br>Learned skill level will be casted, but will not recover AP from auto-casting.<br> | |||
| style="width: | |||
Inflicts Neutral elemental magic damage by awakening the abyss within 7x7 cells in the targeted area.<br>If the caster is within skill range, inflicts the damage twice.<br>Damage additionally increases according to the caster's Base Level and SPL.<br>When From the Abyss is active, there is a chance to autocast Abyss Square, when inflicting physical damage.<br>Learned skill level will be casted, but will not recover AP from auto-casting.<br> | |||
#MATK 750+(Magic Sword Mastery Lv x40)% | #MATK 750+(Magic Sword Mastery Lv x40)% | ||
#MATK 1500+(Magic Sword Mastery Lv x80)% | #MATK 1500+(Magic Sword Mastery Lv x80)% | ||
| Line 565: | Line 1,562: | ||
#MATK 3000+(Magic Sword Mastery Lv x160)% | #MATK 3000+(Magic Sword Mastery Lv x160)% | ||
#MATK 3750+(Magic Sword Mastery Lv x200)% | #MATK 3750+(Magic Sword Mastery Lv x200)% | ||
| style="width: | |} | ||
|- | |||
| style="width: 100%;" | | |||
{| class="wikitable" style="border-collapse: collapse; width: 100%;" | |||
|- | |||
| style="width: 50%; text-align: center;" | '''Item Boosts''' | |||
| style="width: 50%; text-align: center;" | '''Item Combo Boosts''' | |||
|- | |||
| style="width: 50%; text-align: center;" | <span>[[image:510026.png|middle|24px]][https://www.midgardtales.com/item/view/?id=510026 Relapse Dagger [2]] </span> | |||
<span>[[image:510051.png|middle|24px]][https://www.midgardtales.com/item/view/?id=510051 Wicked Dagger [2]]</span> | |||
<span>[[image:510077.png|middle|24px]][https://www.midgardtales.com/item/view/?id=510077 Flush Jewel Detector Mk47 [2]]</span> | |||
<span>[[image:311039.png|middle|24px]][https://www.midgardtales.com/item/view/?id=311039 Abyss Square Tuning Device] </span> | |||
<span>[[image:311154.png|middle|24px]][https://www.midgardtales.com/item/view/?id=311154 Ice Magic Orb (Shadow Spell)]</span> | |||
<span>[[image:311288.png|middle|24px]][https://www.midgardtales.com/item/view/?id=311288 Glacier Magic Orb (Abyss Square)] </span> | |||
<span>[[image:312215.png|middle|24px]][https://www.midgardtales.com/item/view/?id=312215 Abyss Chaser Soul (Abyss Square)]</span> | |||
| style="width: 50%; text-align: center;" | <span>[[image:490165.png|middle|24px]][https://www.midgardtales.com/item/view/?id=490165 Heroic Token (Abyss Chaser) [1]] + [[image:510040.png|middle|24px]][https://www.midgardtales.com/item/view/?id=510040 Magic Sword-LT [2]]</span> | |||
|} | |||
|} | |} | ||
{| class="wikitable" style="border-collapse: collapse; width: 100%; height: | {| class="wikitable" style="border-collapse: collapse; width: 100%; height: 46px; background-color: rgb(248, 202, 198);" | ||
|- style="height: 23px;" | |- style="height: 23px;" | ||
| style="width: | | style="width: 100%; height: 23px;" | | ||
| style=" | {| class="wikitable" style="border-collapse: collapse; width: 100%;" | ||
|- | |- | ||
| style="width: | | style="width: 25%;" | [[File:4th 5319.png|300px|frameless|Omega Abyss Strike]] '''Omega Abyss Strike''' | ||
| style="width: 25%;" | '''Max Level 10''' | |||
| style="width: 25%;" | '''Active''' | |||
| style="width: 25%;" | '''Magical Fire''' | |||
| style="width: | |||
|} | |} | ||
|- style="height: 23px;" | |- style="height: 23px;" | ||
| style="width: | | style="width: 100%; height: 23px;" | | ||
| style="width: | {| class="wikitable" style="border-collapse: collapse; width: 100%;" | ||
| style="width: 25% | |- | ||
| style="width: 25%; text-align: center;" | [[File:Abyssstrike.gif|400px|alt=Omega Abyss Strike Skill Animation|frameless|Omega Abyss Strike]] | |||
| | | style="width: 25%;" | *Ground | ||
| style="width: | |||
*Ground | |||
*Range 9 Cells | *Range 9 Cells | ||
*Element: Fire | *Element: Fire | ||
*Costs: 125 SP, 10 AP | *Costs: 125 SP, 10 AP | ||
* | *MATK% = + 10 x SPL. | ||
* | *MATK% if Demon & Angel = + 200 x Skill Level. | ||
* | *MATK% = x Base Level / 100. | ||
| style="width: 50%;" | Drops the powerful meteorite at the targeted area, inflicting Fire elemental magic damage to all targets within 9x9 cells.<br>Inflicts additional damage against Angel and Demon race monsters.<br>Damage additionally increases according to the caster's Base Level and SPL.<br> | |||
| style="width: | |||
Drops the powerful meteorite at the targeted area, inflicting Fire elemental magic damage to all targets within 9x9 cells.<br>Inflicts additional damage against Angel and Demon race monsters.<br>Damage additionally increases according to the caster's Base Level and SPL.<br> | |||
#MATK 2650%/2850%(Angel/Demon) | #MATK 2650%/2850%(Angel/Demon) | ||
#MATK 5300%/5700%(Angel/Demon) | #MATK 5300%/5700%(Angel/Demon) | ||
| Line 634: | Line 1,616: | ||
#MATK 23850%/25650%(Angel/Demon) | #MATK 23850%/25650%(Angel/Demon) | ||
#MATK 26500%/28500%(Angel/Demon) | #MATK 26500%/28500%(Angel/Demon) | ||
| | |} | ||
|} | |} | ||
| Line 656: | Line 1,631: | ||
'''Supply Dealer''' | '''Supply Dealer''' | ||
Department Store in main town | |||
| style="width: 25%; text-align: center;" | [[File:Supplydealer.png|300px|frameless|Supply Dealer]] | | style="width: 25%; text-align: center;" | [[File:Supplydealer.png|300px|frameless|Supply Dealer]] | ||
| style="width: 50%; text-align: center;" | | | style="width: 50%; text-align: center;" | | ||
| Line 666: | Line 1,641: | ||
|- | |- | ||
| style="width: 25%; text-align: center;" | | | style="width: 25%; text-align: center;" | | ||
<p>'''Magician Steven'''</p> | <p>'''Magician Steven'''</p>Department Store in main town<br> | ||
| style="width: 25%; text-align: center;" | [[image:magiciansteve.png|300px|frameless]] | | style="width: 25%; text-align: center;" | [[image:magiciansteve.png|300px|frameless]] | ||
| style="width: 50%; text-align: center;" | <span>[[image:716.png|middle|24px]][https://www.midgardtales.com/item/view/?id=716 Red Gemstone]</span> | | style="width: 50%; text-align: center;" | <span>[[image:716.png|middle|24px]][https://www.midgardtales.com/item/view/?id=716 Red Gemstone]</span> | ||
| Line 675: | Line 1,648: | ||
'''Plagiarism NPC''' | '''Plagiarism NPC''' | ||
Training Ground | Training Ground | ||
| style="width: 25%; text-align: center;" | [[File:Plagiarismnpc.png|300px|frameless|Plagiarism NPC]] | | style="width: 25%; text-align: center;" | [[File:Plagiarismnpc.png|300px|frameless|Plagiarism NPC]] | ||
| style="width: 50%; text-align: center;" | Copy skills available for Intimidate and Reproduce. | | style="width: 50%; text-align: center;" | Copy skills available for Intimidate and Reproduce. | ||
Latest revision as of 04:45, 23 May 2026
Intro
| Novice | Thief
(1st Job) |
Rogue
(2nd Job) |
Stalker
(2nd Job Transcedent) |
Shadow Chaser
(3rd Job) |
Abyss Chaser
(4th Job) |

|

|

|

|

|
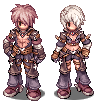
|
|
Description |
Max Level HP/SP | Stats Bonus when Max Job Level |
|
- |
|
Str+8, Agi+9, Vit+8, Int+6, Dex+6, Luk+6 Pow+9, Sta+8, Wis+4, Spl+8, Con+5, Ctr+6 |
1st Job Skills
| |||
|

| |||
|

| ||||
|

| ||||
|

| ||||
|

| ||||
|

| ||||
|

| ||||
|

| ||||
|

| ||||
|

2nd Job Skills
| |||
|

| ||||
|

| ||||
|

| |||
|

| |||
|

| ||||
|

| ||||
|

| ||||
|

| ||||
|

| |||
|

| ||||
|

| ||||
|

| ||||
|

| ||||
|

| |||
|

| |||
|

| ||||
|

| ||||
|

| ||||
|

| |||
|

| ||||
|

2nd Job Transcendent Skills
| ||||
|

| ||||
|

| ||||
|

| ||||
|

3rd Job Skills
| ||||
|

| ||||
|

| ||||
|

| ||||
|

| ||||
|

| ||||
|

| ||||
|

| ||||
|

| ||||
|

| ||||
|

| ||||
|

| ||||
|

| ||||
|

| ||||
|

| ||||
|

| ||||
|

| ||||
|

| ||||
|

| ||||
|

| ||||
|

| ||||
|

| ||||
|

| ||||
|

4th Job Skills
| |||
|

| ||||
| ||||


| ||||
|


| ||||
| ||||
|


| ||||
| ||||


| ||||
|


| ||||
|


| ||||
|


| ||||
| ||||


| ||||
| ||||


| |||
|

| ||||
| ||||
|


| ||||
|


| ||||
| ||||


| ||||
|


Related NPC
|
Job Change |
N/A |
Given |
|
Supply Dealer Department Store in main town |

|
|
|
Magician Steven Department Store in main town |

|
 Red Gemstone Red Gemstone
|
|
Plagiarism NPC Training Ground |

|
Copy skills available for Intimidate and Reproduce. |


