Cardinal: Difference between revisions
| (8 intermediate revisions by the same user not shown) | |||
| Line 44: | Line 44: | ||
== 1st Job Skills == | == 1st Job Skills == | ||
{| class="wikitable" style="border-collapse: collapse; width: 100%; background-color: | {| class="wikitable" style="border-collapse: collapse; width: 100%; background-color: #c2e0f4;" | ||
|- | |||
| style="width: 100%;" | | |||
{| class="wikitable" style="border-collapse: collapse; width: 100%;" | |||
|- | |||
| style="width: 25%;" | [[File:Ruwarch.png|300px|frameless]] '''Ruwach''' | |||
| style="width: 25%;" | '''Max Level 1''' | |||
| style="width: 25%;" | '''Active''' | |||
| style="width: 25%;" | '''Supportive Self''' | |||
|} | |||
|- | |||
| style="width: 100%;" | | |||
{| class="wikitable" style="border-collapse: collapse; width: 100%;" | |||
|- | |||
| style="width: 100%;" | - | |||
|} | |||
|} | |||
{| class="wikitable" style="border-collapse: collapse; width: 100%; background-color: #c2e0f4;" | |||
|- | |||
| style="width: 100%;" | | |||
{| class="wikitable" style="border-collapse: collapse; width: 100%;" | |||
|- | |||
| style="width: 25%;" | [[File:Teleport.png|300px|frameless]] '''Teleport''' | |||
| style="width: 25%;" | '''Max Level 2''' | |||
| style="width: 25%;" | '''Active''' | |||
| style="width: 25%;" | '''Supportive Self''' | |||
|} | |||
|- | |||
| style="width: 100%;" | | |||
{| class="wikitable" style="border-collapse: collapse; width: 100%;" | |||
|- | |||
| style="width: 100%;" | - | |||
|} | |||
|} | |||
{| class="wikitable" style="border-collapse: collapse; width: 100%; background-color: #c2e0f4;" | |||
|- | |||
| style="width: 100%;" | | |||
{| class="wikitable" style="border-collapse: collapse; width: 100%;" | |||
|- | |||
| style="width: 25%;" | [[File:Warpportal.png|300px|frameless]] '''Warp Portal''' | |||
| style="width: 25%;" | '''Max Level 4''' | |||
| style="width: 25%;" | '''Active''' | |||
| style="width: 25%;" | '''Supportive Self''' | |||
|} | |||
|- | |||
| style="width: 100%;" | | |||
{| class="wikitable" style="border-collapse: collapse; width: 100%;" | |||
|- | |- | ||
| style="width: 100%;" | | | style="width: 100%;" | - | ||
|} | |||
|} | |||
{| class="wikitable" style="border-collapse: collapse; width: 100%; background-color: #c2e0f4;" | |||
|- | |||
| style="width: 100%;" | | |||
{| class="wikitable" style="border-collapse: collapse; width: 100%;" | |||
|- | |||
| style="width: 25%;" | [[File:Pneuma.png|300px|frameless]] '''Pneuma''' | |||
| style="width: 25%;" | '''Max Level 1''' | |||
| style="width: 25%;" | '''Active''' | |||
| style="width: 25%;" | '''Supportive''' | |||
|} | |||
|- | |||
| style="width: 100%;" | | |||
{| class="wikitable" style="border-collapse: collapse; width: 100%;" | {| class="wikitable" style="border-collapse: collapse; width: 100%;" | ||
|- | |- | ||
| style="width: 25%;" | [[File: | | style="width: 100%;" | - | ||
|} | |||
|} | |||
{| class="wikitable" style="border-collapse: collapse; width: 100%; background-color: rgb(191, 237, 210);" | |||
|- | |||
| style="width: 100%;" | | |||
{| class="wikitable" style="border-collapse: collapse; width: 100%;" | |||
|- | |||
| style="width: 25%;" | [[image:heal.png|300px|frameless]] '''Heal''' | |||
| style="width: 25%;" | '''Max Level 10''' | |||
| style="width: 25%;" | '''Active''' | |||
| style="width: 25%;" | '''Healing''' | |||
|} | |||
|- | |||
| style="width: 100%;" | | |||
{| class="wikitable" style="border-collapse: collapse; width: 100%;" | |||
|- | |||
| style="width: 100%;" | - | |||
|} | |||
|} | |||
{| class="wikitable" style="border-collapse: collapse; width: 100%; background-color: #c2e0f4;" | |||
|- | |||
| style="width: 100%;" | | |||
{| class="wikitable" style="border-collapse: collapse; width: 100%;" | |||
|- | |||
| style="width: 25%;" | [[File:Cure.png|300px|frameless]] '''Cure''' | |||
| style="width: 25%;" | '''Max Level 1''' | | style="width: 25%;" | '''Max Level 1''' | ||
| style="width: 25%;" | '''Active''' | | style="width: 25%;" | '''Active''' | ||
| style="width: 25%;" | '''Supportive Self''' | | style="width: 25%;" | '''Supportive Self or Other''' | ||
|} | |} | ||
|- | |||
| style="width: 100%;" | | |||
{| class="wikitable" style="border-collapse: collapse; width: 100%;" | |||
|- | |- | ||
| style="width: 100%;" | - | |||
|} | |||
|} | |||
{| class="wikitable" style="border-collapse: collapse; width: 100%; background-color: #c2e0f4;" | |||
|- | |||
| style="width: 100%;" | | | style="width: 100%;" | | ||
{| class="wikitable" style="border-collapse: collapse; width: 100%;" | |||
|- | |||
| style="width: 25%;" | [[File:Aquabenefit.png|300px|frameless]] '''Aqua Benedicta''' | |||
| style="width: 25%;" | '''Max Level 1''' | |||
| style="width: 25%;" | '''Active''' | |||
| style="width: 25%;" | '''Crafting''' | |||
|} | |} | ||
{| class="wikitable" style="border-collapse: collapse; width: 100% | |- | ||
| style="width: 100%;" | | |||
{| class="wikitable" style="border-collapse: collapse; width: 100%;" | |||
|- | |- | ||
| style="width: 100%;" | | | style="width: 100%;" | - | ||
|} | |||
|} | |||
{| class="wikitable" style="border-collapse: collapse; width: 100%; height: 43px; background-color: #c2e0f4;" | |||
|- style="height: 20px;" | |||
| style="width: 100%; height: 20px;" | | |||
{| class="wikitable" style="border-collapse: collapse; width: 100%;" | |||
|- | |||
| style="width: 25%;" | [[File:Incagility.png|300px|frameless]] '''Increase Agility''' | |||
| style="width: 25%;" | '''Max Level 10''' | |||
| style="width: 25%;" | '''Active''' | |||
| style="width: 25%;" | '''Supportive Self or Other''' | |||
|} | |||
|- style="height: 23px;" | |||
| style="width: 100%; height: 23px;" | | |||
{| class="wikitable" style="border-collapse: collapse; width: 100%;" | {| class="wikitable" style="border-collapse: collapse; width: 100%;" | ||
|- | |- | ||
| style="width: 25%;" | [[File: | | style="width: 100%;" | - | ||
| style="width: 25%;" | '''Max Level | |} | ||
|} | |||
{| class="wikitable" style="border-collapse: collapse; width: 100%; background-color: #eccafa;" | |||
|- | |||
| style="width: 100%;" | | |||
{| class="wikitable" style="border-collapse: collapse; width: 100%;" | |||
|- | |||
| style="width: 25%;" | [[File:Decreaseagi.png|300px|frameless]] '''Decrease Agility''' | |||
| style="width: 25%;" | '''Max Level 10''' | |||
| style="width: 25%;" | '''Active''' | | style="width: 25%;" | '''Active''' | ||
| style="width: 25%;" | ''' | | style="width: 25%;" | '''Debuff''' | ||
|} | |||
|- | |||
| style="width: 100%;" | | |||
{| class="wikitable" style="border-collapse: collapse; width: 100%;" | |||
|- | |||
| style="width: 100%;" | - | |||
|} | |||
|} | |||
{| class="wikitable" style="border-collapse: collapse; width: 100%; background-color: #fbeeb8;" | |||
|- | |||
| style="width: 100%;" | | |||
{| class="wikitable" style="border-collapse: collapse; width: 100%;" | |||
|- | |||
| style="width: 12.5%;" | [[File:Divineprotection.png|300px|frameless]] '''Divine Protection''' | |||
| style="width: 12.5%;" | '''Max Level 10''' | |||
| style="width: 25%;" | '''Passive''' | |||
|} | |} | ||
|- | |||
| style="width: 100%;" | | |||
{| class="wikitable" style="border-collapse: collapse; width: 100%;" | |||
|- | |- | ||
| style="width: 100%;" | - | |||
|} | |||
|} | |||
{| class="wikitable" style="border-collapse: collapse; width: 100%; background-color: #fbeeb8;" | |||
|- | |||
| style="width: 100%;" | | | style="width: 100%;" | | ||
{| class="wikitable" style="border-collapse: collapse; width: 100%;" | |||
|- | |||
| style="width: 25%;" | [[File:Demonbane.png|300px|frameless]] '''Demon Bane''' | |||
| style="width: 25%;" | '''Max Level 10''' | |||
| style="width: 50%;" | '''Passive''' | |||
|} | |} | ||
{| class="wikitable" style="border-collapse: collapse; width: 100% | |- | ||
| style="width: 100%;" | | |||
{| class="wikitable" style="border-collapse: collapse; width: 100%;" | |||
|- | |- | ||
| style="width: 100%;" | | | style="width: 100%;" | - | ||
|} | |||
|} | |||
{| class="wikitable" style="border-collapse: collapse; width: 100%; background-color: #c2e0f4;" | |||
|- | |||
| style="width: 100%;" | | |||
{| class="wikitable" style="border-collapse: collapse; width: 100%;" | |||
|- | |||
| style="width: 25%;" | [[File:Blessing.png|300px|frameless]] '''Blessing''' | |||
| style="width: 25%;" | '''Max Level 10''' | |||
| style="width: 25%;" | '''Active''' | |||
| style="width: 25%;" | '''Supportive Self or Other''' | |||
|} | |||
|- | |||
| style="width: 100%;" | | |||
{| class="wikitable" style="border-collapse: collapse; width: 100%;" | {| class="wikitable" style="border-collapse: collapse; width: 100%;" | ||
|- | |- | ||
| style="width: 25%;" | [[File: | | style="width: 100%;" | - | ||
| style="width: 25%;" | '''Max Level | |} | ||
|} | |||
{| class="wikitable" style="border-collapse: collapse; width: 100%; background-color: #c2e0f4;" | |||
|- | |||
| style="width: 100%;" | | |||
{| class="wikitable" style="border-collapse: collapse; width: 100%;" | |||
|- | |||
| style="width: 25%;" | [[File:Angelus.png|300px|frameless]] '''Angelus''' | |||
| style="width: 25%;" | '''Max Level 10''' | |||
| style="width: 25%;" | '''Active''' | | style="width: 25%;" | '''Active''' | ||
| style="width: 25%;" | '''Supportive Self''' | | style="width: 25%;" | '''Supportive Self or Other''' | ||
|} | |} | ||
|- | |||
| style="width: 100%;" | | |||
{| class="wikitable" style="border-collapse: collapse; width: 100%;" | |||
|- | |- | ||
| style="width: 100%;" | - | |||
|} | |||
|} | |||
{| class="wikitable" style="border-collapse: collapse; width: 100%; background-color: #eccafa;" | |||
|- | |||
| style="width: 100%;" | | | style="width: 100%;" | | ||
{| class="wikitable" style="border-collapse: collapse; width: 100%;" | |||
|- | |||
| style="width: 25%;" | [[File:Signump.png|300px|frameless]] '''Signum Crusis''' | |||
| style="width: 25%;" | '''Max Level 10''' | |||
| style="width: 25%;" | '''Active''' | |||
| style="width: 25%;" | '''Debuff''' | |||
|} | |} | ||
{| class="wikitable" style="border-collapse: collapse; width: 100% | |- | ||
| style="width: 100%;" | | |||
{| class="wikitable" style="border-collapse: collapse; width: 100%;" | |||
|- | |- | ||
| style="width: 100%;" | | | style="width: 100%;" | - | ||
|} | |||
|} | |||
{| class="wikitable" style="border-collapse: collapse; width: 100%; background-color: #f8cac6;" | |||
|- | |||
| style="width: 100%;" | | |||
{| class="wikitable" style="border-collapse: collapse; width: 100%; height: 24px;" | |||
|- style="height: 24px;" | |||
| style="width: 25%; height: 24px;" | [[File:Holylight.png|300px|frameless]] '''Holy Light''' | |||
| style="width: 25%; height: 24px;" | '''Quest Skill (Learned from NPC)''' | |||
| style="width: 25%; height: 24px;" | '''Active''' | |||
| style="width: 25%; height: 24px;" | '''Magical Holy''' | |||
|} | |||
|- | |||
| style="width: 100%;" | | |||
{| class="wikitable" style="border-collapse: collapse; width: 100%;" | {| class="wikitable" style="border-collapse: collapse; width: 100%;" | ||
|- | |- | ||
| style="width: 25%;" | [[File: | | style="width: 100%;" | - | ||
|} | |||
|} | |||
== 2nd Job Skills == | |||
{| class="wikitable" style="border-collapse: collapse; width: 100%; background-color: rgb(194, 224, 244);" | |||
|- | |||
| style="width: 100%;" | | |||
{| class="wikitable" style="border-collapse: collapse; width: 100%;" | |||
|- | |||
| style="width: 25%;" | [[File:Kyrie.png|300px|frameless]] '''Kyrie Eleison''' | |||
| style="width: 25%;" | '''Max Level 10''' | |||
| style="width: 25%;" | '''Active''' | |||
| style="width: 25%;" | '''Supportive''' | |||
|} | |||
|- | |||
| style="width: 100%;" | | |||
{| class="wikitable" style="border-collapse: collapse; width: 100%;" | |||
|- | |||
| style="width: 100%;" | - | |||
|} | |||
|} | |||
{| class="wikitable" style="border-collapse: collapse; width: 100%; background-color: rgb(194, 224, 244);" | |||
|- | |||
| style="width: 100%;" | | |||
{| class="wikitable" style="border-collapse: collapse; width: 100%; height: 24px;" | |||
|- style="height: 24px;" | |||
| style="width: 25%; height: 24px;" | [[File:Magnificat.png|300px|frameless]] '''Magnificat''' | |||
| style="width: 25%; height: 24px;" | '''Max Level 5''' | |||
| style="width: 25%; height: 24px;" | '''Active''' | |||
| style="width: 25%; height: 24px;" | '''Supportive''' | |||
|} | |||
|- | |||
| style="width: 100%;" | | |||
{| class="wikitable" style="border-collapse: collapse; width: 100%;" | |||
|- | |||
| style="width: 100%;" | - | |||
|} | |||
|} | |||
{| class="wikitable" style="border-collapse: collapse; width: 100%; background-color: rgb(194, 224, 244);" | |||
|- | |||
| style="width: 100%;" | | |||
{| class="wikitable" style="border-collapse: collapse; width: 100%;" | |||
|- | |||
| style="width: 25%;" | [[File:Gloria.png|300px|frameless]] '''Gloria''' | |||
| style="width: 25%;" | '''Max Level 5''' | |||
| style="width: 25%;" | '''Active''' | |||
| style="width: 25%;" | '''Supportive''' | |||
|} | |||
|- | |||
| style="width: 100%;" | | |||
{| class="wikitable" style="border-collapse: collapse; width: 100%;" | |||
|- | |||
| style="width: 100%;" | - | |||
|} | |||
|} | |||
{| class="wikitable" style="border-collapse: collapse; width: 100%; background-color: rgb(194, 224, 244);" | |||
|- | |||
| style="width: 100%;" | | |||
{| class="wikitable" style="border-collapse: collapse; width: 100%;" | |||
|- | |||
| style="width: 25%;" | [[File:Bsacrima.png|300px|frameless]] '''B.S Sacramenti''' | |||
| style="width: 25%;" | '''Max Level 5''' | |||
| style="width: 25%;" | '''Active''' | |||
| style="width: 25%;" | '''Supportive''' | |||
|} | |||
|- | |||
| style="width: 100%;" | | |||
{| class="wikitable" style="border-collapse: collapse; width: 100%;" | |||
|- | |||
| style="width: 100%;" | - | |||
|} | |||
|} | |||
{| class="wikitable" style="border-collapse: collapse; width: 100%; background-color: rgb(194, 224, 244);" | |||
|- | |||
| style="width: 100%;" | | |||
{| class="wikitable" style="border-collapse: collapse; width: 100%;" | |||
|- | |||
| style="width: 25%;" | [[File:Slowpoison.png|300px|frameless]] '''Slow Poison''' | |||
| style="width: 25%;" | '''Max Level 4''' | |||
| style="width: 25%;" | '''Active''' | |||
| style="width: 25%;" | '''Supportive''' | |||
|} | |||
|- | |||
| style="width: 100%;" | | |||
{| class="wikitable" style="border-collapse: collapse; width: 100%;" | |||
|- | |||
| style="width: 100%;" | - | |||
|} | |||
|} | |||
{| class="wikitable" style="border-collapse: collapse; width: 100%; height: 83px; background-color: rgb(251, 238, 184);" | |||
|- style="height: 60px;" | |||
| style="width: 100%; height: 60px;" | | |||
{| class="wikitable" style="border-collapse: collapse; width: 100%;" | |||
|- | |||
| style="width: 25%;" | [[File:Macemastery.png|300px|frameless]] '''Mace Mastery''' | |||
| style="width: 25%;" | '''Max Level 10''' | |||
| style="width: 50%;" | '''Passive''' | |||
|} | |||
|- style="height: 23px;" | |||
| style="width: 100%; height: 23px;" | | |||
{| class="wikitable" style="border-collapse: collapse; width: 100%;" | |||
|- | |||
| style="width: 100%;" | - | |||
|} | |||
|} | |||
{| class="wikitable" style="border-collapse: collapse; width: 100%; background-color: rgb(194, 224, 244);" | |||
|- | |||
| style="width: 100%;" | | |||
{| class="wikitable" style="border-collapse: collapse; width: 100%;" | |||
|- | |||
| style="width: 25%;" | [[File:Statusrecovery.png|300px|frameless]] '''Status Recovery''' | |||
| style="width: 25%;" | '''Max Level 1''' | | style="width: 25%;" | '''Max Level 1''' | ||
| style="width: 25%;" | '''Active''' | | style="width: 25%;" | '''Active''' | ||
| style="width: 25%;" | '''Supportive''' | | style="width: 25%;" | '''Supportive''' | ||
|} | |} | ||
|- | |- | ||
| style="width: 100%;" | | |||
{| class="wikitable" style="border-collapse: collapse; width: 100%;" | |||
|- | |||
| style="width: 100%;" | - | |||
|} | |||
|} | |||
{| class="wikitable" style="border-collapse: collapse; width: 100%; background-color: rgb(251, 238, 184);" | |||
|- | |||
| style="width: 100%;" | | |||
{| class="wikitable" style="border-collapse: collapse; width: 100%;" | |||
|- | |||
| style="width: 25%;" | [[File:IncreaseSPrecovery.png|300px|frameless]] '''Increase SP Recovery''' | |||
| style="width: 25%;" | '''Max Level 10''' | |||
| style="width: 50%;" | '''Passive''' | |||
|} | |||
|- | |||
| style="width: 100%;" | | | style="width: 100%;" | | ||
{| class="wikitable" style="border-collapse: collapse; width: 100%;" | |||
|- | |||
| style="width: 100%;" | - | |||
|} | |||
|} | |} | ||
{| class="wikitable" style="border-collapse: collapse; width: 100%; background-color: rgb(191, 237, 210);" | {| class="wikitable" style="border-collapse: collapse; width: 100%; background-color: rgb(191, 237, 210);" | ||
| Line 101: | Line 438: | ||
{| class="wikitable" style="border-collapse: collapse; width: 100%;" | {| class="wikitable" style="border-collapse: collapse; width: 100%;" | ||
|- | |- | ||
| style="width: 25%;" | [[ | | style="width: 25%;" | [[File:Resurection.png|300px|frameless]] '''Resurrection''' | ||
| style="width: 25%;" | '''Max Level 4''' | |||
| style="width: 25%;" | '''Active''' | |||
| style="width: 25%;" | '''Healing''' | |||
|} | |||
|- | |||
| style="width: 100%;" | | |||
{| class="wikitable" style="border-collapse: collapse; width: 100%; height: 23px;" | |||
|- style="height: 23px;" | |||
| style="width: 100%; height: 23px;" | - | |||
|} | |||
|} | |||
{| class="wikitable" style="border-collapse: collapse; width: 100%; background-color: rgb(248, 202, 198);" | |||
|- | |||
| style="width: 100%;" | | |||
{| class="wikitable" style="border-collapse: collapse; width: 100%;" | |||
|- | |||
| style="width: 25%;" | [[File:Turnundead.png|300px|frameless]] '''Turn Undead''' | |||
| style="width: 25%;" | '''Max Level 10''' | | style="width: 25%;" | '''Max Level 10''' | ||
| style="width: 25%;" | '''Active''' | | style="width: 25%;" | '''Active''' | ||
| style="width: 25%;" | ''' | | style="width: 25%;" | '''Magical Holy''' | ||
|} | |} | ||
|- | |- | ||
| Line 113: | Line 467: | ||
|} | |} | ||
|} | |} | ||
{| class="wikitable" style="border-collapse: collapse; width: 100%; background-color: rgb( | {| class="wikitable" style="border-collapse: collapse; width: 100%; background-color: rgb(236, 202, 250); height: 83px;" | ||
|- style="height: 60px;" | |||
| style="width: 100%; height: 60px;" | | |||
{| class="wikitable" style="border-collapse: collapse; width: 100%;" | |||
|- | |||
| style="width: 25%;" | [[File:Lexdivina.png|300px|frameless]] '''Lex Divina''' | |||
| style="width: 25%;" | '''Max Level 10''' | |||
| style="width: 25%;" | '''Active''' | |||
| style="width: 25%;" | '''Debuff''' | |||
|} | |||
|- style="height: 23px;" | |||
| style="width: 100%; height: 23px;" | | |||
{| class="wikitable" style="border-collapse: collapse; width: 100%;" | |||
|- | |||
| style="width: 100%;" | - | |||
|} | |||
|} | |||
{| class="wikitable" style="border-collapse: collapse; width: 100%; background-color: rgb(236, 202, 250);" | |||
|- | |||
| style="width: 100%;" | | |||
{| class="wikitable" style="border-collapse: collapse; width: 100%;" | |||
|- | |||
| style="width: 25%;" | [[File:Lexaaterna.png|300px|frameless]] '''(MT) Lex Aeterna''' | |||
| style="width: 25%;" | '''Max Level 10''' | |||
| style="width: 25%;" | '''Active''' | |||
| style="width: 25%;" | '''Debuff''' | |||
|} | |||
|- | |- | ||
| style="width: 100%;" | | | style="width: 100%;" | | ||
{| class="wikitable" style="border-collapse: collapse; width: 100%;" | {| class="wikitable" style="border-collapse: collapse; width: 100%;" | ||
|- | |- | ||
| style="width: 25%;" | [[File: | | style="width: 100%;" | - | ||
| style="width: 25%;" | '''Max Level | |} | ||
|} | |||
{| class="wikitable" style="border-collapse: collapse; width: 100%; height: 46px; background-color: rgb(194, 224, 244);" | |||
|- style="height: 23px;" | |||
| style="width: 100%; height: 23px;" | | |||
{| class="wikitable" style="border-collapse: collapse; width: 100%;" | |||
|- | |||
| style="width: 25%;" | [[File:Impositio.png|300px|frameless]] '''Impositio Manus''' | |||
| style="width: 25%;" | '''Max Level 5''' | |||
| style="width: 25%;" | '''Active''' | | style="width: 25%;" | '''Active''' | ||
| style="width: 25%;" | '''Supportive | | style="width: 25%;" | '''Supportive''' | ||
|} | |} | ||
|- style="height: 23px;" | |||
| style="width: 100%; height: 23px;" | | |||
{| class="wikitable" style="border-collapse: collapse; width: 100%;" | |||
|- | |- | ||
| style="width: 100%;" | | | style="width: 100%;" | - | ||
|} | |||
|} | |} | ||
{| class="wikitable" style="border-collapse: collapse; width: 100%; background-color: rgb(194, 224, 244);" | {| class="wikitable" style="border-collapse: collapse; width: 100%; background-color: rgb(194, 224, 244);" | ||
| Line 131: | Line 523: | ||
{| class="wikitable" style="border-collapse: collapse; width: 100%;" | {| class="wikitable" style="border-collapse: collapse; width: 100%;" | ||
|- | |- | ||
| style="width: 25%;" | [[File: | | style="width: 25%;" | [[File:Suffragurim.png|300px|frameless]] '''Suffragium''' | ||
| style="width: 25%;" | '''Max Level | | style="width: 25%;" | '''Max Level 3''' | ||
| style="width: 25%;" | '''Active''' | |||
| style="width: 25%;" | '''Supportive''' | |||
|} | |||
|- | |||
| style="width: 100%;" | | |||
{| class="wikitable" style="border-collapse: collapse; width: 100%;" | |||
|- | |||
| style="width: 100%;" | - | |||
|} | |||
|} | |||
{| class="wikitable" style="border-collapse: collapse; width: 100%; background-color: rgb(194, 224, 244); height: 83px;" | |||
|- style="height: 60px;" | |||
| style="width: 100%; height: 60px;" | | |||
{| class="wikitable" style="border-collapse: collapse; width: 100%;" | |||
|- | |||
| style="width: 25%;" | [[File:Asperisio.png|300px|frameless]] '''Aspersio''' | |||
| style="width: 25%;" | '''Max Level 5''' | |||
| style="width: 25%;" | '''Active''' | | style="width: 25%;" | '''Active''' | ||
| style="width: 25%;" | ''' | | style="width: 25%;" | '''Supportive''' | ||
|} | |} | ||
|- style="height: 23px;" | |||
| style="width: 100%; height: 23px;" | | |||
{| class="wikitable" style="border-collapse: collapse; width: 100%;" | |||
|- | |- | ||
| style="width: 100%;" | | | style="width: 100%;" | - | ||
|} | |||
|} | |} | ||
{| class="wikitable" style="border-collapse: collapse; width: 100% | {| class="wikitable" style="border-collapse: collapse; width: 100%; background-color: rgb(191, 237, 210);" | ||
|- | |- | ||
| style="width: 100% | | style="width: 100%;" | | ||
{| class="wikitable" style="border-collapse: collapse; width: 100%;" | {| class="wikitable" style="border-collapse: collapse; width: 100%;" | ||
|- | |- | ||
| style="width: 25%;" | [[File: | | style="width: 25%;" | [[File:Sanctuary.png|300px|frameless]] '''Sanctuary''' | ||
| style="width: 25%;" | '''Max Level 10''' | | style="width: 25%;" | '''Max Level 10''' | ||
| style="width: 25%;" | '''Active''' | | style="width: 25%;" | '''Active''' | ||
| style="width: 25%;" | ''' | | style="width: 25%;" | '''Healing''' | ||
|} | |||
|- | |||
| style="width: 100%;" | | |||
{| class="wikitable" style="border-collapse: collapse; width: 100%;" | |||
|- | |||
| style="width: 100%;" | - | |||
|} | |||
|} | |} | ||
|- style=" | {| class="wikitable" style="border-collapse: collapse; width: 100%; background-color: rgb(194, 224, 244);" | ||
| style="width: 100%; | |- | ||
| style="width: 100%;" | | |||
{| class="wikitable" style="border-collapse: collapse; width: 100%;" | |||
|- | |||
| style="width: 25%;" | [[File:Safetywalll.png|300px|frameless]] '''(MT) Safety Wall''' | |||
| style="width: 25%;" | '''Max Level 10''' | |||
| style="width: 25%;" | '''Active''' | |||
| style="width: 25%;" | '''Supportive''' | |||
|} | |} | ||
|- | |- | ||
| style="width: 100%;" | | | style="width: 100%;" | | ||
{| class="wikitable" style="border-collapse: collapse; width: 100%;" | {| class="wikitable" style="border-collapse: collapse; width: 100%;" | ||
|- | |- | ||
| style="width: 25%;" | [[File: | | style="width: 100%;" | - | ||
|} | |||
|} | |||
{| class="wikitable" style="border-collapse: collapse; width: 100%; background-color: rgb(248, 202, 198); height: 119px;" | |||
|- style="height: 60px;" | |||
| style="width: 100%; height: 60px;" | | |||
{| class="wikitable" style="border-collapse: collapse; width: 100%;" | |||
|- | |||
| style="width: 25%;" | [[File:Magnusexorcism.png|300px|frameless]] '''Magnus Exorcismus''' | |||
| style="width: 25%;" | '''Max Level 10''' | | style="width: 25%;" | '''Max Level 10''' | ||
| style="width: 25%;" | '''Active''' | | style="width: 25%;" | '''Active''' | ||
| style="width: 25%;" | ''' | | style="width: 25%;" | '''Magical Holy''' | ||
|} | |||
|- style="height: 59px;" | |||
| style="width: 100%; height: 59px;" | | |||
{| class="wikitable" style="border-collapse: collapse; width: 100%;" | |||
|- | |||
| style="width: 100%;" | - | |||
|} | |||
|} | |||
{| class="wikitable" style="border-collapse: collapse; width: 100%; height: 46px; background-color: rgb(191, 237, 210);" | |||
|- style="height: 23px;" | |||
| style="width: 100%; height: 23px;" | | |||
{| class="wikitable" style="border-collapse: collapse; width: 100%;" | |||
|- | |||
| style="width: 25%;" | [[File:Redemptio.png|300px|frameless]] '''Redemptio''' | |||
| style="width: 25%;" | '''Quest Skill (Learned from NPC)''' | |||
| style="width: 25%;" | '''Active''' | |||
| style="width: 25%;" | '''Healing''' | |||
|} | |} | ||
|- style="height: 23px;" | |||
| style="width: 100%; height: 23px;" | | |||
{| class="wikitable" style="border-collapse: collapse; width: 100%;" | |||
|- | |- | ||
| style="width: 100%;" | | | style="width: 100%;" | - | ||
|} | |||
|} | |} | ||
== 2nd Job Transcendent Skills == | |||
{| class="wikitable" style="border-collapse: collapse; width: 100%; background-color: rgb(251, 238, 184);" | {| class="wikitable" style="border-collapse: collapse; width: 100%; background-color: rgb(251, 238, 184);" | ||
|- | |- | ||
| Line 170: | Line 627: | ||
{| class="wikitable" style="border-collapse: collapse; width: 100%;" | {| class="wikitable" style="border-collapse: collapse; width: 100%;" | ||
|- | |- | ||
| style="width: | | style="width: 25%;" | [[File:Manarecharge.png|300px|frameless]] '''Mana Recharge''' | ||
| style="width: | | style="width: 25%;" | '''Max Level 5''' | ||
| style="width: 25%;" | ''' | | style="width: 50%;" | '''Passive''' | ||
|} | |||
|- | |||
| style="width: 100%;" | | |||
{| class="wikitable" style="border-collapse: collapse; width: 100%;" | |||
|- | |||
| style="width: 100%;" | - | |||
|} | |||
|} | |||
{| class="wikitable" style="border-collapse: collapse; width: 100%; background-color: rgb(194, 224, 244);" | |||
|- | |||
| style="width: 100%;" | | |||
{| class="wikitable" style="border-collapse: collapse; width: 100%;" | |||
|- | |||
| style="width: 25%;" | [[File:Assumptio.png|300px|frameless]] '''Assumptio''' | |||
| style="width: 25%;" | '''Max Level 5''' | |||
| style="width: 25%;" | '''Active''' | |||
| style="width: 25%;" | '''Supportive''' | |||
|} | |||
|- | |||
| style="width: 100%;" | | |||
{| class="wikitable" style="border-collapse: collapse; width: 100%;" | |||
|- | |||
| style="width: 100%;" | - | |||
|} | |||
|} | |||
{| class="wikitable" style="border-collapse: collapse; width: 100%; background-color: rgb(194, 224, 244); height: 83px;" | |||
|- style="height: 60px;" | |||
| style="width: 100%; height: 60px;" | | |||
{| class="wikitable" style="border-collapse: collapse; width: 100%;" | |||
|- | |||
| style="width: 25%;" | [[File:Basilica.png|300px|frameless]] '''Basilica''' | |||
| style="width: 25%;" | '''Max Level 5''' | |||
| style="width: 25%;" | '''Active''' | |||
| style="width: 25%;" | '''Supportive''' | |||
|} | |} | ||
|- style="height: 23px;" | |||
| style="width: 100%; height: 23px;" | | |||
{| class="wikitable" style="border-collapse: collapse; width: 100%;" | |||
|- | |- | ||
| style="width: 100%;" | | | style="width: 100%;" | - | ||
|} | |||
|} | |} | ||
{| class="wikitable" style="border-collapse: collapse; width: 100%; background-color: rgb(251, 238, 184);" | {| class="wikitable" style="border-collapse: collapse; width: 100%; background-color: rgb(251, 238, 184);" | ||
| Line 182: | Line 677: | ||
{| class="wikitable" style="border-collapse: collapse; width: 100%;" | {| class="wikitable" style="border-collapse: collapse; width: 100%;" | ||
|- | |- | ||
| style="width: 25%;" | [[File: | | style="width: 25%;" | [[File:Meditation.png|300px|frameless]] '''Meditation''' | ||
| style="width: 25%;" | '''Max Level 10''' | | style="width: 25%;" | '''Max Level 10''' | ||
| style="width: 50%;" | '''Passive''' | | style="width: 50%;" | '''Passive''' | ||
|} | |} | ||
|- | |- | ||
| style="width: 100%;" | | |||
{| class="wikitable" style="border-collapse: collapse; width: 100%;" | |||
|- | |||
| style="width: 100%;" | - | |||
|} | |||
|} | |||
== 3rd Job Skills == | |||
{| class="wikitable" style="border-collapse: collapse; width: 100%; background-color: rgb(248, 202, 198);" | |||
|- | |||
| style="width: 100%;" | | |||
{| class="wikitable" style="border-collapse: collapse; width: 100%;" | |||
|- | |||
| style="width: 25%;" | [[File:Judex.png|300px|frameless]] '''Judex''' | |||
| style="width: 25%;" | '''Max Level 10''' | |||
| style="width: 25%;" | '''Active''' | |||
| style="width: 25%;" | '''Magical Holy''' | |||
|} | |||
|- | |||
| style="width: 100%;" | | |||
{| class="wikitable" style="border-collapse: collapse; width: 100%;" | |||
|- | |||
| style="width: 100%;" | - | |||
|} | |||
|} | |||
{| class="wikitable" style="border-collapse: collapse; width: 100%; background-color: rgb(248, 202, 198);" | |||
|- | |||
| style="width: 100%;" | | |||
{| class="wikitable" style="border-collapse: collapse; width: 100%;" | |||
|- | |||
| style="width: 25%;" | [[File:Adoramus.png|300px|frameless]] '''Adoramus''' | |||
| style="width: 25%;" | '''Max Level 10''' | |||
| style="width: 25%;" | '''Active''' | |||
| style="width: 25%;" | '''Magical Holy / Neutral''' | |||
|} | |||
|- | |||
| style="width: 100%;" | | |||
{| class="wikitable" style="border-collapse: collapse; width: 100%;" | |||
|- | |||
| style="width: 100%;" | - | |||
|} | |||
|} | |||
{| class="wikitable" style="border-collapse: collapse; width: 100%; background-color: rgb(191, 237, 210);" | |||
|- | |||
| style="width: 100%;" | | |||
{| class="wikitable" style="border-collapse: collapse; width: 100%;" | |||
|- | |||
| style="width: 25%;" | [[File:Cheal.png|300px|frameless]] '''Coluceo Heal''' | |||
| style="width: 25%;" | '''Max Level 3''' | |||
| style="width: 25%;" | '''Active''' | |||
| style="width: 25%;" | '''Healing''' | |||
|} | |||
|- | |||
| style="width: 100%;" | | | style="width: 100%;" | | ||
{| class="wikitable" style="border-collapse: collapse; width: 100%;" | |||
|- | |||
| style="width: 100%;" | - | |||
|} | |||
|} | |||
{| class="wikitable" style="border-collapse: collapse; width: 100%; background-color: rgb(191, 237, 210);" | |||
|- | |||
| style="width: 100%;" | | |||
{| class="wikitable" style="border-collapse: collapse; width: 100%;" | |||
|- | |||
| style="width: 25%;" | [[File:Renovatio.png|300px|frameless]] '''Renovatio''' | |||
| style="width: 25%;" | '''Max Level 4''' | |||
| style="width: 25%;" | '''Active''' | |||
| style="width: 25%;" | '''Healing''' | |||
|} | |||
|- | |||
| style="width: 100%;" | | |||
{| class="wikitable" style="border-collapse: collapse; width: 100%;" | |||
|- | |||
| style="width: 100%;" | - | |||
|} | |||
|} | |||
{| class="wikitable" style="border-collapse: collapse; width: 100%; background-color: rgb(191, 237, 210);" | |||
|- | |||
| style="width: 100%;" | | |||
{| class="wikitable" style="border-collapse: collapse; width: 100%;" | |||
|- | |||
| style="width: 25%;" | [[File:Highhea.png|300px|frameless]] '''Highness Heal''' | |||
| style="width: 25%;" | '''Max Level 5''' | |||
| style="width: 25%;" | '''Active''' | |||
| style="width: 25%;" | '''Healing''' | |||
|} | |||
|- | |||
| style="width: 100%;" | | |||
{| class="wikitable" style="border-collapse: collapse; width: 100%;" | |||
|- | |||
| style="width: 100%;" | - | |||
|} | |||
|} | |} | ||
{| class="wikitable" style="border-collapse: collapse; width: 100%; background-color: rgb(194, 224, 244);" | {| class="wikitable" style="border-collapse: collapse; width: 100%; background-color: rgb(194, 224, 244);" | ||
| Line 194: | Line 780: | ||
{| class="wikitable" style="border-collapse: collapse; width: 100%;" | {| class="wikitable" style="border-collapse: collapse; width: 100%;" | ||
|- | |- | ||
| style="width: 25%;" | [[File: | | style="width: 25%;" | [[File:Offertom.png|300px|frameless]] '''Offertorium''' | ||
| style="width: 25%;" | '''Max Level | | style="width: 25%;" | '''Max Level 5''' | ||
| style="width: 25%;" | '''Active''' | |||
| style="width: 25%;" | '''Supportive''' | |||
|} | |||
|- | |||
| style="width: 100%;" | | |||
{| class="wikitable" style="border-collapse: collapse; width: 100%;" | |||
|- | |||
| style="width: 100%;" | - | |||
|} | |||
|} | |||
{| class="wikitable" style="border-collapse: collapse; width: 100%; background-color: rgb(194, 224, 244);" | |||
|- | |||
| style="width: 100%;" | | |||
{| class="wikitable" style="border-collapse: collapse; width: 100%;" | |||
|- | |||
| style="width: 25%;" | [[File:Clementia.png|300px|frameless]] '''Clementia''' | |||
| style="width: 25%;" | '''Max Level 5''' | |||
| style="width: 25%;" | '''Active''' | |||
| style="width: 25%;" | '''Supportive''' | |||
|} | |||
|- | |||
| style="width: 100%;" | | |||
{| class="wikitable" style="border-collapse: collapse; width: 100%;" | |||
|- | |||
| style="width: 100%;" | - | |||
|} | |||
|} | |||
{| class="wikitable" style="border-collapse: collapse; width: 100%; background-color: rgb(194, 224, 244);" | |||
|- | |||
| style="width: 100%;" | | |||
{| class="wikitable" style="border-collapse: collapse; width: 100%;" | |||
|- | |||
| style="width: 25%;" | [[File:Ancilla.png|300px|frameless]] '''(MT) Ancilla''' | |||
| style="width: 25%;" | '''Max Level 1''' | |||
| style="width: 25%;" | '''Active''' | |||
| style="width: 25%;" | '''Crafting''' | |||
|} | |||
|- | |||
| style="width: 100%;" | | |||
{| class="wikitable" style="border-collapse: collapse; width: 100%;" | |||
|- | |||
| style="width: 100%;" | - | |||
|} | |||
|} | |||
{| class="wikitable" style="border-collapse: collapse; width: 100%; background-color: rgb(191, 237, 210);" | |||
|- | |||
| style="width: 100%;" | | |||
{| class="wikitable" style="border-collapse: collapse; width: 100%;" | |||
|- | |||
| style="width: 25%;" | [[File:Epiclesis.png|300px|frameless]] '''Epiclesis''' | |||
| style="width: 25%;" | '''Max Level 5''' | |||
| style="width: 25%;" | '''Active''' | |||
| style="width: 25%;" | '''Healing''' | |||
|} | |||
|- | |||
| style="width: 100%;" | | |||
{| class="wikitable" style="border-collapse: collapse; width: 100%;" | |||
|- | |||
| style="width: 100%;" | - | |||
|} | |||
|} | |||
{| class="wikitable" style="border-collapse: collapse; width: 100%; background-color: rgb(236, 202, 250);" | |||
|- | |||
| style="width: 100%;" | | |||
{| class="wikitable" style="border-collapse: collapse; width: 100%;" | |||
|- | |||
| style="width: 25%;" | [[File:Vituperatum.png|300px|frameless]] '''Vituperatum''' | |||
| style="width: 25%;" | '''Max Level 5''' | |||
| style="width: 25%;" | '''Active''' | | style="width: 25%;" | '''Active''' | ||
| style="width: 25%;" | ''' | | style="width: 25%;" | '''Debuff''' | ||
|} | |} | ||
|- | |- | ||
| style="width: 100%;" | | | style="width: 100%;" | | ||
{| class="wikitable" style="border-collapse: collapse; width: 100%;" | |||
|- | |||
| style="width: 100%;" | - | |||
|} | |||
|} | |} | ||
{| class="wikitable" style="border-collapse: collapse; width: 100%; background-color: rgb(194, 224, 244);" | {| class="wikitable" style="border-collapse: collapse; width: 100%; background-color: rgb(194, 224, 244);" | ||
| Line 207: | Line 865: | ||
{| class="wikitable" style="border-collapse: collapse; width: 100%;" | {| class="wikitable" style="border-collapse: collapse; width: 100%;" | ||
|- | |- | ||
| style="width: 25%;" | [[File: | | style="width: 25%;" | [[File:Praefatio.png|300px|frameless]] '''Praefatio''' | ||
| style="width: 25%;" | '''Max Level 10''' | | style="width: 25%;" | '''Max Level 10''' | ||
| style="width: 25%;" | '''Active''' | | style="width: 25%;" | '''Active''' | ||
| style="width: 25%;" | '''Supportive | | style="width: 25%;" | '''Supportive''' | ||
|} | |} | ||
|- | |- | ||
| style="width: 100%;" | | | style="width: 100%;" | | ||
{| class="wikitable" style="border-collapse: collapse; width: 100%;" | |||
|- | |||
| style="width: 100%;" | - | |||
|} | |||
|} | |} | ||
{| class="wikitable" style="border-collapse: collapse; width: 100%; background-color: rgb(236, 202, 250);" | {| class="wikitable" style="border-collapse: collapse; width: 100%; background-color: rgb(236, 202, 250);" | ||
| Line 220: | Line 882: | ||
{| class="wikitable" style="border-collapse: collapse; width: 100%;" | {| class="wikitable" style="border-collapse: collapse; width: 100%;" | ||
|- | |- | ||
| style="width: 25%;" | [[File: | | style="width: 25%;" | [[File:Oratio.png|300px|frameless]] '''Oratio''' | ||
| style="width: 25%;" | '''Max Level 10''' | | style="width: 25%;" | '''Max Level 10''' | ||
| style="width: 25%;" | '''Active''' | | style="width: 25%;" | '''Active''' | ||
| Line 226: | Line 888: | ||
|} | |} | ||
|- | |- | ||
| style="width: 100%;" | | | style="width: 100%;" | | ||
{| class="wikitable" style="border-collapse: collapse; width: 100%;" | |||
|- | |||
| style="width: 100%;" | - | |||
|} | |||
|} | |} | ||
{| class="wikitable" style="border-collapse: collapse; width: 100%; background-color: rgb( | {| class="wikitable" style="border-collapse: collapse; width: 100%; background-color: rgb(194, 224, 244); height: 83px;" | ||
|- | |- style="height: 60px;" | ||
| style="width: 100%;" | | | style="width: 100%; height: 60px;" | | ||
{| class="wikitable" style="border-collapse: collapse; width: 100%; height: 24px;" | {| class="wikitable" style="border-collapse: collapse; width: 100%; height: 24px;" | ||
|- style="height: 24px;" | |- style="height: 24px;" | ||
| style="width: 25%; height: 24px;" | [[File: | | style="width: 25%; height: 24px;" | [[File:Convenio.png|300px|frameless]] '''Convenio''' | ||
| style="width: 25%; height: 24px;" | ''' | | style="width: 25%; height: 24px;" | '''Max Level 1''' | ||
| style="width: 25%; height: 24px;" | '''Active''' | | style="width: 25%; height: 24px;" | '''Active''' | ||
| style="width: 25%; height: 24px;" | ''' | | style="width: 25%; height: 24px;" | '''Supportive''' | ||
|} | |||
|- style="height: 23px;" | |||
| style="width: 100%; height: 23px;" | | |||
{| class="wikitable" style="border-collapse: collapse; width: 100%;" | |||
|- | |||
| style="width: 100%;" | - | |||
|} | |||
|} | |||
{| class="wikitable" style="border-collapse: collapse; width: 100%; background-color: rgb(194, 224, 244);" | |||
|- | |||
| style="width: 100%;" | | |||
{| class="wikitable" style="border-collapse: collapse; width: 100%;" | |||
|- | |||
| style="width: 25%;" | [[File:Duplelight.png|300px|frameless]] '''Duple Light''' | |||
| style="width: 25%;" | '''Max Level 10''' | |||
| style="width: 25%;" | '''Active''' | |||
| style="width: 25%;" | '''Supportive / Physical Melee''' | |||
|} | |||
|- | |||
| style="width: 100%;" | | |||
{| class="wikitable" style="border-collapse: collapse; width: 100%;" | |||
|- | |||
| style="width: 100%;" | - | |||
|} | |||
|} | |||
{| class="wikitable" style="border-collapse: collapse; width: 100%; background-color: rgb(194, 224, 244);" | |||
|- | |||
| style="width: 100%;" | | |||
{| class="wikitable" style="border-collapse: collapse; width: 100%;" | |||
|- | |||
| style="width: 25%;" | [[File:Expiatio.png|300px|frameless]] '''Expiatio''' | |||
| style="width: 25%;" | '''Max Level 5''' | |||
| style="width: 25%;" | '''Active''' | |||
| style="width: 25%;" | '''Supportive''' | |||
|} | |||
|- | |||
| style="width: 100%;" | | |||
{| class="wikitable" style="border-collapse: collapse; width: 100%;" | |||
|- | |||
| style="width: 100%;" | - | |||
|} | |||
|} | |||
{| class="wikitable" style="border-collapse: collapse; width: 100%; background-color: rgb(194, 224, 244);" | |||
|- | |||
| style="width: 100%;" | | |||
{| class="wikitable" style="border-collapse: collapse; width: 100%;" | |||
|- | |||
| style="width: 25%;" | [[File:Sacrament.png|300px|frameless]] '''Sacrament''' | |||
| style="width: 25%;" | '''Max Level 5''' | |||
| style="width: 25%;" | '''Active''' | |||
| style="width: 25%;" | '''Supportive''' | |||
|} | |||
|- | |||
| style="width: 100%;" | | |||
{| class="wikitable" style="border-collapse: collapse; width: 100%;" | |||
|- | |||
| style="width: 100%;" | - | |||
|} | |||
|} | |||
{| class="wikitable" style="border-collapse: collapse; width: 100%; background-color: rgb(194, 224, 244);" | |||
|- | |||
| style="width: 100%;" | | |||
{| class="wikitable" style="border-collapse: collapse; width: 100%;" | |||
|- | |||
| style="width: 25%;" | [[File:Laudaagnus.png|300px|frameless]] '''Lauda Agnus''' | |||
| style="width: 25%;" | '''Max Level 4''' | |||
| style="width: 25%;" | '''Active''' | |||
| style="width: 25%;" | '''Supportive''' | |||
|} | |||
|- | |||
| style="width: 100%;" | | |||
{| class="wikitable" style="border-collapse: collapse; width: 100%;" | |||
|- | |||
| style="width: 100%;" | - | |||
|} | |||
|} | |||
{| class="wikitable" style="border-collapse: collapse; width: 100%; background-color: rgb(194, 224, 244);" | |||
|- | |||
| style="width: 100%;" | | |||
{| class="wikitable" style="border-collapse: collapse; width: 100%;" | |||
|- | |||
| style="width: 25%;" | [[File:Laudaramus.png|300px|frameless]] '''Lauda Ramus''' | |||
| style="width: 25%;" | '''Max Level 4''' | |||
| style="width: 25%;" | '''Active''' | |||
| style="width: 25%;" | '''Supportive''' | |||
|} | |||
|- | |||
| style="width: 100%;" | | |||
{| class="wikitable" style="border-collapse: collapse; width: 100%;" | |||
|- | |||
| style="width: 100%;" | - | |||
|} | |||
|} | |||
{| class="wikitable" style="border-collapse: collapse; width: 100%; background-color: rgb(194, 224, 244);" | |||
|- | |||
| style="width: 100%;" | | |||
{| class="wikitable" style="border-collapse: collapse; width: 100%;" | |||
|- | |||
| style="width: 25%;" | [[File:Clearance.png|300px|frameless]] '''Clearance''' | |||
| style="width: 25%;" | '''Max Level 5''' | |||
| style="width: 25%;" | '''Active''' | |||
| style="width: 25%;" | '''Supportive''' | |||
|} | |||
|- | |||
| style="width: 100%;" | | |||
{| class="wikitable" style="border-collapse: collapse; width: 100%;" | |||
|- | |||
| style="width: 100%;" | - | |||
|} | |||
|} | |||
{| class="wikitable" style="border-collapse: collapse; width: 100%; background-color: rgb(236, 202, 250);" | |||
|- | |||
| style="width: 100%;" | | |||
{| class="wikitable" style="border-collapse: collapse; width: 100%;" | |||
|- | |||
| style="width: 25%;" | [[File:Silentium.png|300px|frameless]] '''(MT) Silentium''' | |||
| style="width: 25%;" | '''Max Level 5''' | |||
| style="width: 25%;" | '''Active''' | |||
| style="width: 25%;" | '''Debuff''' | |||
|} | |||
|- | |||
| style="width: 100%;" | | |||
{| class="wikitable" style="border-collapse: collapse; width: 100%;" | |||
|- | |||
| style="width: 100%;" | - | |||
|} | |||
|} | |||
{| class="wikitable" style="border-collapse: collapse; width: 100%; height: 83px; background-color: rgb(194, 224, 244);" | |||
|- style="height: 60px;" | |||
| style="width: 100%; height: 60px;" | | |||
{| class="wikitable" style="border-collapse: collapse; width: 100%;" | |||
|- | |||
| style="width: 25%;" | [[File:Cantocaditus.png|300px|frameless]] '''Cantocandidus''' | |||
| style="width: 25%;" | '''Max Level 3''' | |||
| style="width: 25%;" | '''Active''' | |||
| style="width: 25%;" | '''Supportive''' | |||
|} | |} | ||
|- style="height: 23px;" | |||
| style="width: 100%; height: 23px;" | | |||
{| class="wikitable" style="border-collapse: collapse; width: 100%;" | |||
|- | |- | ||
| style="width: 100%;" | - | |||
|} | |||
|} | |||
{| class="wikitable" style="border-collapse: collapse; width: 100%; background-color: rgb(194, 224, 244);" | |||
|- | |||
| style="width: 100%;" | | | style="width: 100%;" | | ||
{| class="wikitable" style="border-collapse: collapse; width: 100%;" | |||
|- | |||
| style="width: 25%;" | [[File:Fullthrottle.png|300px|frameless]]<font color="#000000"><span style="font-size: 14.4px;"> '''Full Throttle'''</span></font> | |||
| style="width: 25%;" | '''<font color="#000000"><span style="font-size: 14.4px;" >Max Level 5</span></font>''' | |||
| style="width: 25%;" | '''<font color="#000000"><span style="font-size: 14.4px;" >Active</span></font>''' | |||
| style="width: 25%;" | '''<font color="#000000"><span style="font-size: 14.4px;" >Supportive Self</span></font>''' | |||
|} | |||
|- | |||
| style="width: 100%;" | | |||
{| class="wikitable" style="border-collapse: collapse; width: 100%; height: 23px;" | |||
|- style="height: 23px;" | |||
| style="width: 25%; height: 23px; text-align: center;" | - | |||
| style="width: 25%; height: 23px;" | | |||
*Target: Caster<br> | |||
*Cost: 1 SP | |||
*Immune to Dispel, Clearance and Banishing Buster | |||
| style="width: 50%; height: 23px;" | | |||
Exceed the limits of the body by sacrificing vitality to strength for a short duration. | |||
Fully restores HP when casted, All Stats +20% and increases Movement Speed. | |||
When skill duration is over, you will receive Rebound debuff, during Rebound your movement speed is lowered and your natural HP/SP regen is disabled. | |||
*Level 5: 1% HP/SP drained per second for 30 seconds. | |||
|} | |||
|} | |} | ||
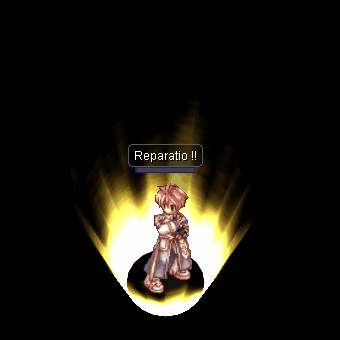
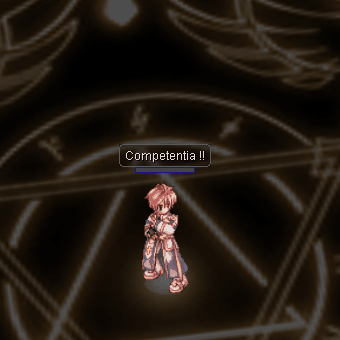
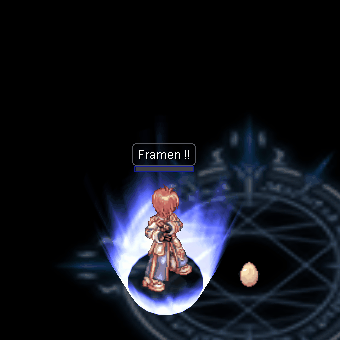
== 4th Job Skills == | == 4th Job Skills == | ||
{| class="wikitable" style="border-collapse: collapse; width: 100%; background-color: rgb(191, 237, 210);" | {| class="wikitable" style="border-collapse: collapse; width: 100%; background-color: rgb(191, 237, 210);" | ||
Latest revision as of 01:20, 15 May 2026
Intro
| Novice | Acolyte
(1st Job) |
Priest
(2nd Job) |
High Priest
(2nd Job Transcedent) |
Arch Bishop
(3rd Job) |
Cardinal
(4th Job) |

|

|

|

|

|
|
Description |
Max Level HP/SP | Stats Bonus when Max Job Level |
|
- |
|
Str+6, Agi+7, Vit+7, Int+12, Dex+7, Luk+3 Pow+8, Sta+5, Wis+5, Spl+10, Con+5, Ctr+7 |
1st Job Skills
| ||||
|
| ||||
|
| ||||
|
| ||||
|
| ||||
|
| ||||
|
| ||||
|
| ||||
|
| ||||
|
| |||
|
| |||
|
| ||||
|
| ||||
|
| ||||
|
| ||||
|
2nd Job Skills
| ||||
|
| ||||
|
| ||||
|
| ||||
|
| ||||
|
| |||
|
| ||||
|
| |||
|
| ||||
|
| ||||
|
| ||||
|
| ||||
|
| ||||
|
| ||||
|
| ||||
|
| ||||
|
| ||||
|
| ||||
|
| ||||
|
2nd Job Transcendent Skills
| |||
|
| ||||
|
| ||||
|
| |||
|
3rd Job Skills
| ||||
|
| ||||
|
| ||||
|
| ||||
|
| ||||
|
| ||||
|
| ||||
|
| ||||
|
| ||||
|
| ||||
|
| ||||
|
| ||||
|
| ||||
|
| ||||
|
| ||||
|
| ||||
|
| ||||
|
| ||||
|
| ||||
|
| ||||
|
| ||||
|
| ||||
|
4th Job Skills
| ||||
|

| ||||
|

| ||||
|
| ||||
|

| ||||
|

| ||||
|

| ||||
|

| ||||
|

| ||||
|
| |||
|
| ||||
| ||||
| ||||
|

| ||||
| ||||
| ||||
|
| |||
|
| ||||
| ||||
| ||||
| ||||
|

Related NPC
|
Tool Dealer /navi prt_in 126/75 |

|
Supply Crafting Details
| Product | Item Description | Material required |
| Cure Curse | ||
|
When used, you recover 15% of MaxSP. Healing power of skill by 15%, SP Recovery rate by 30% for 60 seconds. |

